
Stable Diffusion is an open-source machine-learning model designed for text-to-image generation. While most AI image generators in the segment are paid and can be used online, Stable Diffusion needs to be installed locally, making it complex.
For this, we have provided detailed steps paired with clear screenshots for easier understanding and seamless installation of Stable Diffusion.
Note: For proper installation and working on Stable Diffusion, ensure your PC has a GPU and an active internet connection.
Install Stable Diffusion
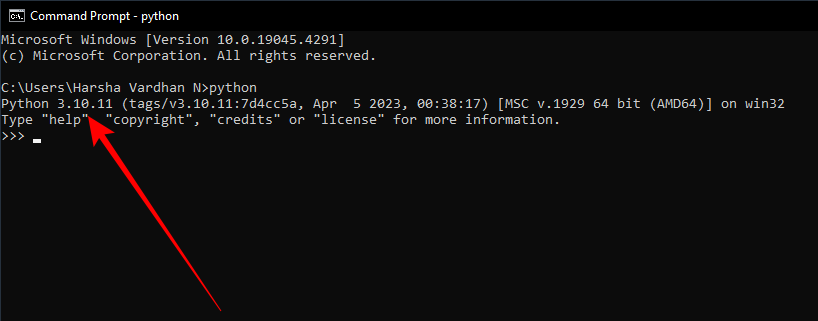
- Before starting, check if Python is installed on your PC. To do this, open Command Prompt, type python, and hit Enter. If you have Python pre-installed, you will find its version listed.
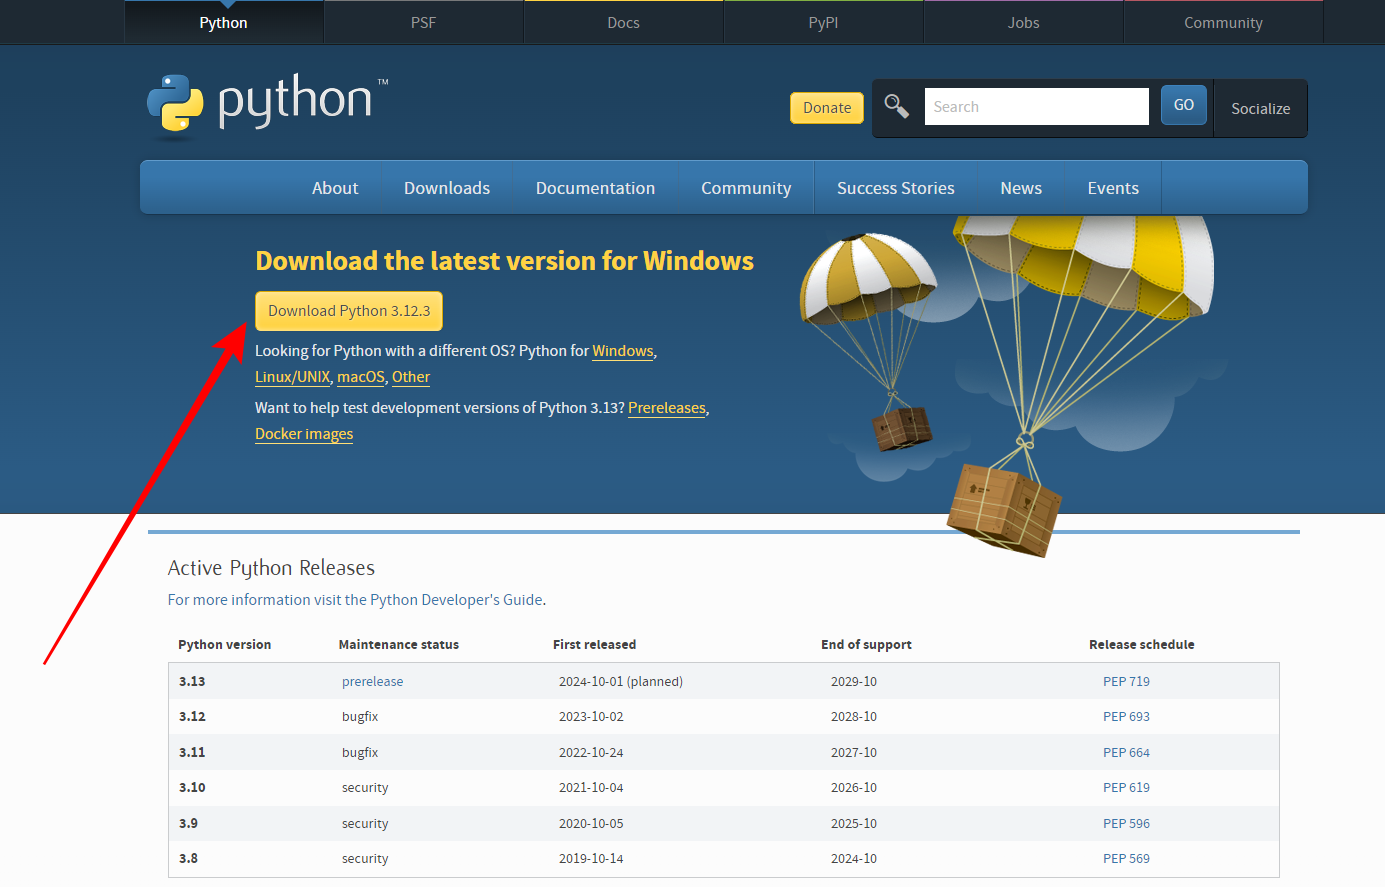
- If the Python version isn’t displayed, it needs to be installed. To do this, start by opening the browser and navigating to Python’s download page. Next, click on the Download button, which ishighlighted.
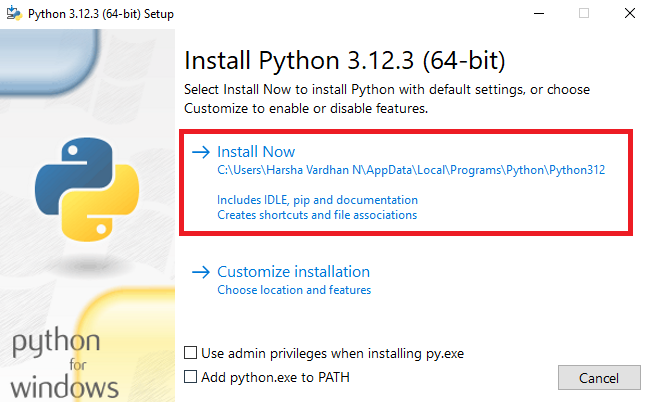
- After Python’s setup file is downloaded, open it and begin with the installation process.
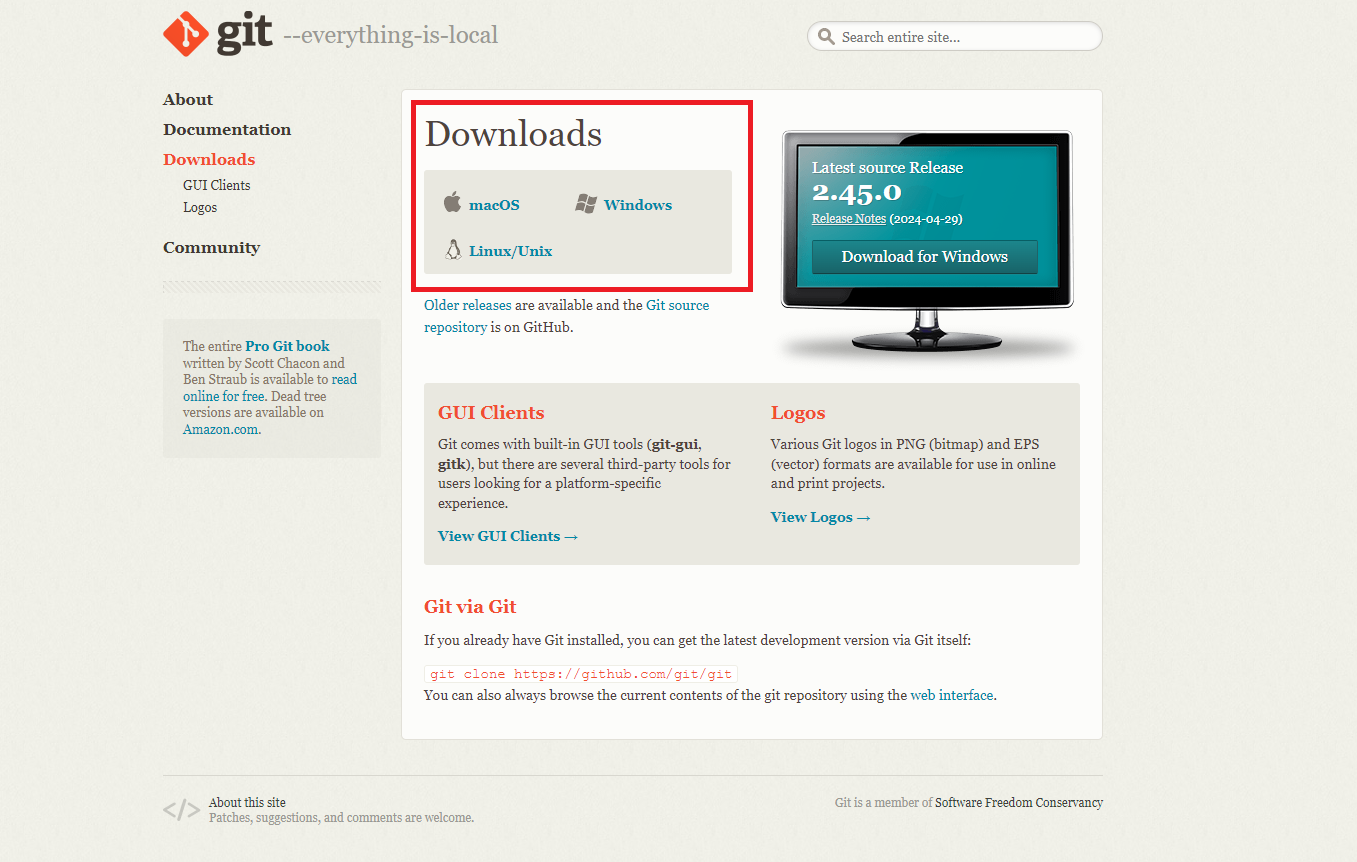
- With Python installed successfully, repeat Step 1 to ensure it is installed. Once you’re sure, proceed with the installation of Git (Download Git), as it is crucial for the installation of Stable Diffusion.
- Like Python, run the setup file of Git to install. During the setup, ensure not to change any settings and go with the defaults unless you’re aware.
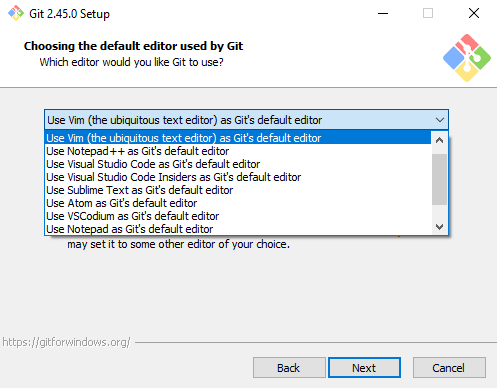
Quick Tip: Git setup uses Vim editor as a text editor, which can be confusing and complicated to work with. Hence, change the text editor to Notepad or Notepad++ while in the setup (Refer to the image below for better understanding).
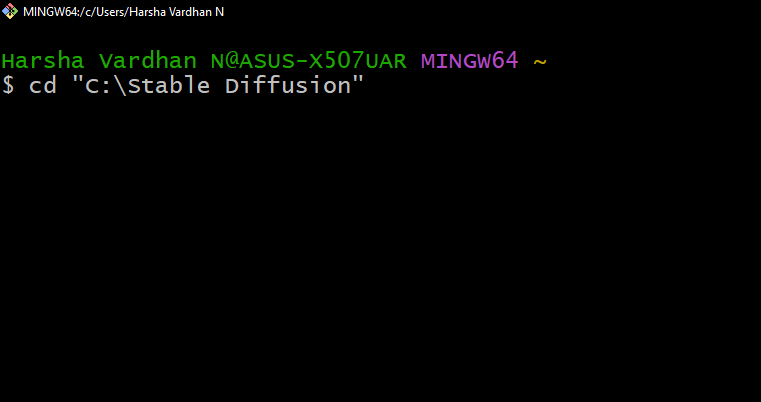
- Wait for Git to install, and once done, you don’t have to verify, as on successful installation, it opens the Git bash. Once it is loaded, type in the below command to change the directory to where you want to save and install Stable Diffusion.
cd <enter your file path in quotes>
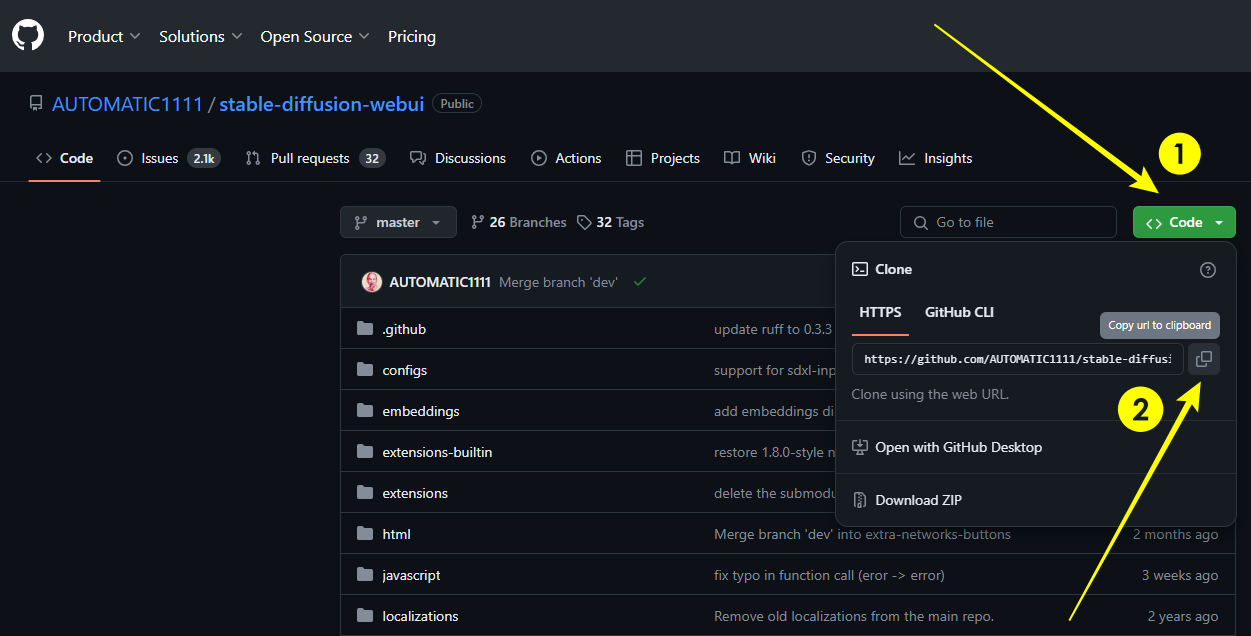
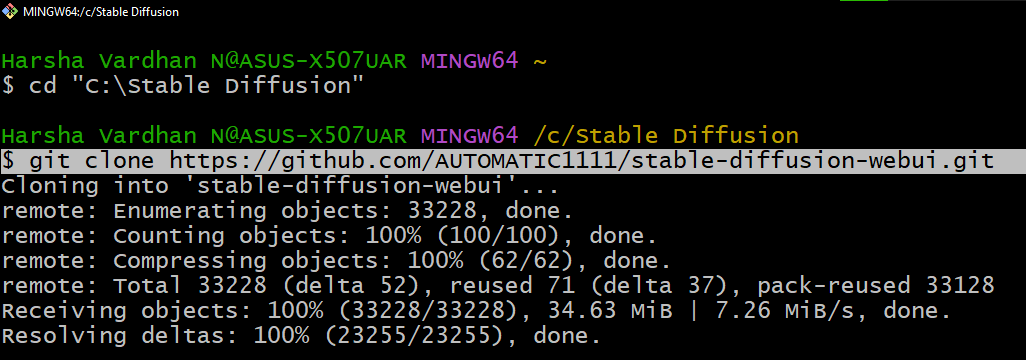
- With the directory changed you can proceed with installing Stable Diffusion. For this, the first step is to clone Stable Diffusion WebUI. To get the clone URL, navigate to AUTOMATIC111’s Stable Diffusion WebUI page, click on the Code button, and then the Copy button.
- Once the URL is copied, open Git bash and paste it into the command provided. While this process can take a while, we suggest not closing it as the download process starts from the first.
git clone <paste AUTOMATIC111’s Stable Diffusion WebUI clone URL>
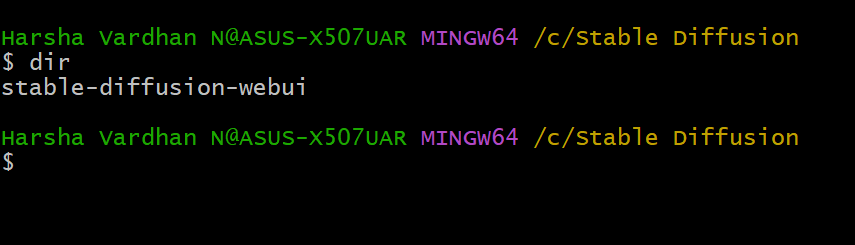
- After the download process finishes, cross-check to see if it has been cloned successfully. For this, type dir and press Enter, and you will notice the Stable Diffusion WebUI file is added to the folder when you have cloned.
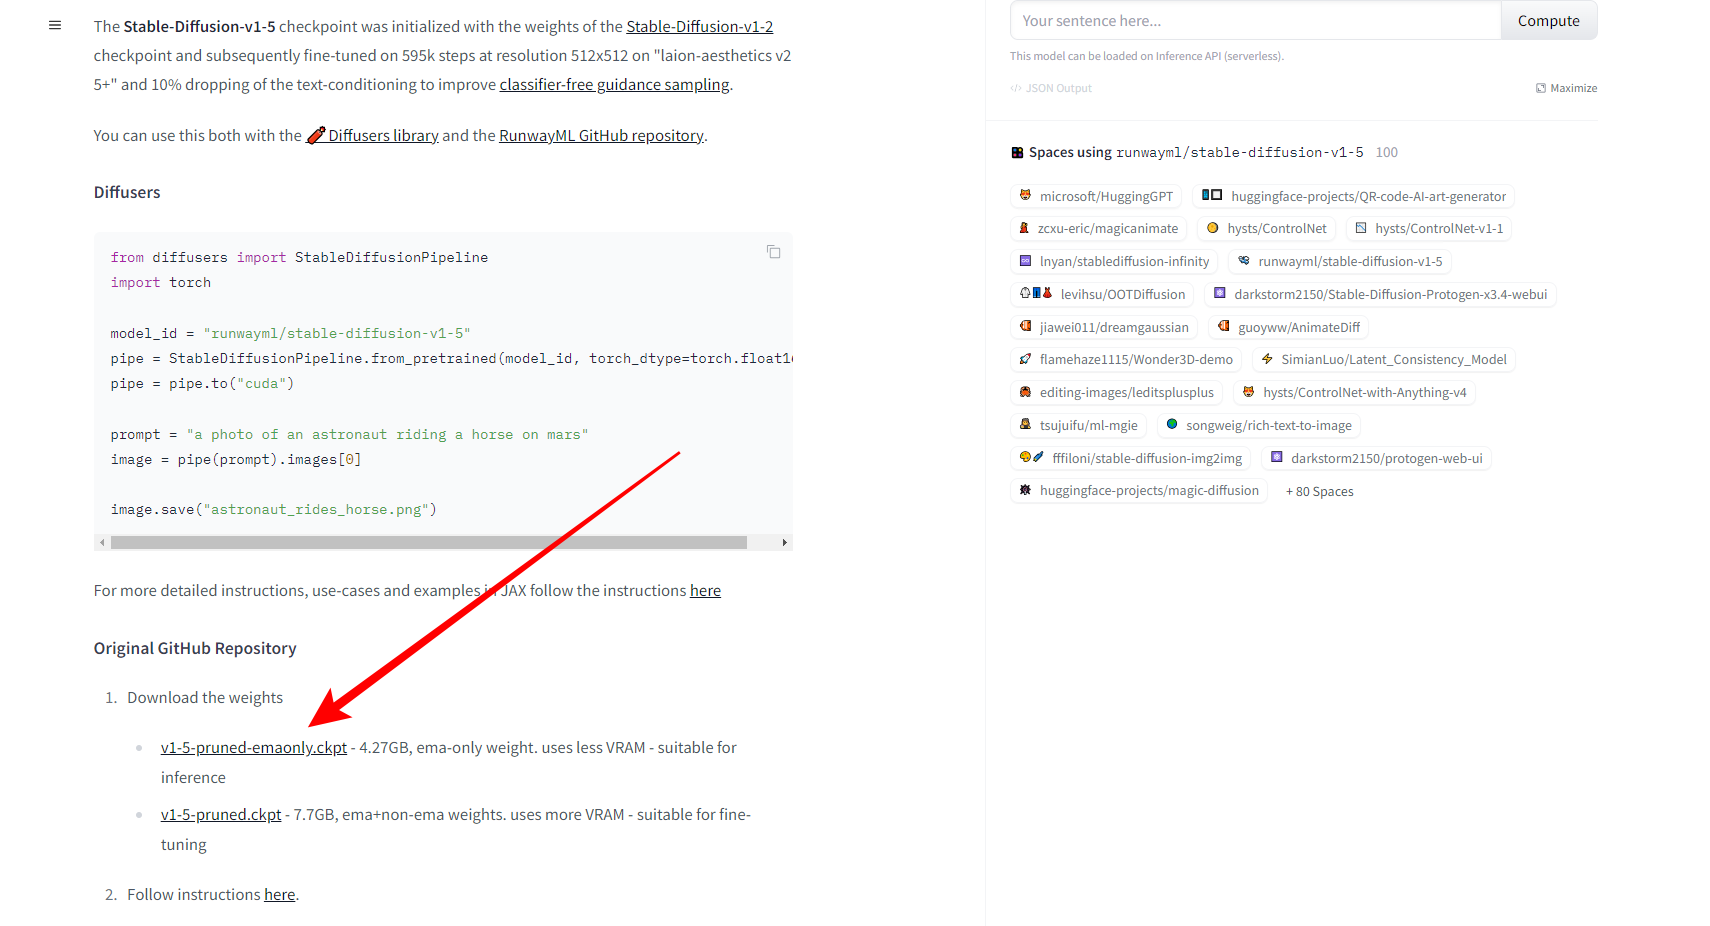
- The Stable Diffusion WebUI file serves as the basis for models that we add later. Hence, it is crucial to get it cloned, and once you’re sure, visit the Hugging Face Stable Diffusion space page.

- Now, scroll down to find the models and their download links. Next, click on the model file according to your device’s VRAM (Refer to the image below for better understanding).
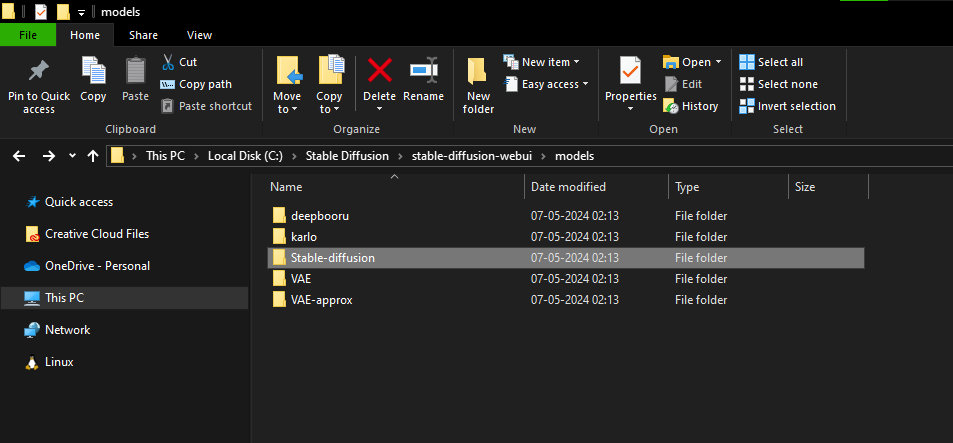
- The model files are usually large, and while they download, open the folder where Stable Diffusion WebUI is cloned. Doing so, you will notice multiple folders and from which open – models.
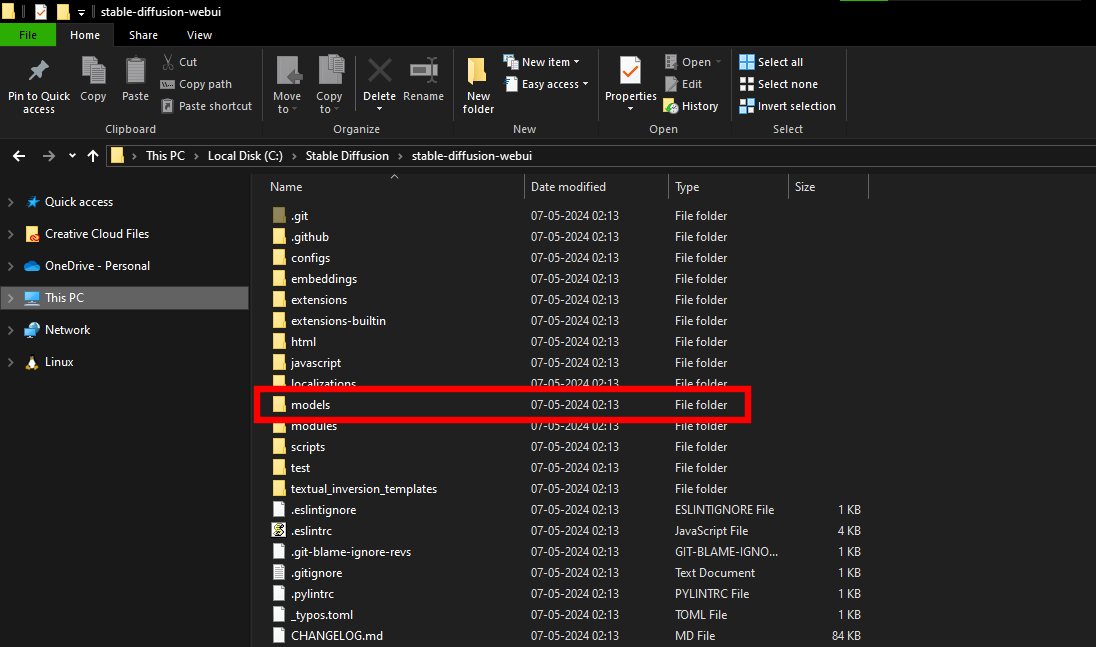
- In the model’s folder, look for the folder named Stable-diffusion and open it.
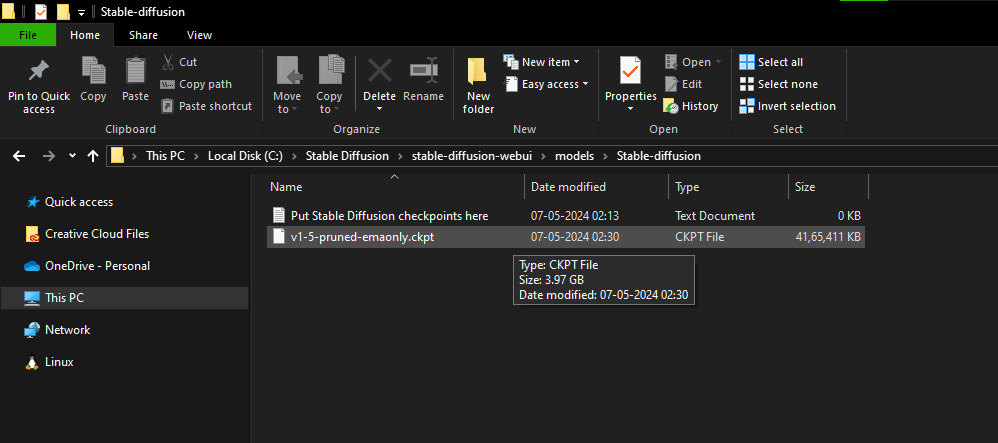
- If you do it right, you will find a text file with the name – Put Stable Diffusion checkpoints here. Now, check if the model that we downloaded in Step 11 is finished, and then move it here.
(Filepath: stable-diffusion-webui –> models –> Stable-diffusion)
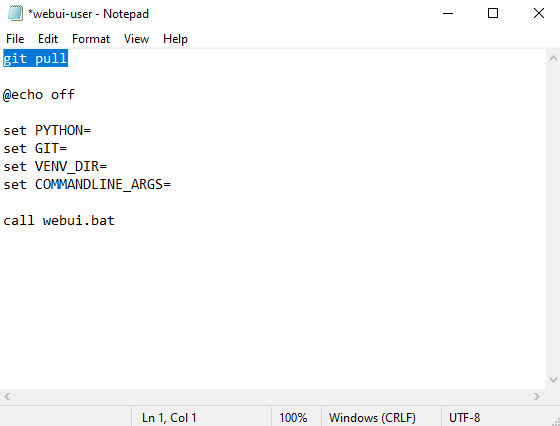
- After you have added the model file to the designated folder, navigate back to the Stable Diffusion WebUI folder and look for the webui-user.bat file. Next, right-click on it, and from the options, click on Edit.

- In doing so, open the file on the notepad. Now, edit the file by adding git pull at the start, as displayed in the image below, to ensure the latest version of Stable Diffusion is always loaded. Also, after you add it, be sure to save the file before closing it.
- With the edits made to the webui-user.bat file, open it by double-clicking on it. Now wait for a while as multiple dependencies will be downloaded, and once you are done, you will find the Local URL.
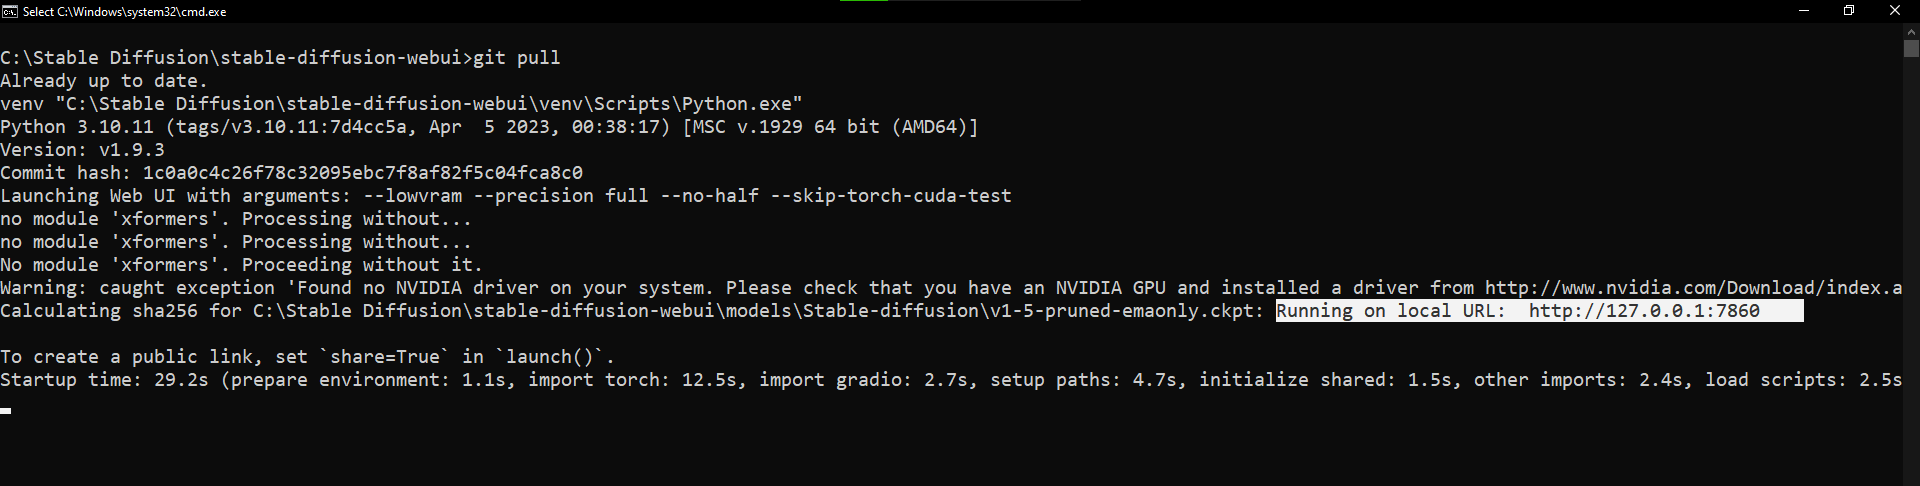
- Usually, after the Local URL appears and the webui-user.bat file finishes execution, Stable Diffusion opens on your default browser. If it hasn’t loaded, keep the webui-user.bat file running in the background, manually copy the URL, and paste it on your browser. You will have Stable Diffusion successfully installed and running.

Wrapping Up
Congratulations on learning how to install Stable Diffusion!
The above steps are arguably the detailed and only way to install Stable Diffusion. While following these steps, ensure you don’t proceed further unless finished to avoid potential issues that can arise while loading and running Stable Diffusion.