In this article, we will discuss labels and unravel the ways of effective label printing, which will save time and elevate your label game.
If you’re new to labels and working on them for the first time, you must realize that every shape and size meets a distinct need. From address labels to product tags, label sheet formats vary widely, each serving a unique purpose.
What we cover
Understanding Label Sheets
You can arrange labels on a sheet through formats, which must be practical. On the other hand, size is responsible for the labels’ dimensions, which must be adhered to standards to ensure compatibility with multiple situations.
Both lead to a template, which acts as a blueprint featuring the label sheet’s specifications, eliminates guesswork and provides guidelines for text, graphics, and even positioning.
Hence, ensure the format, size, and specifications are correct before creating or working with a template.
How to Create and Print Labels on Printers?
While you can use pre-set templates to the full extent, with expertise, you can also create custom templates. Continue reading to learn how to create and print labels in different ways.
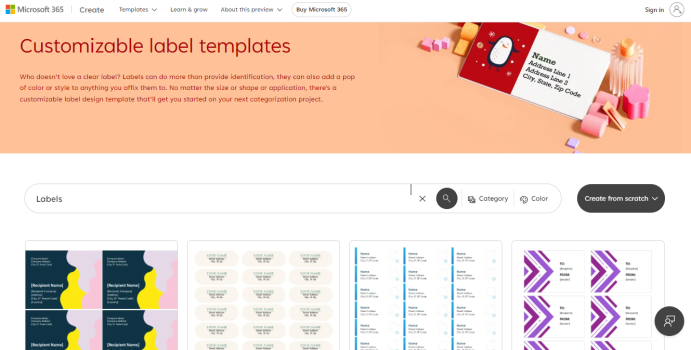
Method 1: Using Microsoft Label Templates
Microsoft Label Templates features a wide collection of templates tailored for various needs. Whether you’re labeling products, organizing files, or sending mail, you’re all covered with these templates.
We suggest this method for beginners as it doesn’t involve prior label creation expertise. The best part of these pre-set templates is the flexibility to edit.
Here are steps to create and print labels using Microsoft Label Templates:
- Firstly, open your web browser and navigate to Microsoft Label Templates.

- Once it is loaded, you are greeted with multiple templates, from which you choose the one that fits your requirement.
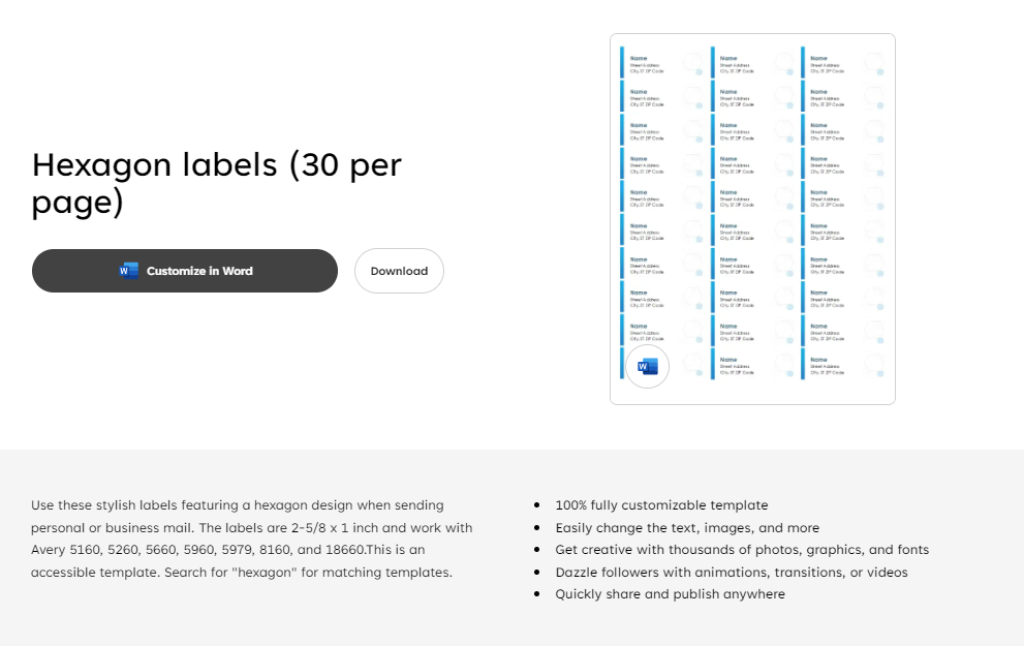
- Clicking “Customize in Word” opens the template in Microsoft 365 (Word), where you can edit it and make changes. If you have an older MS Office, you can manage the template from Microsoft 365 Online, and the best part is it offers complete flexibility.
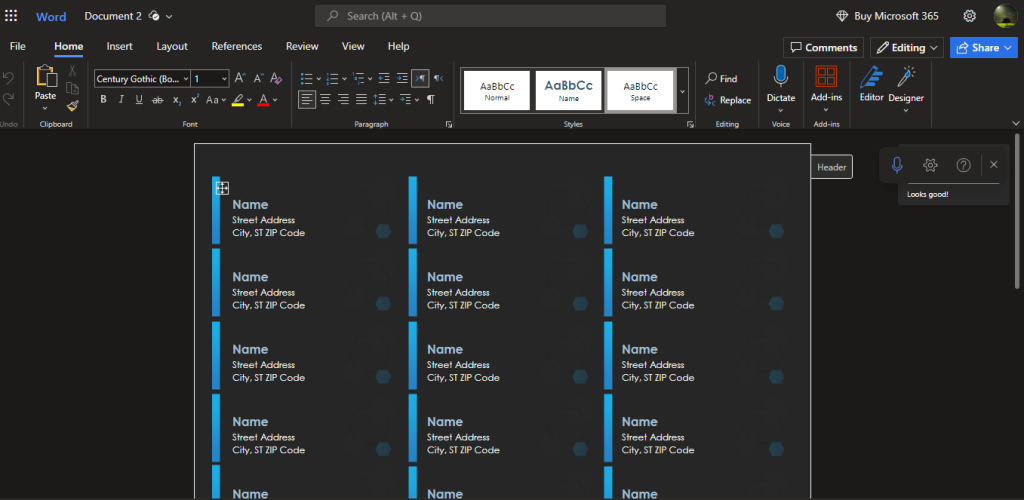
- Once you’re done with the editing, print the labels through Word or straight from the browser.
Method 2: Using Microsoft Word
Microsoft Word isn’t just for managing documents. It is feature loaded and has many great tools from which you can also create professional labels with precision.
Even though there aren’t graphically designed pre-set templates, Word offers basic templates which can be customized in every aspect. You have full control over the layout adjustment and settings.
However, this method is for those with basic knowledge or prior experience with label making, as it can be complex, considering it involves multiple steps.
Here are steps to create and print labels using Microsoft Word:
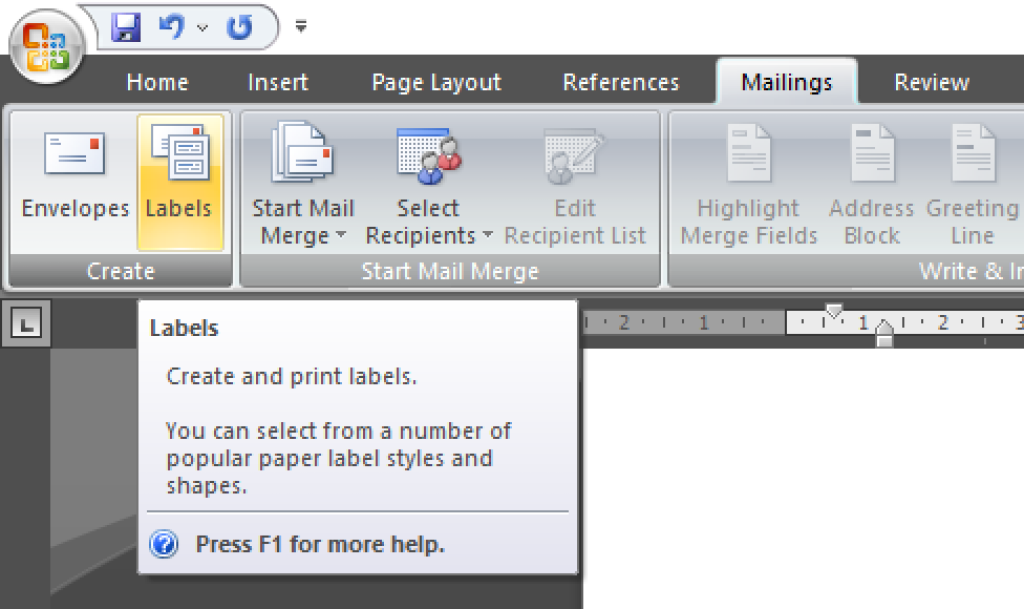
- Open Microsoft Word and head to the Mailings tab.
- On clicking “Mailings,” multiple options are displayed on the ribbon. Select Labels.
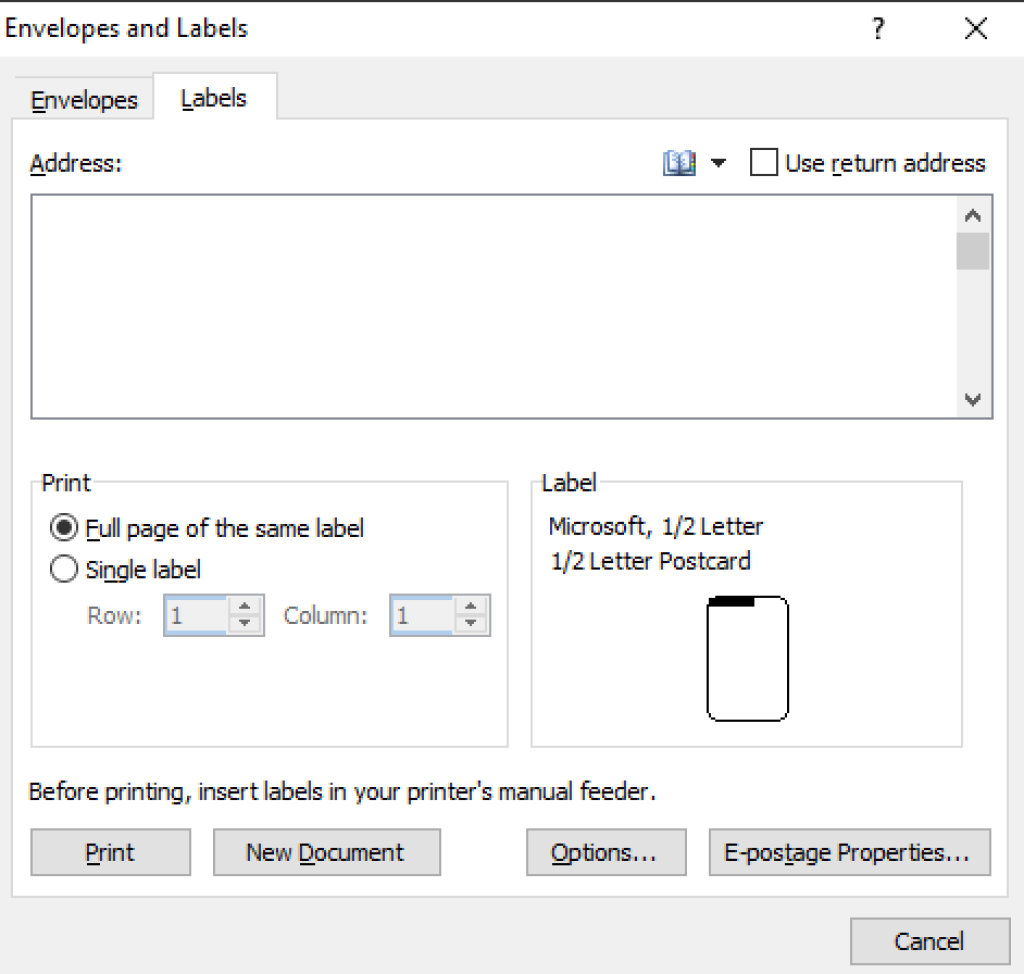
- Once the “Labels” window has opened, look for the Options button and click on it.
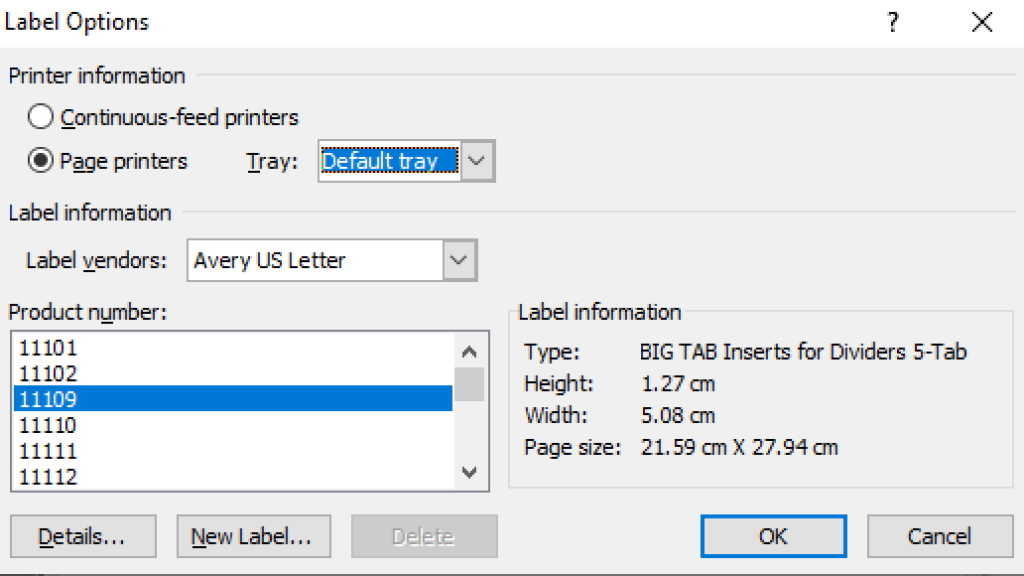
- After the Label Options window is opened, select “Page printers.” Also, select “Label vendors” and the “Product Number” according to your requirement and click OK.
- You can see that the label is loaded and ready to customize. Fill in the details in the Address box. If you’re unsatisfied with the formatting, select the text, right-click, and make changes with Font.
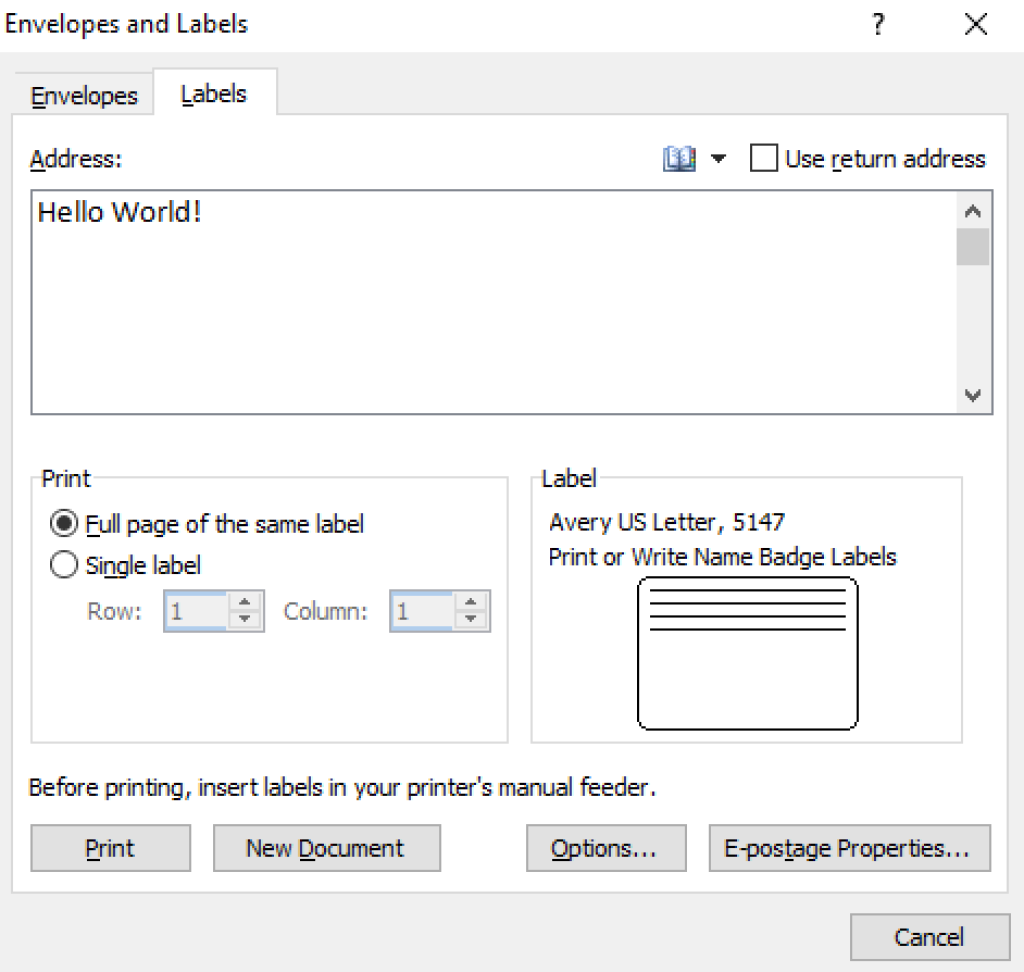
- Before proceeding with the print, it is important to consider your requirement and select “Full page of the same label” or “Single Label.” Once done, you can Print or save it for future use.
Through this tool, you’re not limited to the creation and can also create a page of different labels, add graphics to the labels, print one label on a partially used sheet, etc.
Method 3: Using Google Docs
If you can’t access Microsoft 365 Online or Microsoft Word, you can try Google Docs to create and print labels.
The reason for tagging this method as optional is that Google Docs doesn’t offer any in-built tools to create labels, and you must rely on third-party add-ons.
Here are steps to create and print labels using Google Docs:
- Open Google Docs on your web browser and open a new document. Avoid using existing docs to avoid confusion.
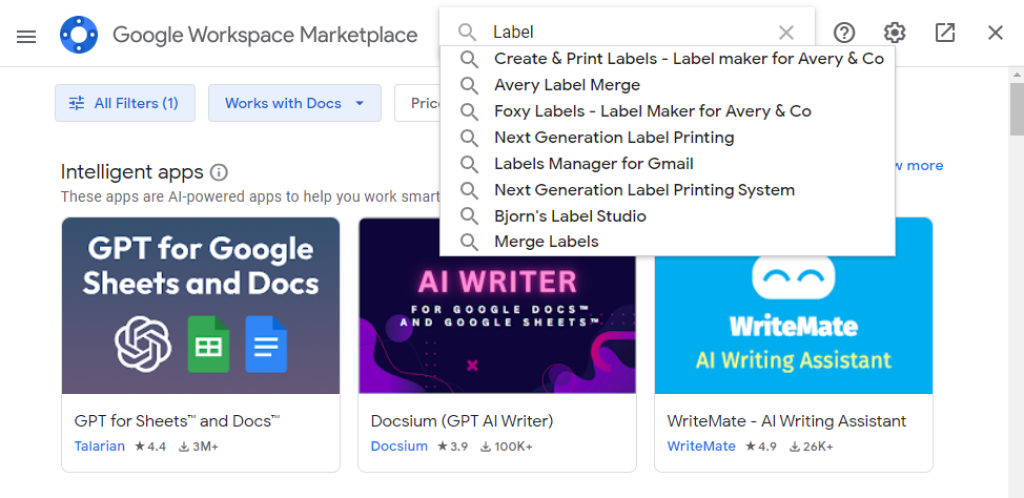
- After you have opened a new document, head to the tabs and click on Extensions, now select, Add-ons, and click “Get Add-ons,” which opens Google Workspace Marketplace.

- In the Google Workspace Marketplace, search for the extension that can create labels of your choice and add them.
- Once the extension is added, follow the steps provided or visit the respective website for tutorials and create labels, as each extension has a different approach.
Note: The above three methods described are the same for Windows and MacOS. However, you can use Microsoft 365 Online or Google Docs to create and print labels for Linux Distributions.
Adjust the Printer for Printing Labels
Printing labels isn’t just about creating and editing, but it is also about how you handle your printer. You might have experienced issues once in a while printing labels.
Here’s a quick guide to ensure your label printing process is smooth and successful:
- Load Labels Correctly: Proper loading prevents jams, and for proper printing, blow air gently toward labels to separate them and remove static buildup. Once done, align them by tapping on a surface.
- Use the Media Bypass Tray: This tray ensures accurate prints. Its straighter path helps avoid misalignment.
- Use Guides for Precision: Guides in the tray keep sheets straight. Align sheets against guides but don’t overload the tray.
- Edge Leading Matters: Choose a narrow edge leading to smooth printing and prevent jams or lifting.
- Modify Print Settings: Adjust the printer settings according to your requirement and the nature of the label. Here are some of the common settings.
- Select A4 page size and Turn off scaling options.
- Avoid default settings like “Ignore Printer Settings.”
- Choose the appropriate media type and weight, often labeled as “Labels” or “Heavy Paper.”
- Consult Manual or Manufacturer: When in doubt about settings, consult the manual or manufacturer’s guidelines.
Unfortunately, we couldn’t provide specific settings as different printers follow different approaches. Before proceeding with the final print, we suggest taking samples or test prints for better practice.
Consider the above suggestions as a reference, and follow them before printing. You can get flawless label prints without wasting resources by mastering these settings.
Final Words
This article has provided necessary insights on label creation and printing through Microsoft Label Templates, Microsoft Word, and Google Docs. Each approach caters to different expertise levels, ensuring anyone can produce professional labels.
Remember, mastering not only the design but also printer settings is essential. As you embark on your label-printing journey, rely on these insights to ensure seamless and successful printing.
How do I fix misaligned labels in Word?
Here are steps to fix misaligned labels in Word:
· Open Word and go to the “Mailings” tab.
· Click “Labels” and select “Options.”
· Ensure you’ve chosen the correct label brand and product number.
· Adjust the “Top Margin,” “Side Margin,” “Vertical Pitch,” or “Horizontal Pitch” if necessary.
· Click “OK” and print a test page. Adjust settings as needed until alignment is correct.
What print quality settings should I use for Avery Labels?
To attain the best quality on Avery Labels, use the following print quality settings:
· Set your printer to “Labels” mode if available.
· Choose “High” or “Best” print quality.
· Ensure the paper type is “Heavy” or “Cardstock.”
· Always use the manufacturer’s template for accurate alignment.
· Print a test page first to ensure quality and alignment. Adjust settings if necessary.


