The Microsoft Teams screen share feature is helpful, but beware that if you’re not careful with the contents of your window, you could share your data with the world. While the app is quite safe, you can never be too careful, especially, if you’re sharing your screen in a conference call with unknown individuals.
Before sharing your screen on the Teams app, it is highly recommended to only open the relevant files because once you have enabled the screen-sharing option, everything on your window will be broadcasted and everyone will be able to see what’s happening on your end.
What we cover
Screen Sharing on Windows App
Firstly, ensure that you have downloaded the Microsoft Teams app on your PC and you’re properly logged in. After that, go through the following steps to use the screen-sharing option.
1. Select the chat and initiate an audio/video call with the desired person.
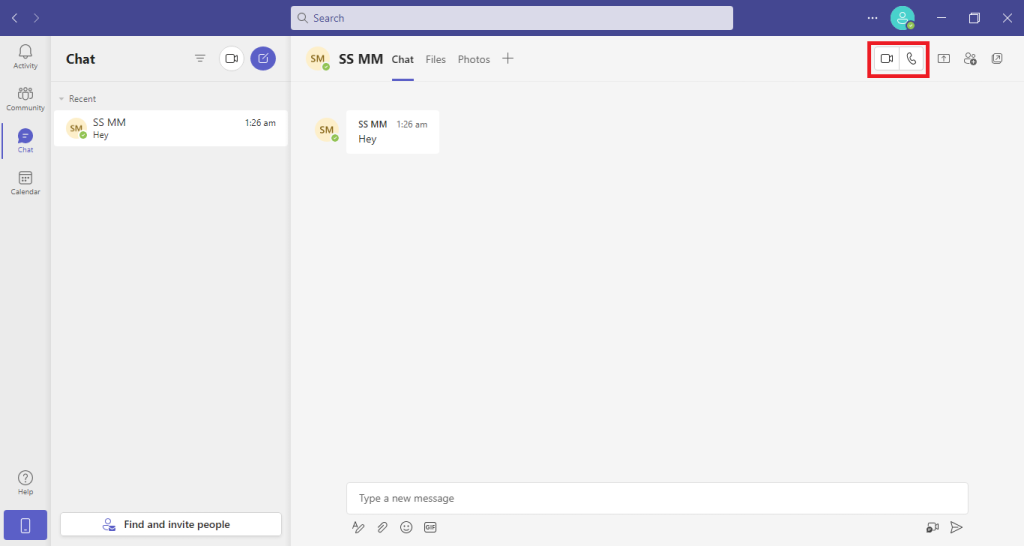
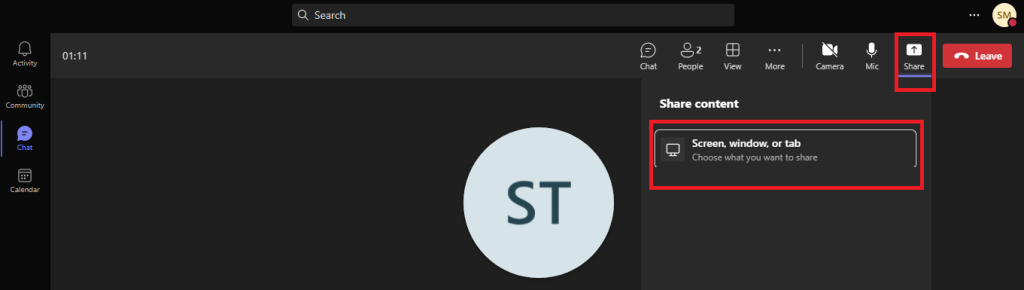
2. Once you have initialed the call and the other person has picked up, you will see the “Share” option on the calling window.
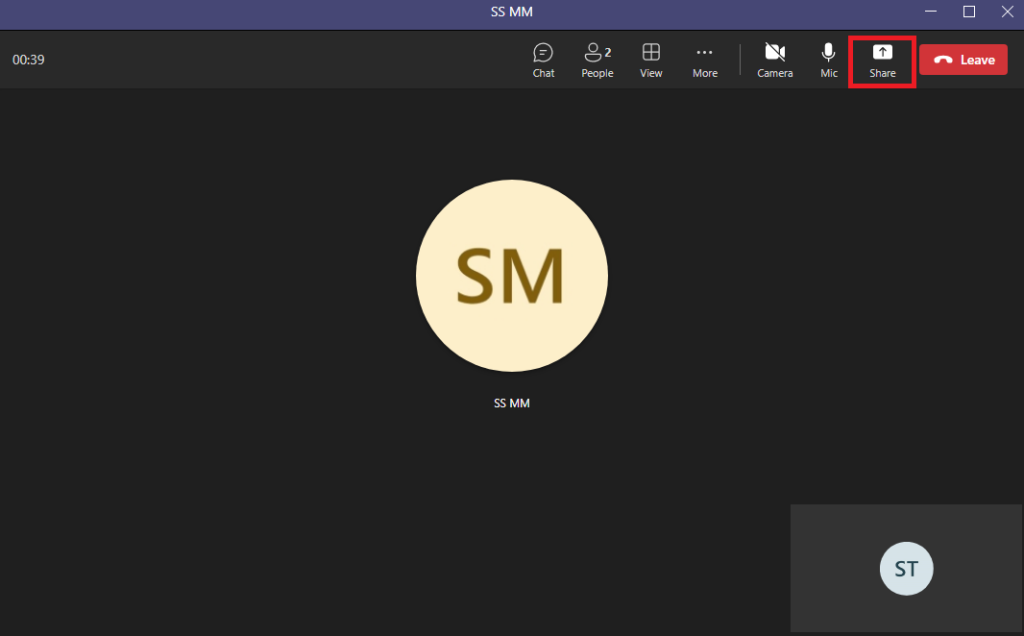
3. Once you have clicked on the ‘Share’ button, you will have two options for sharing your screen with the other person.
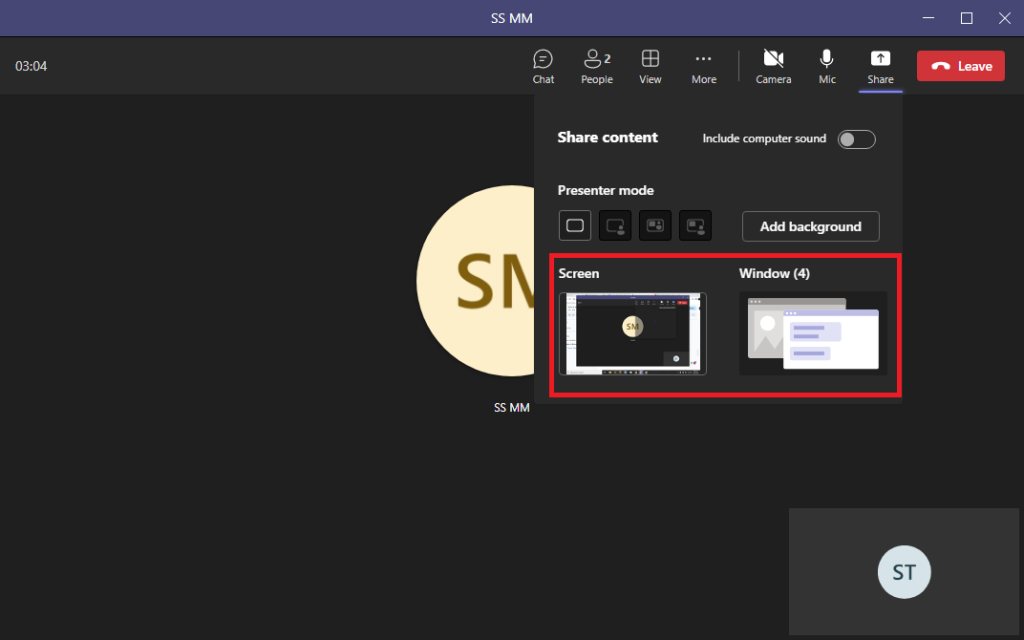
4. The first ‘Screen’ option will share the entire screen from your end with the other person while the second option, that is ‘Window’, will allow you to share a specific window with the end user.
Note: In case you have a few web pages opened on a browser and you only want to share that page, you can select the tab only from the “Window” option.
Once you have selected one of the two options, the screen will be instantly shared with the end users. Keep in mind that this option means that only your screen will be visible on the screen of the end-users but they won’t be able to control your PC or anything.
Screen Sharing on Windows Browser
If you’re using Microsoft Teams on your browser, follow these steps to share your screen with your peers:
1. Select the contact and initiate a call.
2. Once the call is accepted, you can click on the ‘Share’ button and then click on ‘Screen, window, or tab’.
3. After that, you will have multiple options to select the desired window.
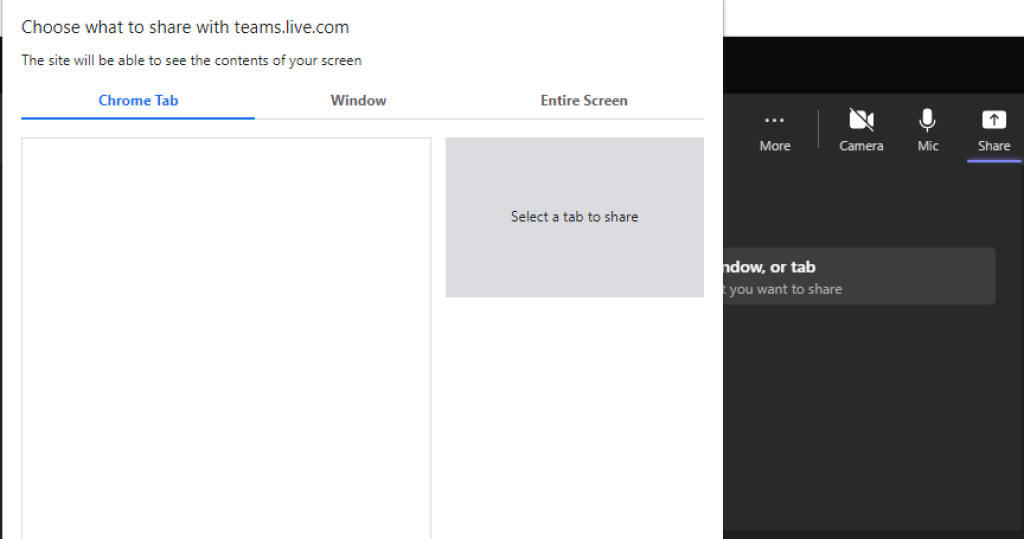
4. Select the window that you want to share with the person on the call and the chosen window will now be displayed on the screen of the end-user.
Screen Sharing on macOS
If you’re using Apple’s macOS, sharing the screen with someone can be a bit complicated since you have to enable permission from the privacy and settings of the device. To do so, ensure that Microsoft Teams is properly installed on your Mac, and then follow these steps:
1. Click on the “Apple” logo in the top-left corner of the window and select “System Preferences”.
2. Once the new window pops up, click on “Security & Privacy”.
3. Now select the Microphone, Camera, and Screen recording options from the navigation menu and ensure that Microsoft Teams has a tick on all these options.
Once you have enabled the settings, you shouldn’t have any problems sharing your screen with other people on the internet. Now, to share your screen on iOS, follow these steps:
1. Initiate a call and once accepted, click on the “Share” button on the top-right corner of the window.
2. From the menu, select the screen or the window that you want to share with the person on the call.
3. Once you have selected the window, it will start to appear on the screen of the end user.
Keep in mind that the screen-sharing option won’t be available on the Mac unless you have enabled the permissions that we’ve mentioned above.
Screen Sharing on iOS
Using iOS and want to share your screen with someone on Microsoft Teams? We have you covered. Just follow these steps and you’ll be able to share your screen with your fellas:
1. Open the Microsoft Teams application on your device.
2. Select the desired chat and initiate a call and once it is accepted, click on the three dots.

3. From the menu, click on Share > Share Screen > Start Broadcast.
4. After that, the person on the other end will be able to see your window on their end.
Advanced Sharing Tips & Best Practices
Screen sharing with Audio
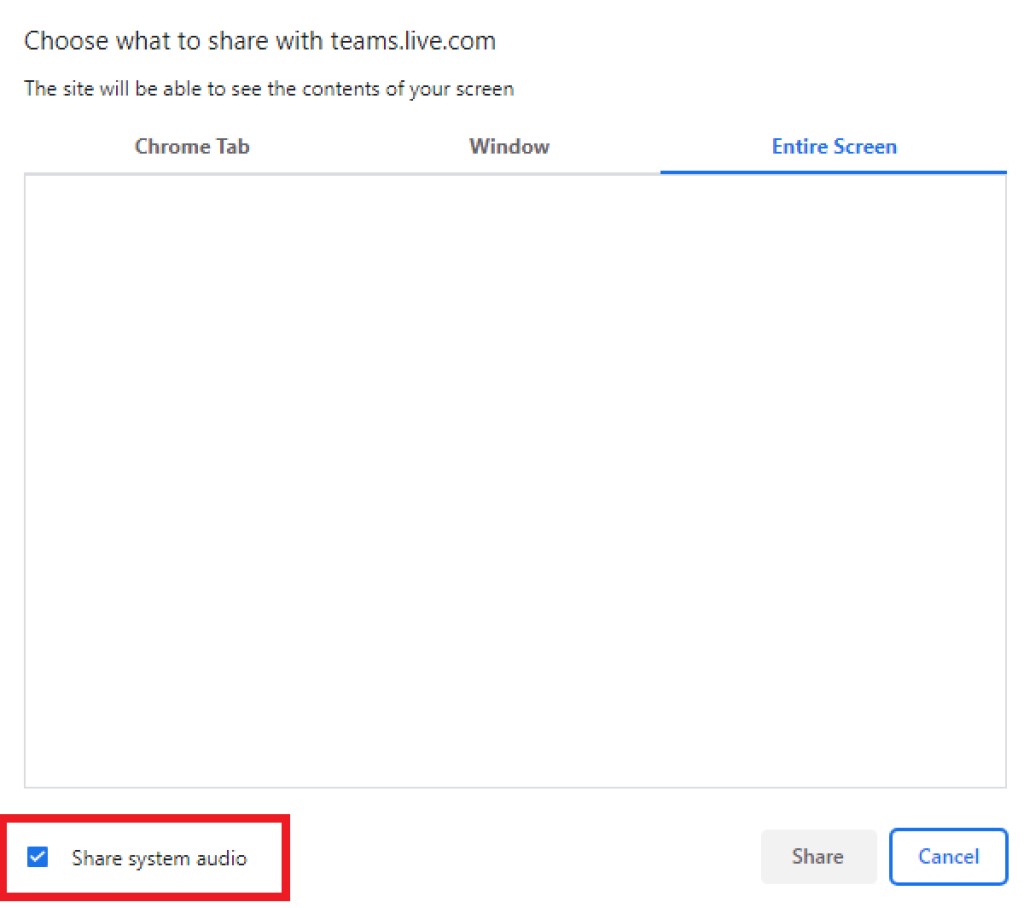
If you want to share your system’s audio with the other person through screen sharing, you must ensure that you have enabled the ‘Share system audio’.
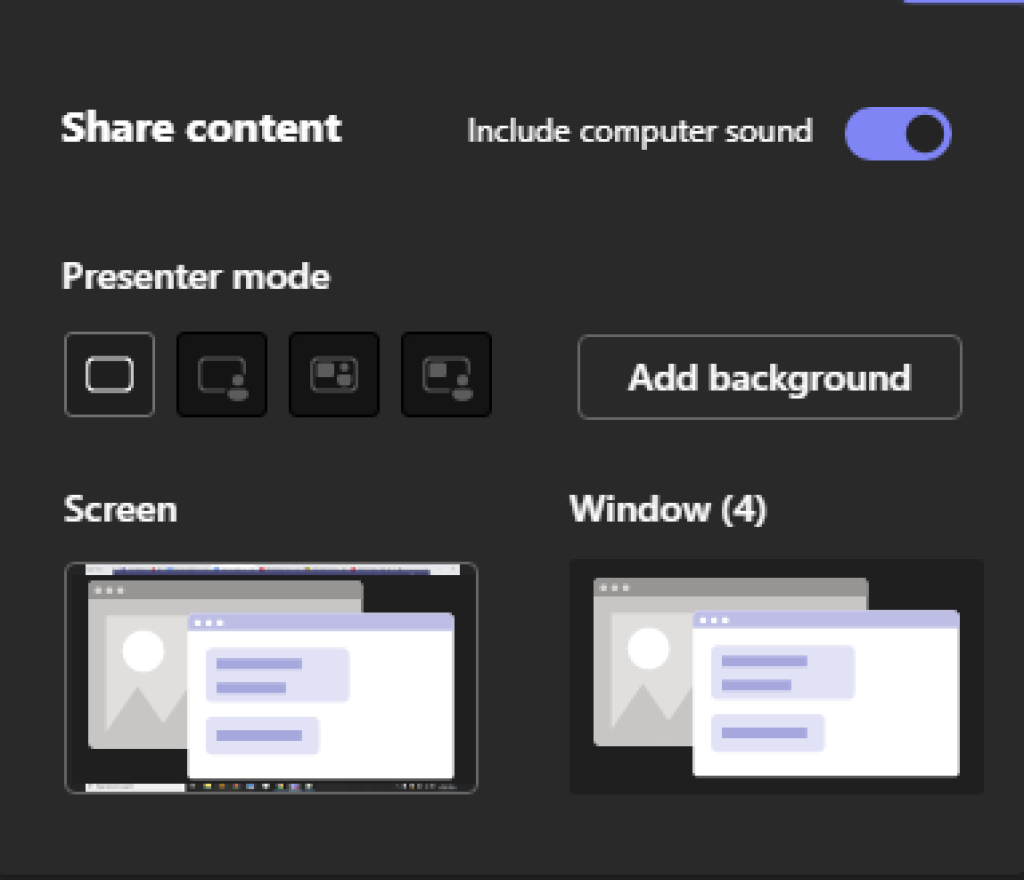
And in case you’re using the app version, you have to enable the “Include computer sound” option.
Using Whiteboard Feature
One of the many exciting features of Microsoft Teams is that it allows you to share your creativity with your team using the Whiteboard feature. It is basically a blank page where you can collaborate with your peers to discuss ideas and bring them to life.
Here’s how you can use the whiteboard feature in Microsoft Teams.
1. Initiate a call with the person that you want to collaborate with.
2. Once the call is accepted, click on the ‘Share’ button on the top-right and then select the “Microsoft Whiteboard feature”.

After that, an entire new window will pop up and you can select the desired template to showcase your ideas with your team. There are plenty of different tools that allow you to share your ideas in creative ways.
FAQs
Why can’t I share my screen on Teams?
If you have not enabled screen-sharing permissions on your device, likely, you won’t be able to share your screen with someone on Microsoft Teams. If you’re facing such an issue, make sure that you have enabled the permission for Camera, Microphone, and Screen sharing/screen recording on your device.
What is the difference between the share screen and the share window in Teams?
The screen-sharing option allows you to share your entire screen with the person on the call. However, the share window option allows you to only share a specific window with the other person.


