
Canva not only offers the flexibility to upload images but also offers different tools to edit them. In this guide, we will help you blur an image through a simple demonstration to get you all covered.
Blur an image on Canva
- To begin, use your web browser to go to Canva and select the project you’re working on from the Recent designs section. If you haven’t started yet, choose a design from the options under Create a design.

- After the new/existing design loads and the canva is displayed, click on Uploads from the Editor panel on the left.
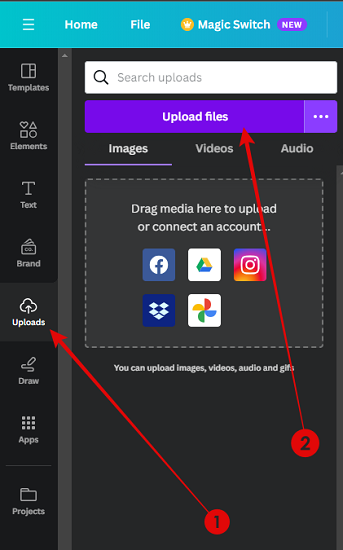
- By doing so, the Uploads panel appears, and before uploading an image, make sure you’re on the Images tab to avoid the hassle of selecting the image.
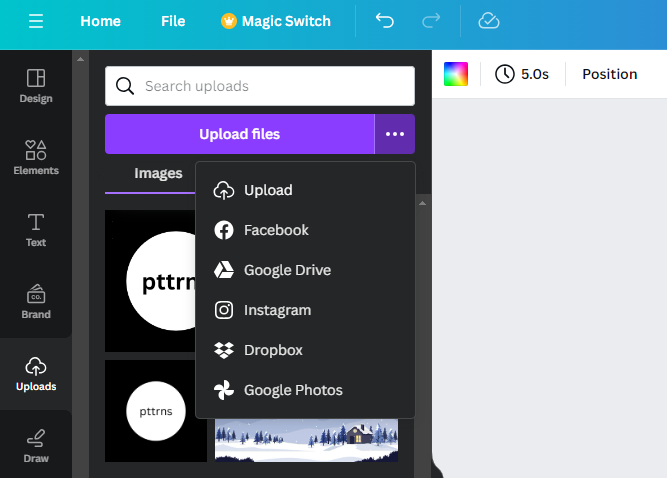
- If you aren’t uploading the image from local storage, click on the three horizontal dots next to Upload Files and select the source.
- Once the image has been successfully uploaded, click on it to add it to the canvas. After it is added, click on it to select it, and you will find the Editor toolbar at the top and from which click on Edit photo.

- With this, the Effects panel displayed on the left. Next, navigate to the Effects section and click on the Blur tool.

- The blur tool allows you to blur a particular portion or a complete image through the brush and whole image options, respectively.

- Finally, select the brush type and adjust the sliders accordingly to create the blur effect according to your liking.

Wrapping Up
Congratulations on learning how to achieve blur in Canva!
While Canva allows you to blur an image with ease, if you aren’t happy with the results, try using a conventional photo editor like GIMP or Adobe Photoshop. Alternatively, you can use online image blur tools if you don’t want the hassle of installing software.


