Canva offers exclusive apps for their users that can help in creating engaging and useful designs. As you’re trying to work on QR codes, you can use Canva’s QR Code apps to your advantage. Follow the steps below to get started.
What we cover
Create and Edit QR Codes on Canva
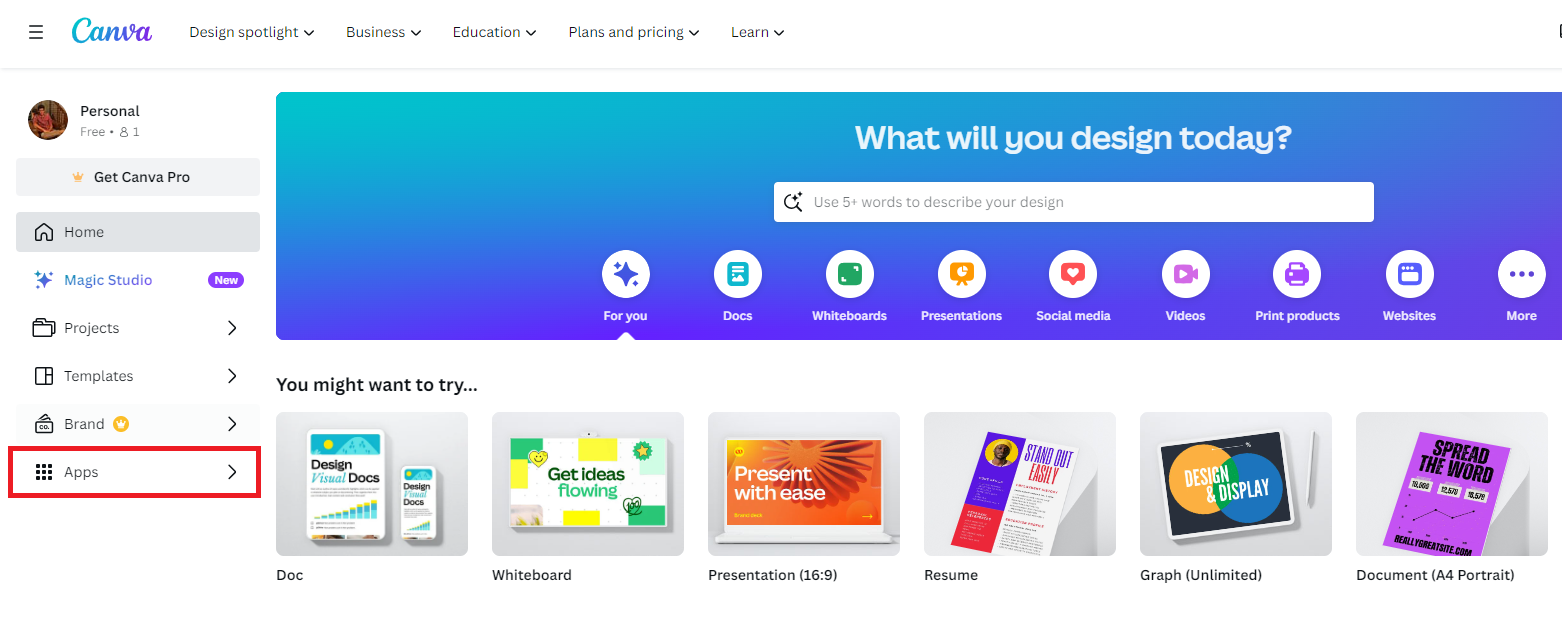
- Start by navigating to Canva and sign in with your credentials. Once you’re on Canva, navigate to options on the left and click on Apps.
- By doing so, you’re redirected to the Discover apps page. Now, use the Search box provided and look for QR Code apps. The result displays several apps that offer different QR code generation. Hence, verify your requirements and pick the one that matches them.
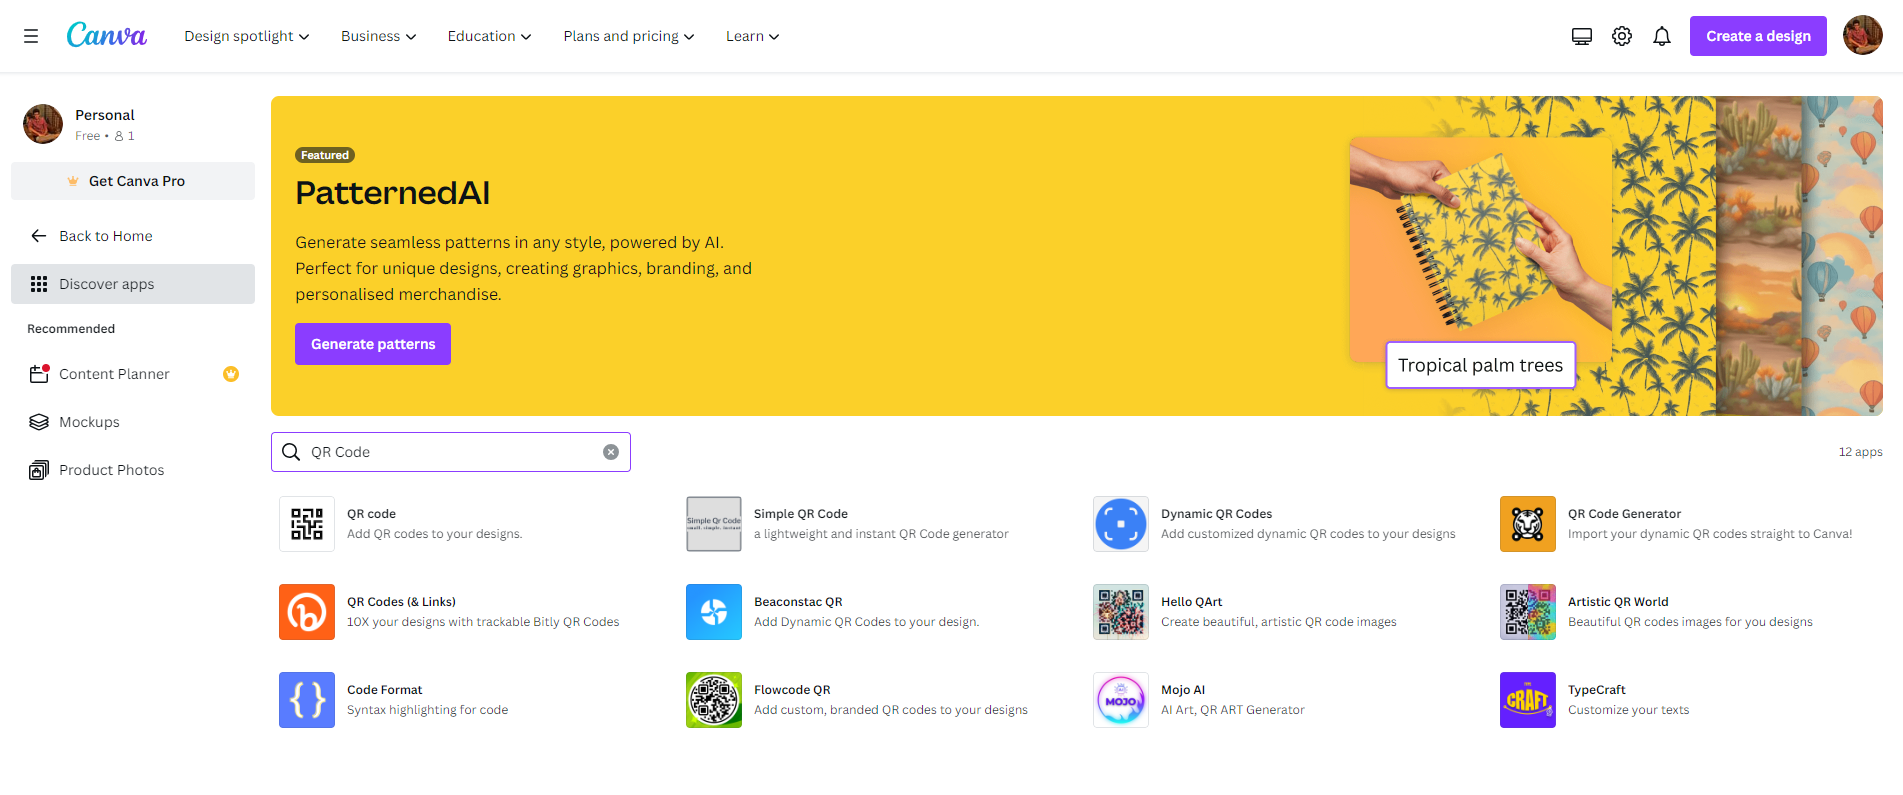
- For the demonstration, we have selected the app offered by Canva. However, we suggest you check out all before proceeding with one.
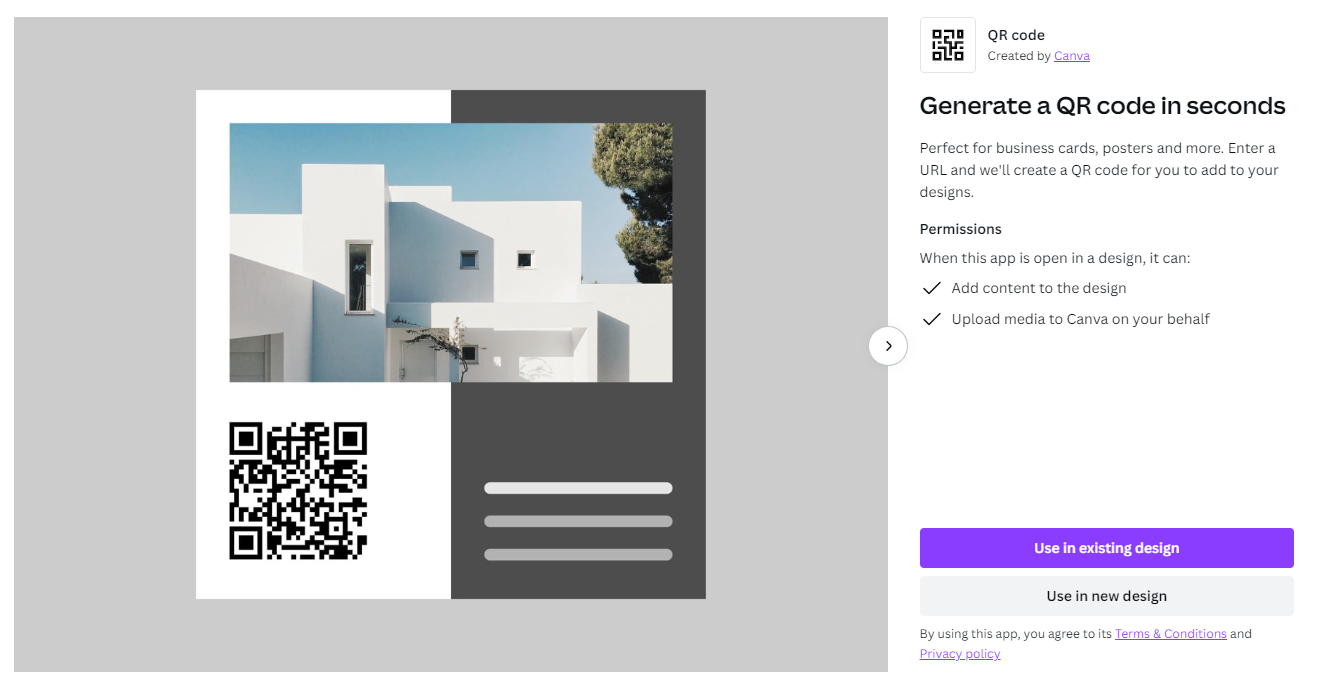
- Once you have selected an app and you’re presented with an empty design, look to the left and navigate to the input box provided under the QR code tab. Next, fill in the box with the URL and click on Generate code.

- While it might take a while, once Canva generates a QR code, make edits, like changing dimensions if needed. With the QR code looking good and you’re sure that it matches your requirements, click on the Share button and then Download.
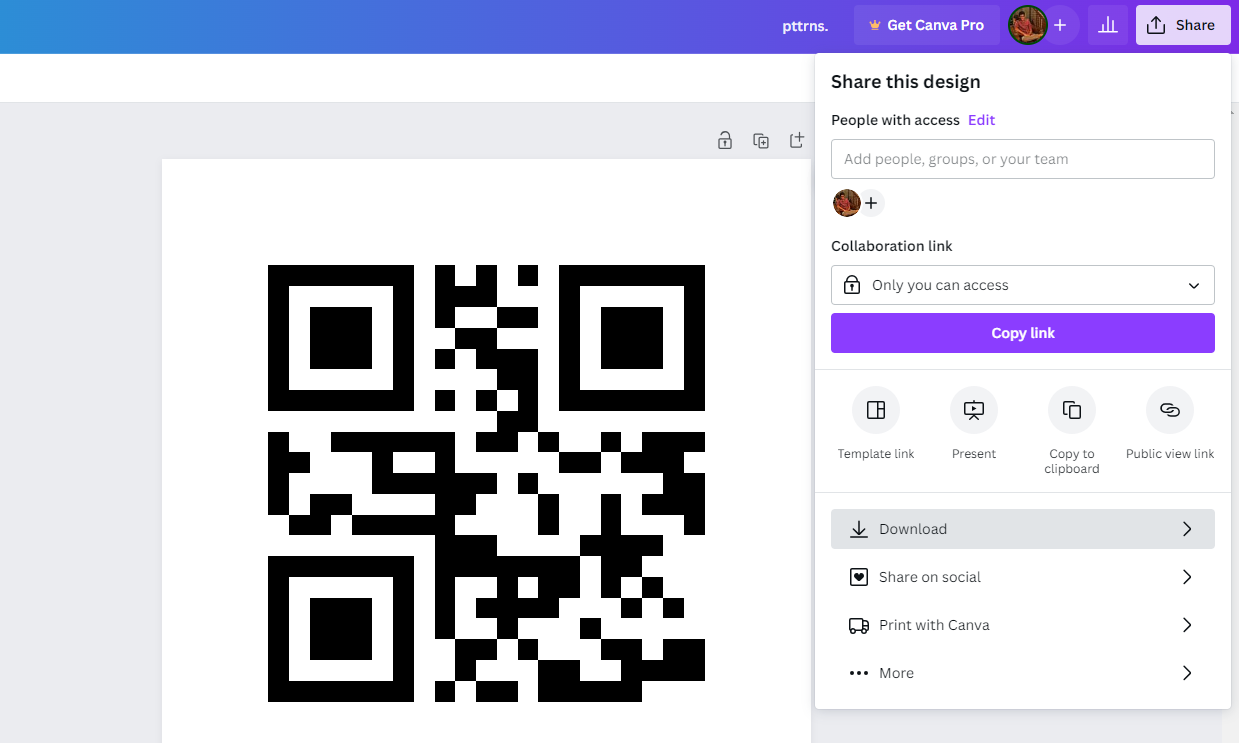
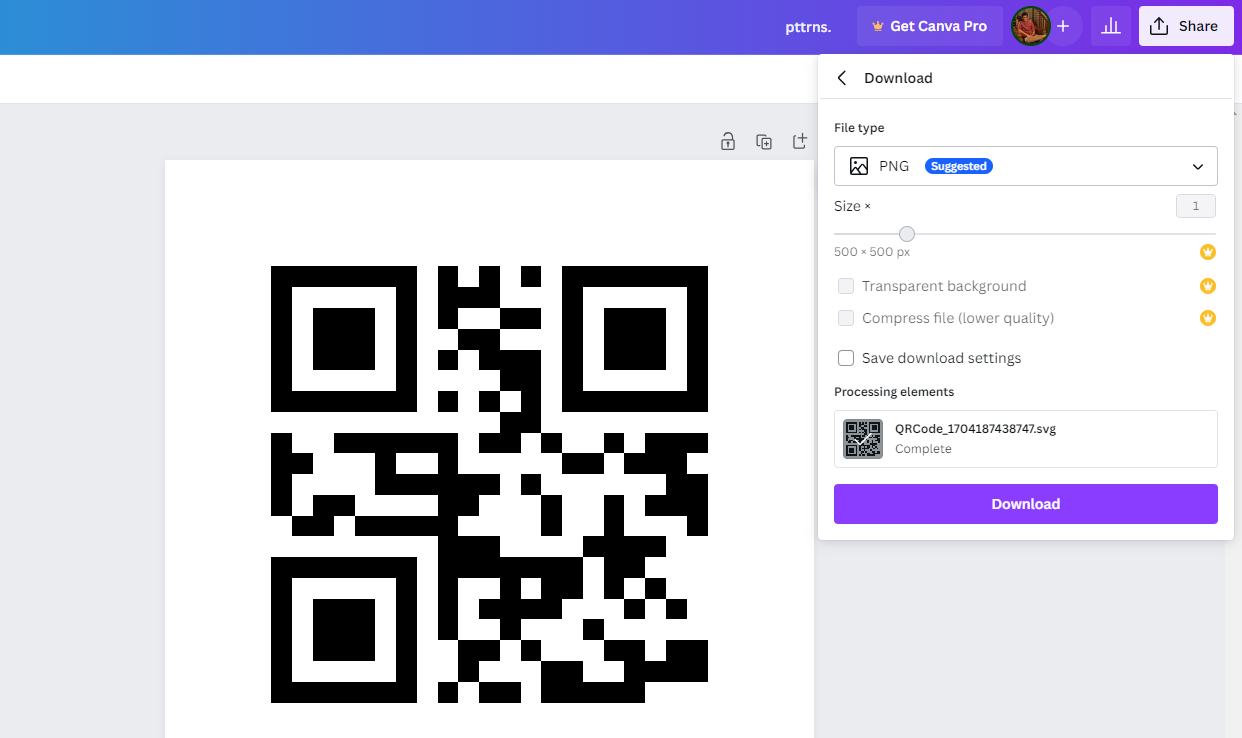
- By doing so, you’re displayed with Download options. Now, set the File type to PNG, PDF Standard, or PDF Print according to your requirement and click on the Download button.
What about Dynamic QR Codes?
The approach above generates static QR codes, and if you’re in need of a QR code that redirects to a second URL on demand, even after it is generated or printed, you need a Dynamic QR code. Luckily, Canva offers apps for this as well, and here are steps to get started:
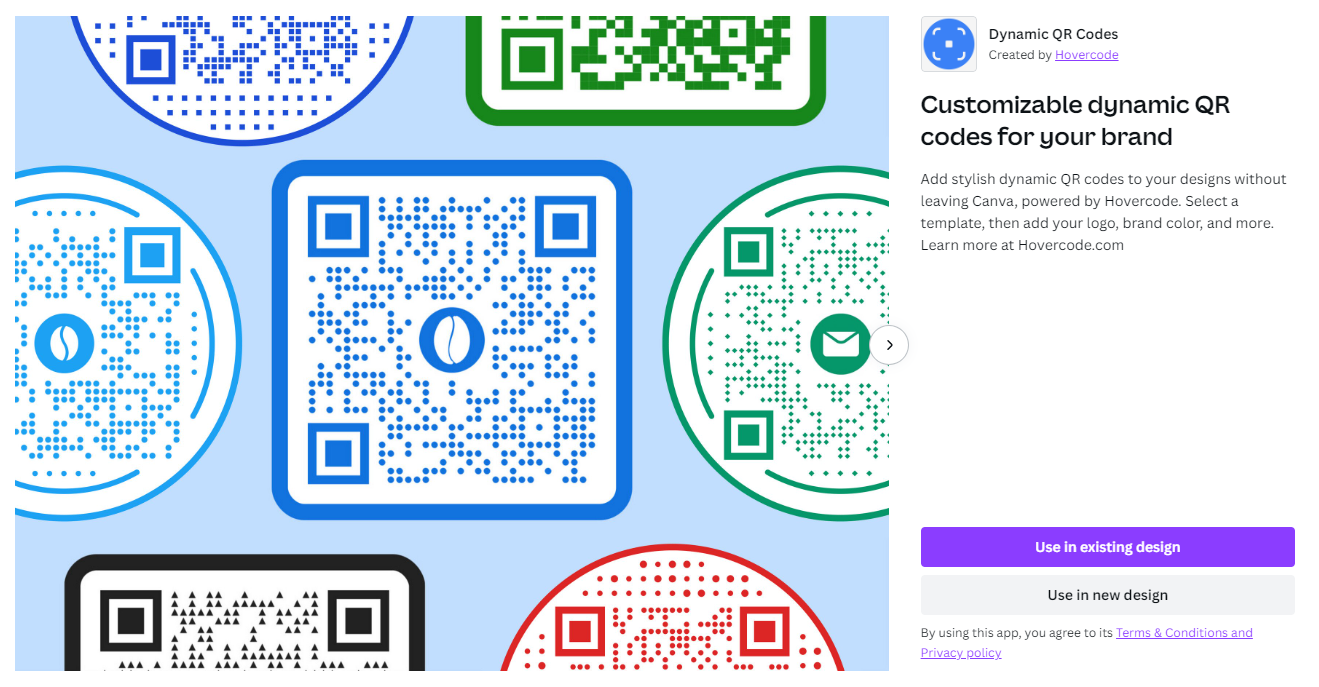
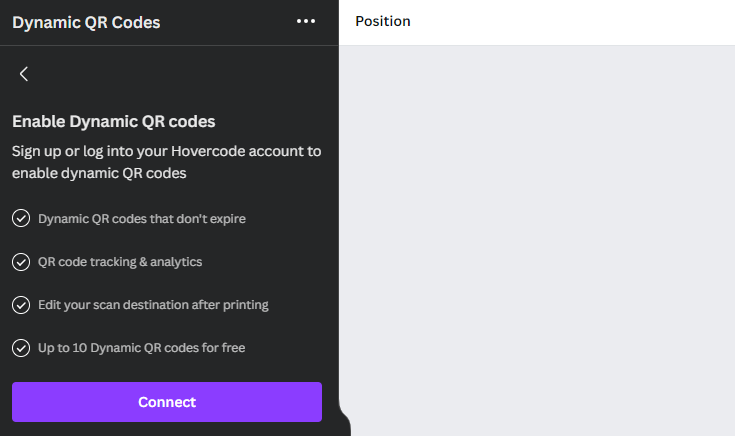
- Repeat Steps 1-2 from the above approach to open Canva and search for QR apps. Once you’re displayed with multiple QR apps, read their description and select the one that says Dynamic QR code [For demonstration, we have selected Hovercode’s Dynamic QR Code application].
- Once you’re presented with an empty design, look to the left and Select a template. Next, fill in the details, make edits, and check the option at the end to make the QR dynamic.
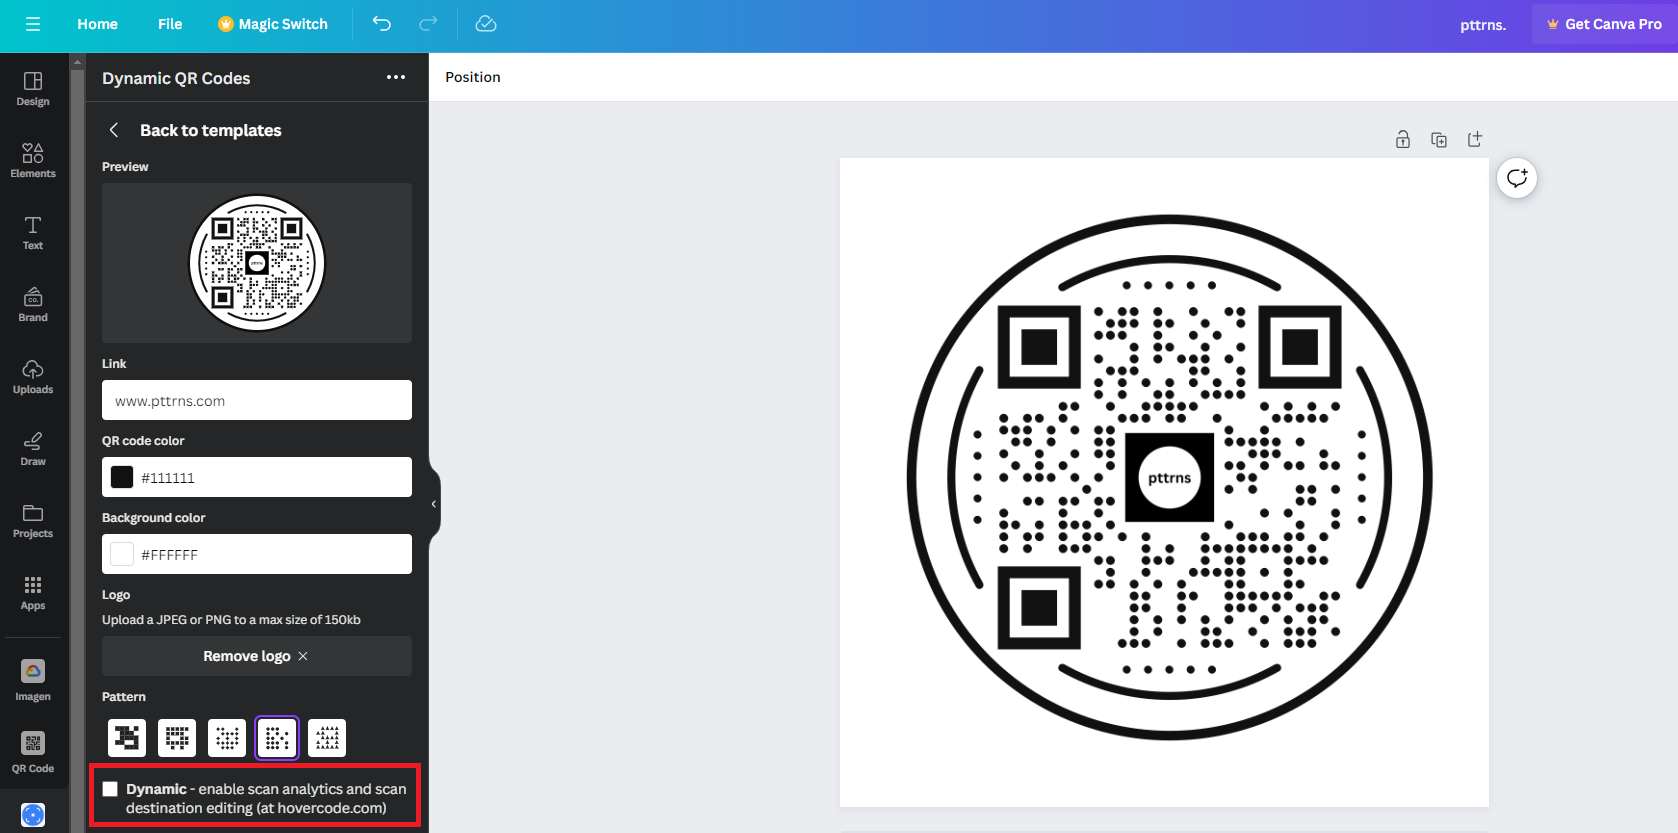
- By doing so, you’re asked to connect to the Hovercode account. Once connected, carry out the rest of the process. With the changes made and the provided scan destination, Repeat Steps 5-6 from the above approach, and you’re done.
Wrapping Up
Congratulations on creating and editing QR codes on Canva!
After creating and managing QR codes on Canva, we felt it was arguably the best option and didn’t require any alternatives. All the apps offered in Canva for QR creation work well and are open to customization.
Note: The QR codes developed on both approaches don’t expire. However, we suggest you cross-check before implementing it into your design.


