
Canva doesn’t allow you to adjust design orientation. However, worry not, as the below approaches will help you mimic orientation change.
Making changes while creating a design is arguably inevitable, but if it is about changing the orientation, you’re left with no choice in Canva. To address this issue, we have provided multiple approaches, and while they aren’t the solution, they’re handy when you need to switch your design’s orientation quickly.
What we cover
Before You Work on a Design
It is important to consider the factors below before proceeding with working on a design to avoid orientation change:
- Always know your requirements, and if you’re unsure, make time to create portrait and landscape models of your design.
- Opt for working on the Whiteboard to avoid restrictions with the template while manually changing orientation.
- Consider creating a custom-size template before working on the design, as it prevents you from making unnecessary changes.
Adjust Design Orientation in Canva
Usually, there would be one way or another to achieve a certain result in Canva, even if it fails to offer a feature or tool for it. While adjusting design orientation depends on the below approaches, the key to making it right depends on your creativity and your skill.
Using Magic Switch [Canva Pro/ Teams/Education]
The older versions of Canva had a dedicated tool for resizing the template. However, it is replaced with Magic Switch, and here is how to use it to change the design orientation:
- Start by opening the project you’re working on and wait for it to load fully. Once done, navigate to the top left and click on Magic Switch.
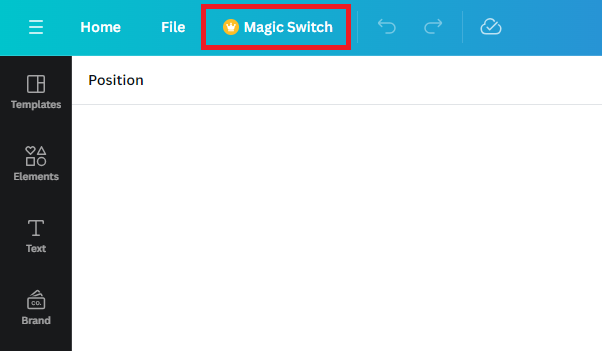
- Doing so reveals multiple options, from which you select Custom Size. Alternatively, you can consider checking out categories that would ease up the process.

- After you click on custom size, you’re asked to fill in the width and height to which you want to update your template. Refer to the below images for a better understanding.
- Portrait orientation – Height > Width
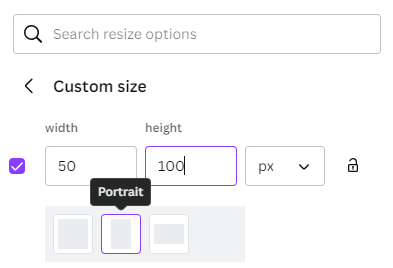
- Landscape orientation – Width > Height

Tip: Maintain a ratio where the longer side’s value is at least 1.75x to 2x greater than the shorter side in terms of pixels. For other measurement units, ensure a 1.25x difference between the values of the longer and shorter sides. This ratio balance provides optimal design proportions and visual appeal.
- Once you’re happy with the values, click on Resize and add the missing elements.
Manually Rotate Design Orientation
Considering the above approach (Magic Switch) is available to Pro users, we have found a way around it. However, while working on this approach, be prepared for the rotation of multiple elements, and it can be extremely time-consuming if the design is large.
Note: We can consider a simple example for demonstration, and the steps below must be regarded as a reference for the bigger design as well.
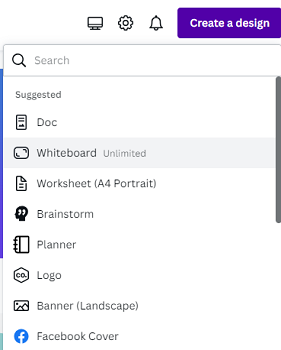
- Start by opening a new project on Whiteboard by clicking on Create a design and then Whiteboard from the home screen.
- After the project is loaded, work on developing the design in the orientation of your choice. For demonstration, we have finished our project in Portrait mode.
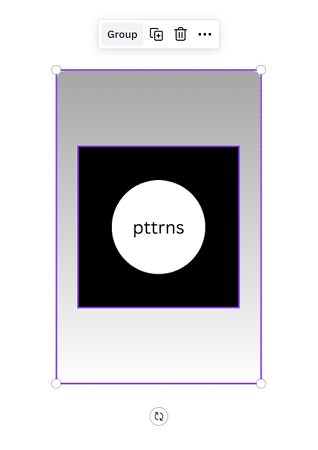
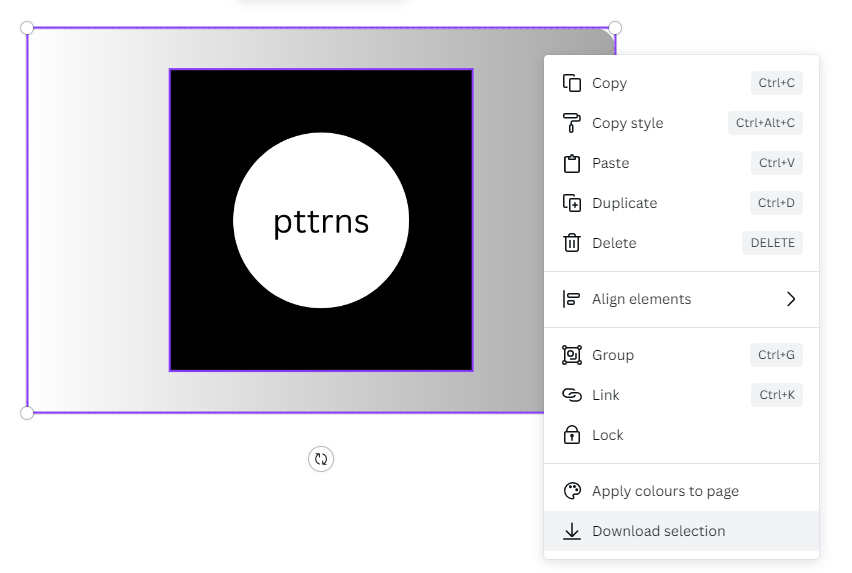
- Now, let us convert the design to landscape mode. To do that, start by grouping all elements by selecting everything and clicking on the Group option.
- After all elements are grouped, hold the rotate icon and rotate the design to landscape orientation.
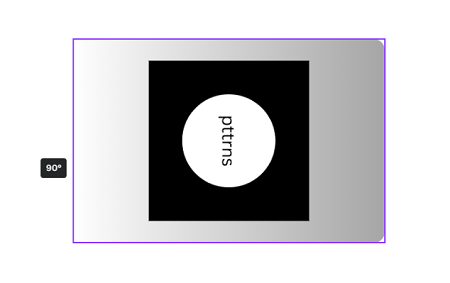
- From the above image, you can notice that the design orientation has changed. However, the text inside isn’t adjusted according to the orientation, and to fix that, click on the Ungroup button.
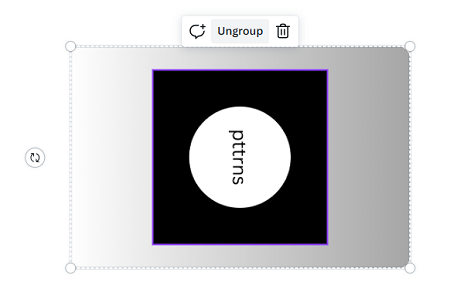
- With the elements inside ungrouped, rotate again to make it match the design orientation.
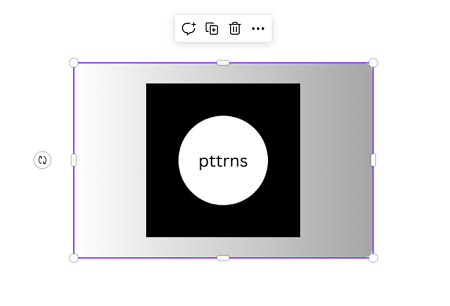
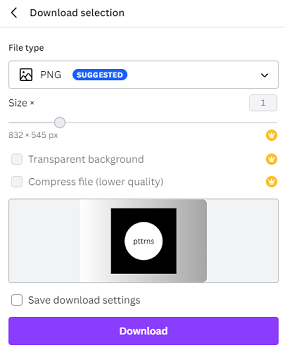
- Once done, select the entire design and right-click on it to reveal options, from which click on Download Selection.
- If you notice the dimensions, the width is larger than the height. Also, the preview features the design as a landscape image, ready to be downloaded.
Wrapping Up
Congratulations on learning how to adjust design orientation in Canva!
The way-around approach provided for non-Canva Pro users must be used for simple designs, and we suggest not working on large designs as it can take forever and can confuse you due to several elements.
Likewise, the resize approach being a Pro feature it is ideal only for simple designs as you still have to make changes to the elements to match the orientation manually.
Hence, we suggest software from Adobe Suite, as many can change orientation right away, even for complex designs.
Related Reading
How to Add Grid Lines in Canva


