
Sending newsletters through email has become a reliable and engaging option as it enables cost-effective and direct communication to share updates, promotions, and educational content.
If you’re doing this for the first time, follow the below steps to create a newsletter on Canva and learn how to send it in an email.
What we cover
Create a Newsletter in Canva
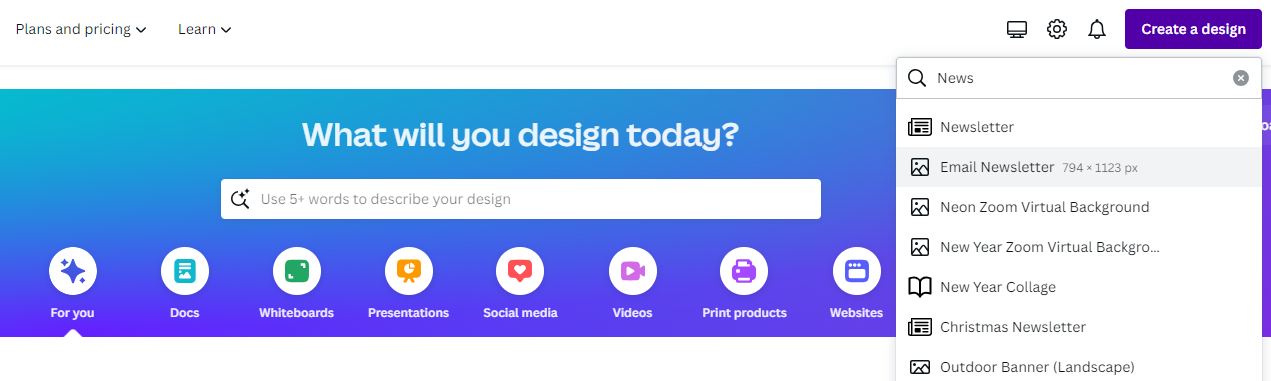
- Start by opening Canva and login with your credentials. Once you’re on the home screen, navigate to the Create a design button, search for Email Newsletter, and click on it.
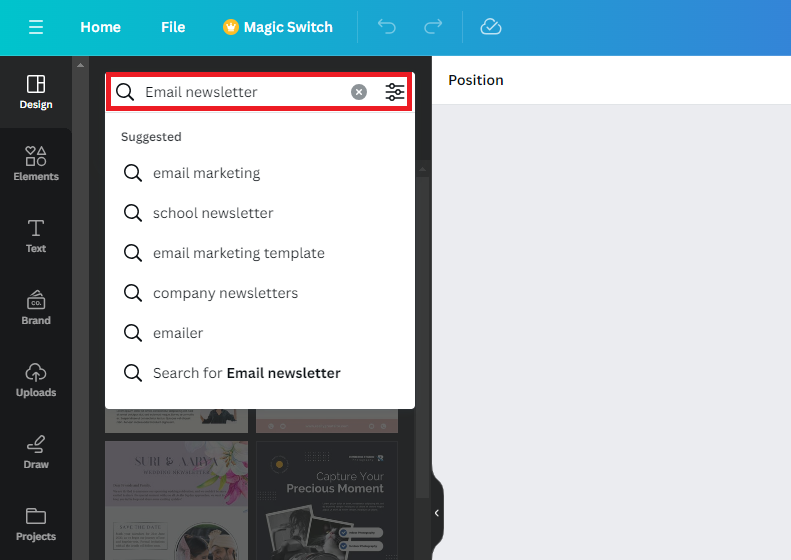
- Once the new design is created, start working on it. If you’re looking to ease the process, click on Design on the left. Now, navigate to the search box associated with it, type – Email Newsletter, and hit Enter.
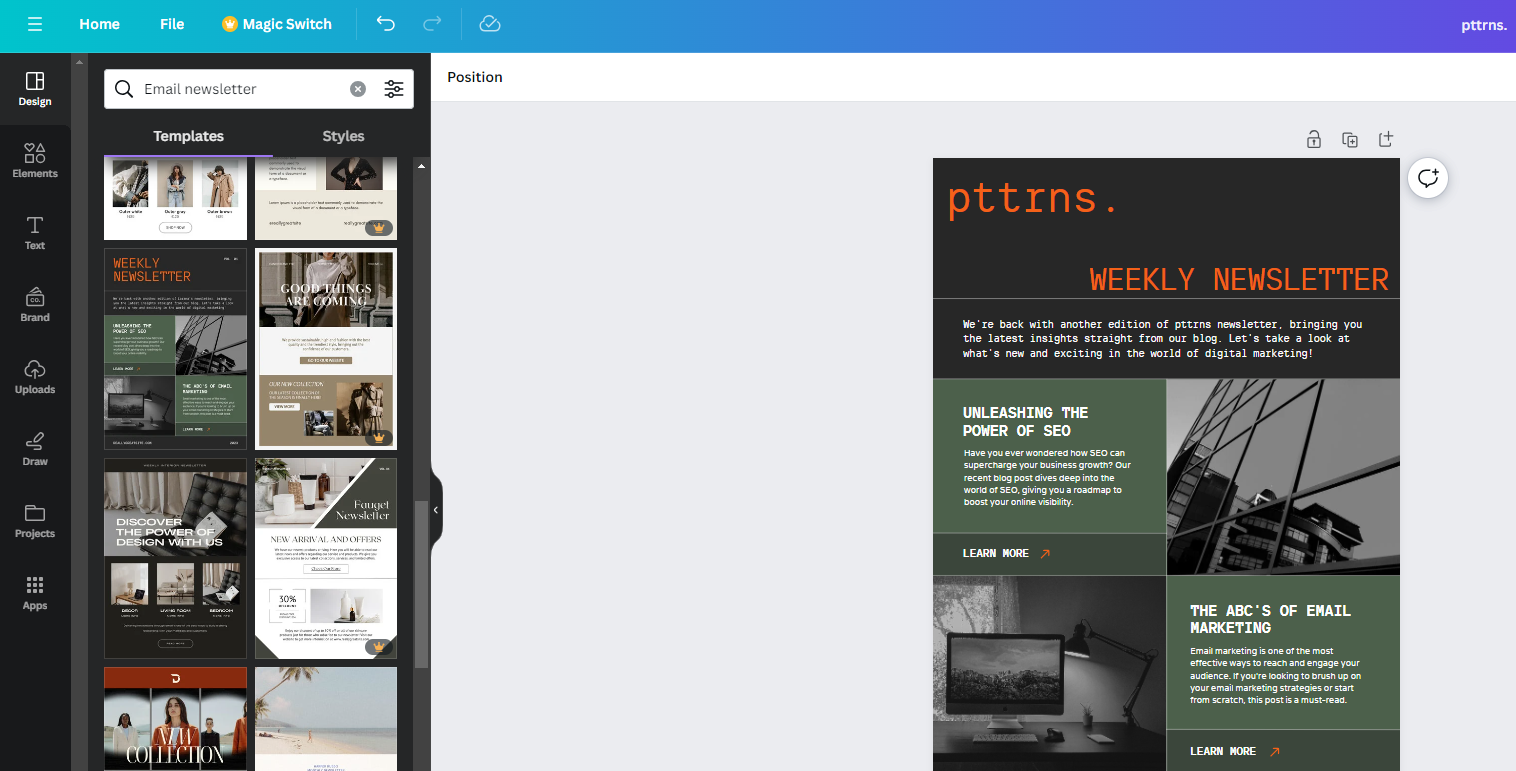
- Doing so, you’re displayed with multiple templates. Now, look for the template that matches your requirements, and drag and drop it onto the empty design.
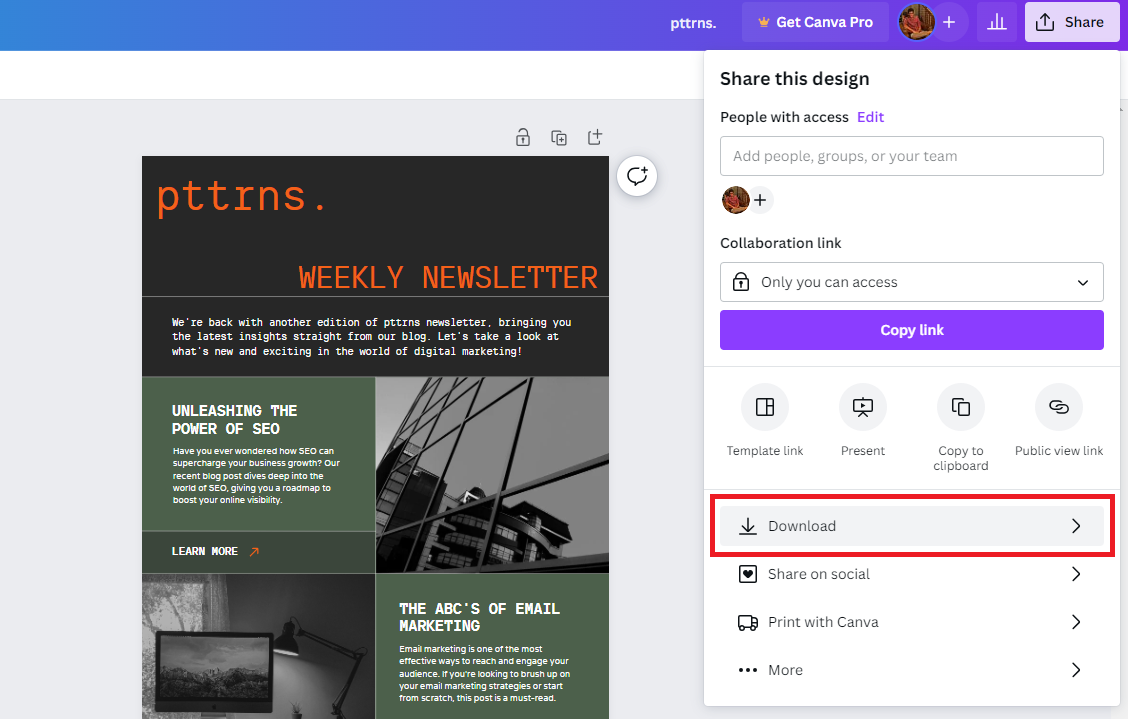
- After you’re done making changes to the template or if you have finished creating your newsletter, click on the Share button at the top right corner and then Download.
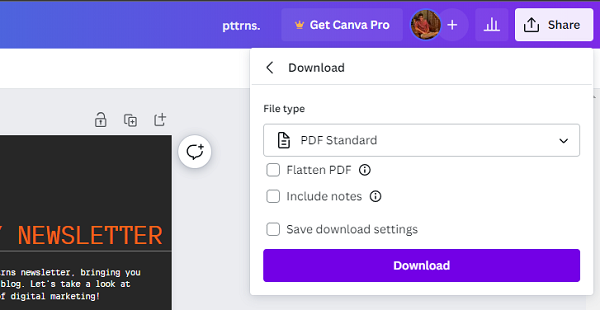
- Once you’re displayed with a separate section for download, select PDF standard as the File type and click on the Download button.
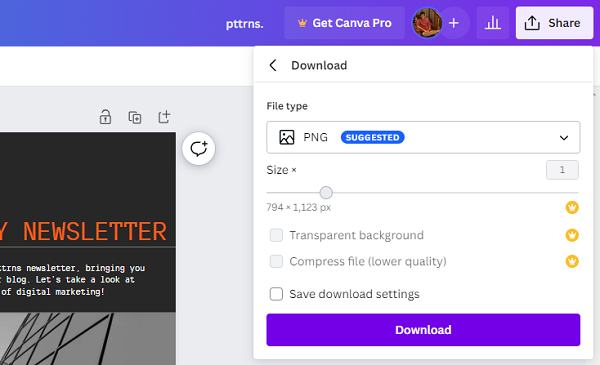
- After the newsletter is downloaded as a PDF, repeat Steps 4-5. However, before clicking on the Download button, set the File type as PNG.
If you follow all the steps right, you will have the newsletter downloaded as a PNG and PDF. Are you confused as to why we have downloaded it in two file formats? Keep reading to find out why.
Embed Canva Newsletter in Email
Note: The below steps involve using Google Drive to redirect the reader to check the newsletter from the mail. While it is an easy process using Google Drive, you can check out alternatives like Mega, Dropbox, etc.
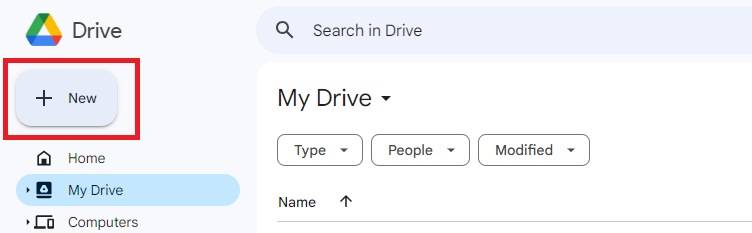
- Begin by navigating to Google Drive and logging in with your credentials. Once you’re in, navigate to the New button and click on it.
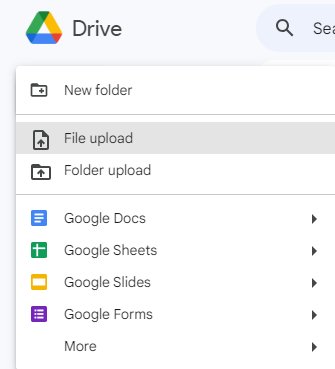
- Now, select File Upload from the list of options. Next, select the PDF downloaded earlier and upload it to Google Drive.
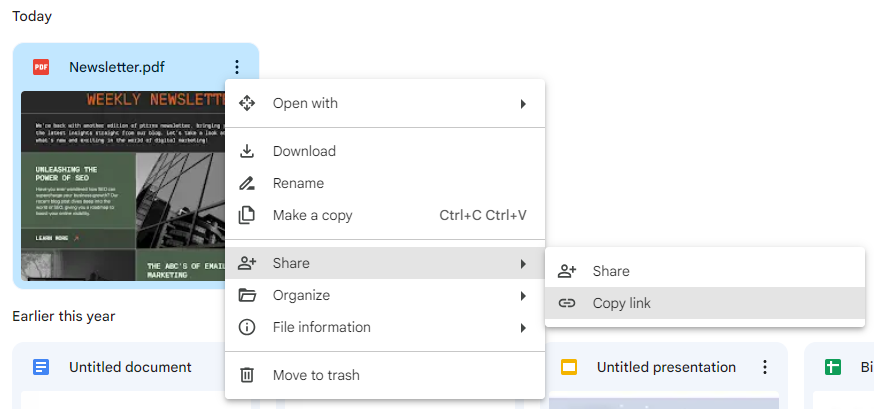
- After the PDF is added to the Drive, right-click on it to reveal options. Next, click on Share and then Copy link.
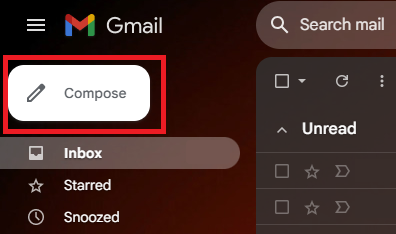
- Once you have copied the link, navigate to Gmail and click on the Compose button.
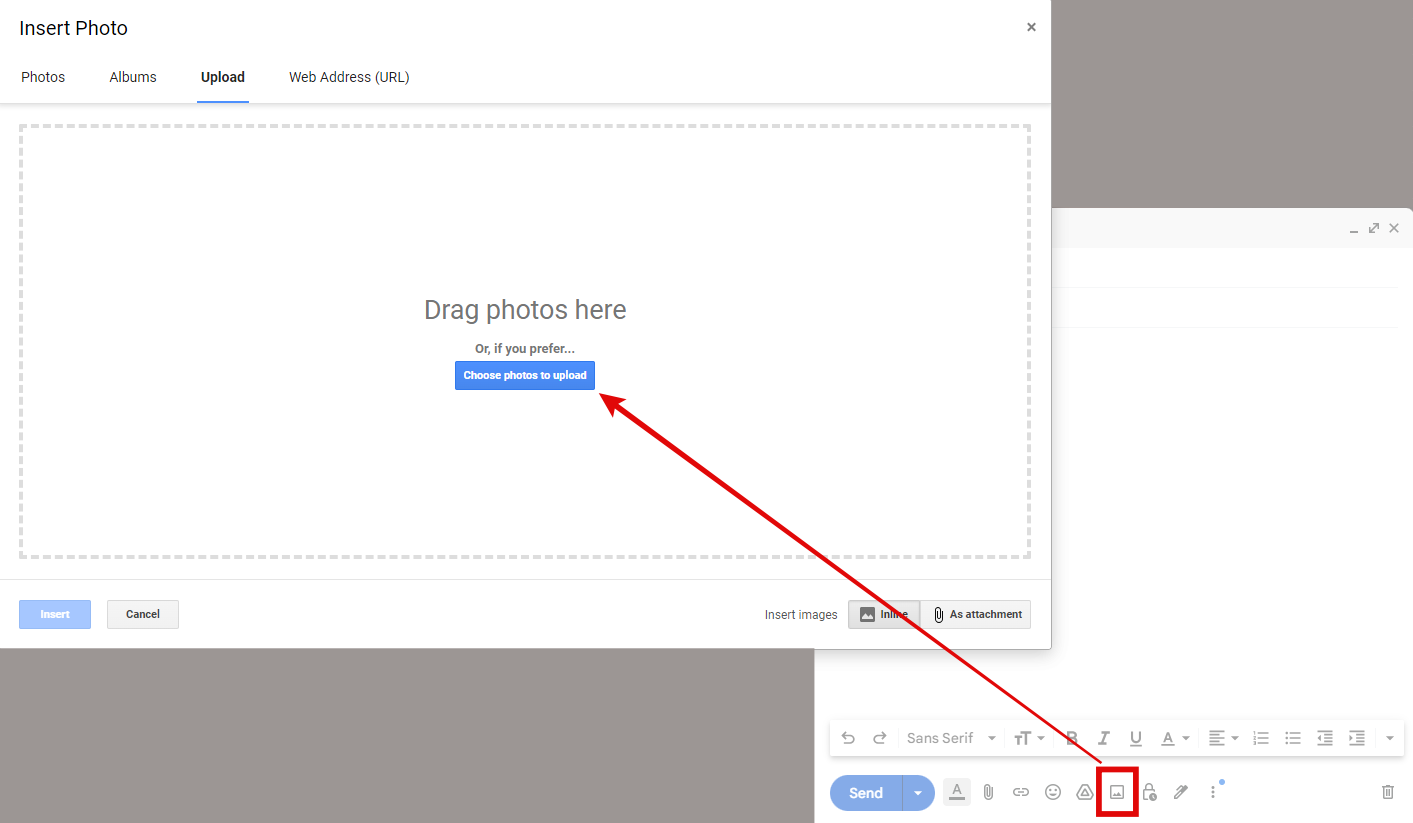
- Doing this opens the New Message box at the bottom. Now, navigate to options at the bottom, click on the Insert photo icon, and upload the newsletter image we downloaded earlier.
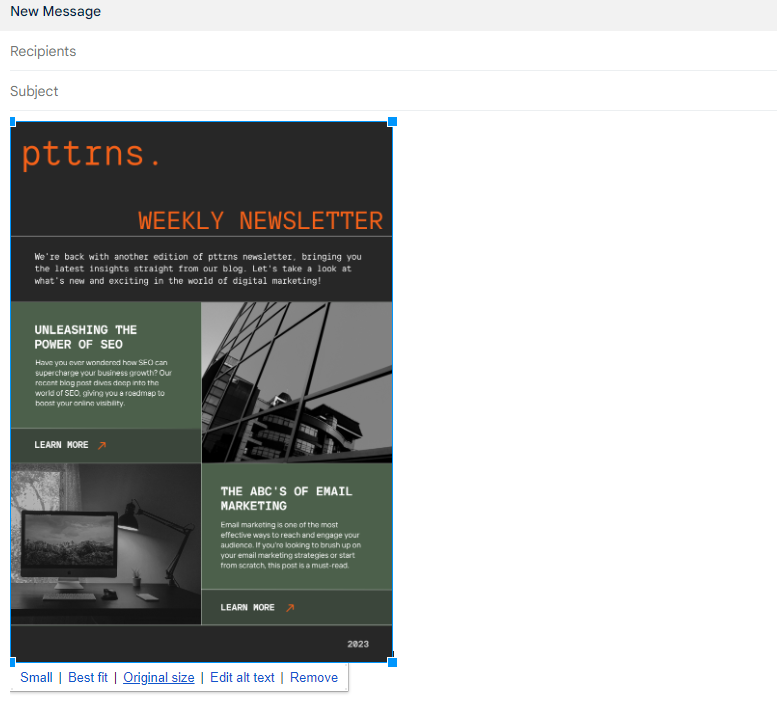
- With the newsletter image added to the mail, select it and double-click on it to reveal options, from which click on Original Size or Best Fit.
- After the image is set to its original/best size, select it and press the Ctrl + K keys to open the Edit Link. Now, paste the Google Drive share link we have copied in Step 3 in the second input box like below.
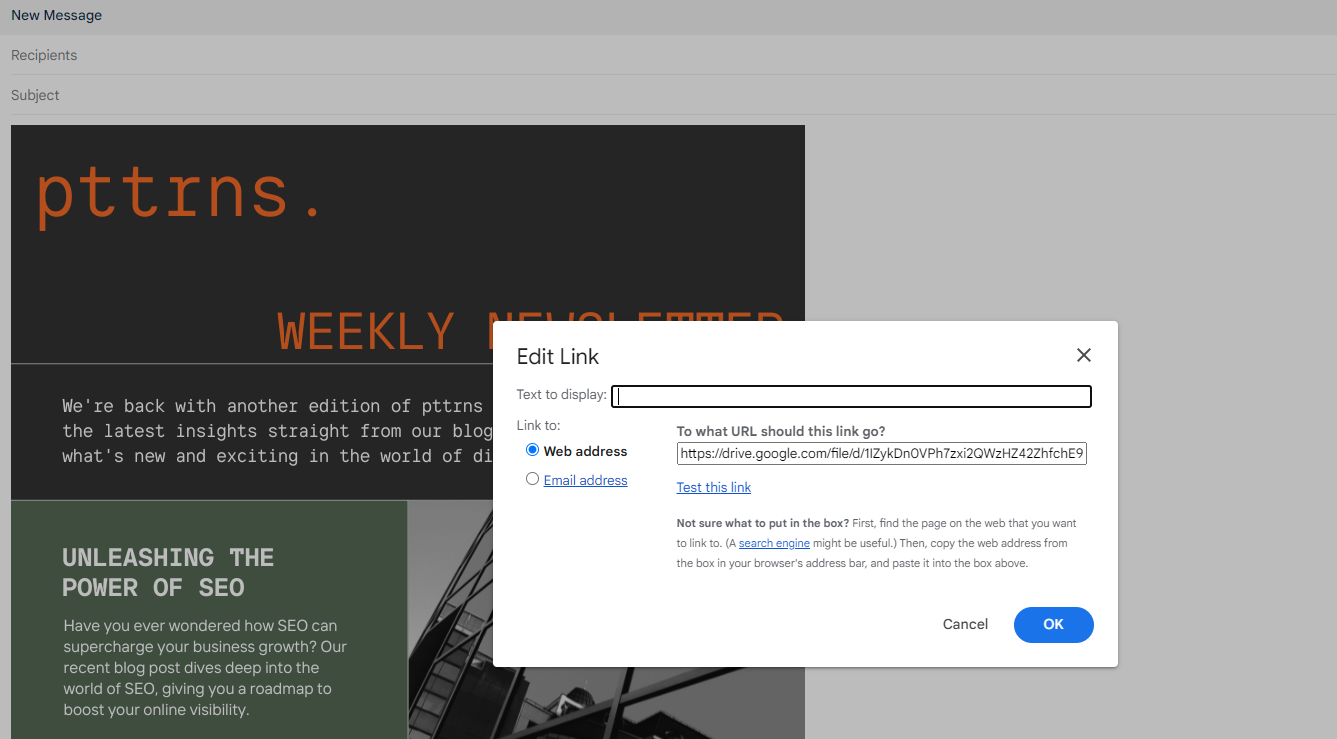
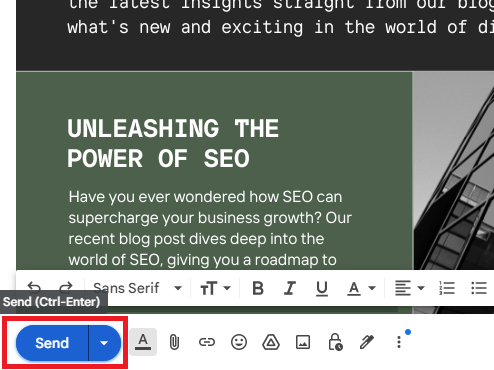
- Before proceeding with clicking on OK, ensure you clear the input box next to Text to display and update it with any text or an empty white space by clicking on Space. Once done, add your Recipients and click on the Send button.
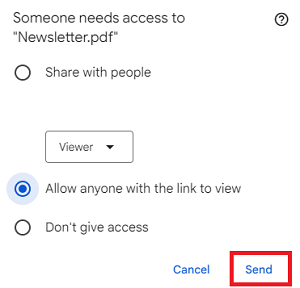
- If you haven’t set the share permissions prior, you’re asked to provide access. We suggest selecting the second option, like below, and clicking on Send.
- Once you have sent it successfully, here is what your reader/subscriber will look at. For demonstration, we have right-clicked on the image, and as you can see, it redirects to the Drive link we have added.

Wrapping Up
Congratulations on embedding the Canva newsletter in Email!
If you’re not happy with the newsletter created on Canva, we suggest checking out Mailchimp because of its exclusive newsletter templates and wide integration support.
Also, it is as flexible and customizable as Canva, so you don’t have to go through any hassle of creating engaging newsletters.
Related Reading
How to Create and Post Canva Design to LinkedIn?


