
Most Windows users rely on the built-in tools, considering they are reliable and arguably easy to use. For instance, if you’re a Windows user, you might have used Snipping Tool or Snip & Sketch to capture the screen with ease.
Likewise, if you have tried to use a built-in tool to record the screen, you might not find one dedicated to it. However, there is a way around it! Please keep reading to find out how to record the screen with audio on Windows.
Note: The steps listed under each approach arguably remain the same for Windows 11. However, with future updates or changes in the interface with the tool or certain applications, the steps might not coincide. Hence, consider them as references when needed.
What we cover
Using Built-in Tool [Windows Game Bar]
With the help of the Game Bar in Windows 10 and Windows 11, you can record gameplay, take screenshots, and monitor system performance, all while playing games without needing to exit.
The best part of it is you can use it for more than gaming; hence, it can be used to record the screen with audio except for the desktop and file explorer. Here’s how to use Windows Game Bar:
- Start by pressing the keys – Windows + G to open Game Bar.
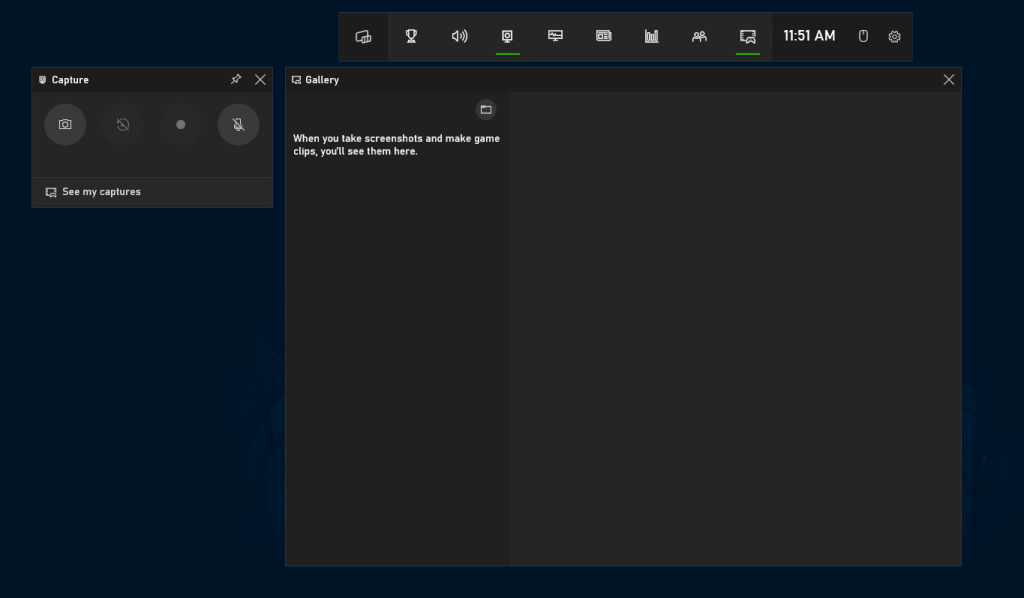
- After the bar opens, before proceeding with the screen recording, ensure to make a few changes to its settings by clicking on the Gear icon located at the end of the game bar.
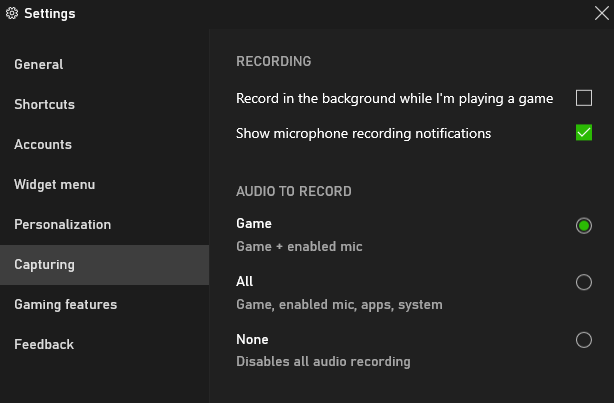
- Doing so, a small window opens featuring all Game Bar settings. Now, from the list of options present on the left, click on Capturing.
- When the associated settings appear, navigate to the Audio To Record and select the option that best fits your requirement. As we are trying to record the screen with audio, ensure you choose Game or All, but not None.
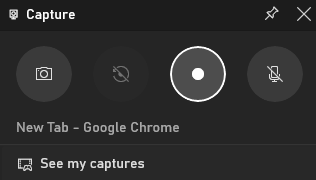
- Once done, close the settings, and click on the Record button or press keys – Windows + Alt + R to start the recording with audio. Ensure the mic next to the record button isn’t disabled if the screen recording should feature microphone audio.
Using Third Party Applications [ShareX]
While there are several applications available on the internet that can record the screen in Windows with audio, most of them are paid and commercial. Usually, we don’t prefer them unless they are extremely unique and reliable.
As an alternative, we suggest open-source projects that perform exceptionally well. In the case of screen recorders, we believe the open-source ShareX is arguably one of the best options, and here is how to use it to record the screen with audio:
- Open ShareX by searching it in the Start and clicking on the first result or by double-clicking the ShareX icon from the desktop.
- Once it is loaded, before heading straight to the recording, make changes to a few settings by clicking on Task Settings from the list of options present on the left.
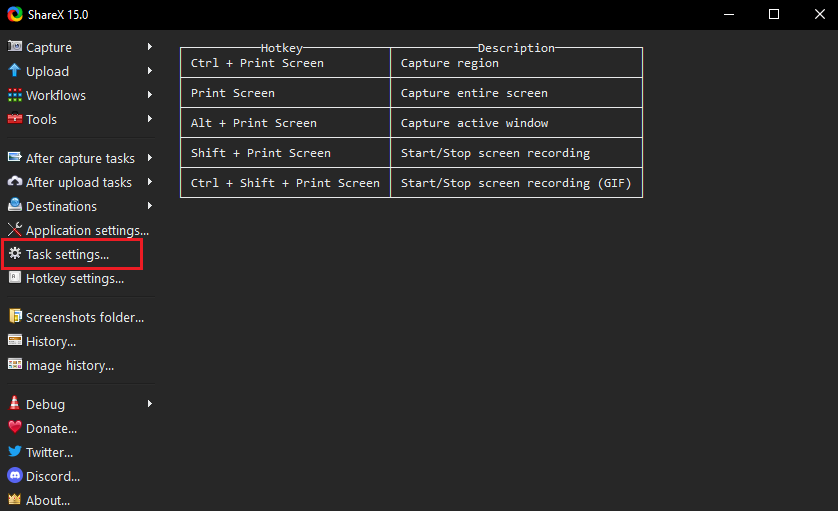
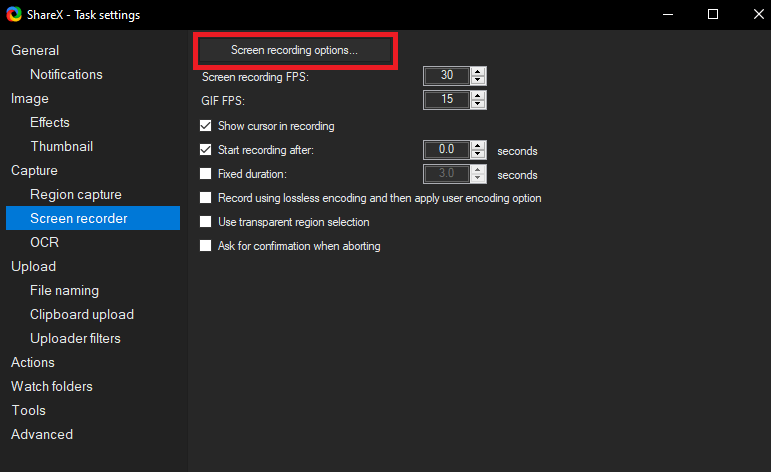
- Doing so opens a new window with multiple settings. Now, navigate to the options on the left and click on Screen Recorder. If needed, modify the settings displayed and then click on the Screen Recording Options.
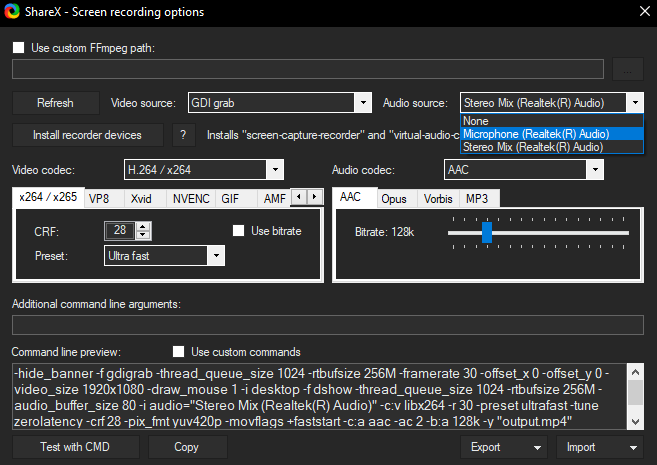
- After the ShareX screen recording options are displayed, please select an option from the dropdown beside Audio Source, and we suggest choosingthe one that suits your requirements.
- Now close the settings and press the keys – Shift + Print Screen to start/stop the screen. Ensure you set the area right before recording.

Using Online Screen Recorder [Screen Capture]
Like third-party screen recorder applications, you have multiple options with online screen recorders as well. For demonstration, we have selected Screen Capture as it felt easy when compared to the rest, and here are steps on how to use it.
- Open the web browser and navigate to Screen Capture.
- Now enable the options [Sound, Webcam, and Microphone] needed for screen recording. As we are trying to record the screen with audio, ensure the Sound is enabled. Also, you can allow Microphone if you want to add your voice to the recording.

- Once done, click on Start Recording and select the recording to proceed.
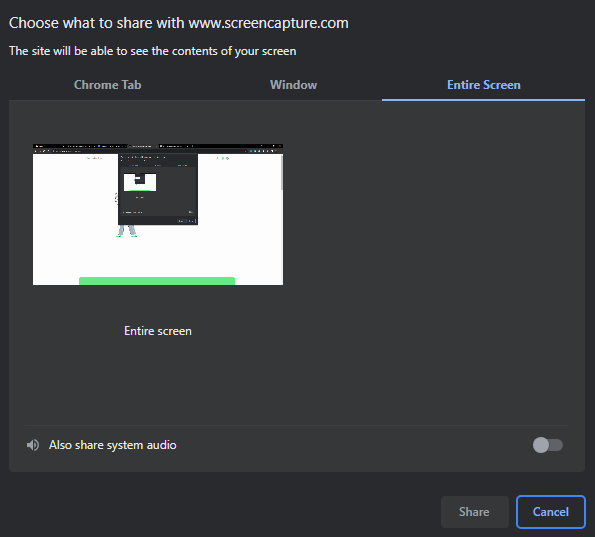
- After selecting the area, click on Share to start recording, and once done, click on Stop Recording and Download the recording.
Using Chrome Extension [Vidyard]
If you’re not happy with the online screen recorders and want a more flexible approach online, then it is advised to get a screen recording extension. For demonstration, we have selected Vidyard on Chrome, and here are steps below on how to use it:
- Open Chrome, navigate to Chrome Web Store, and search for Vidyard.
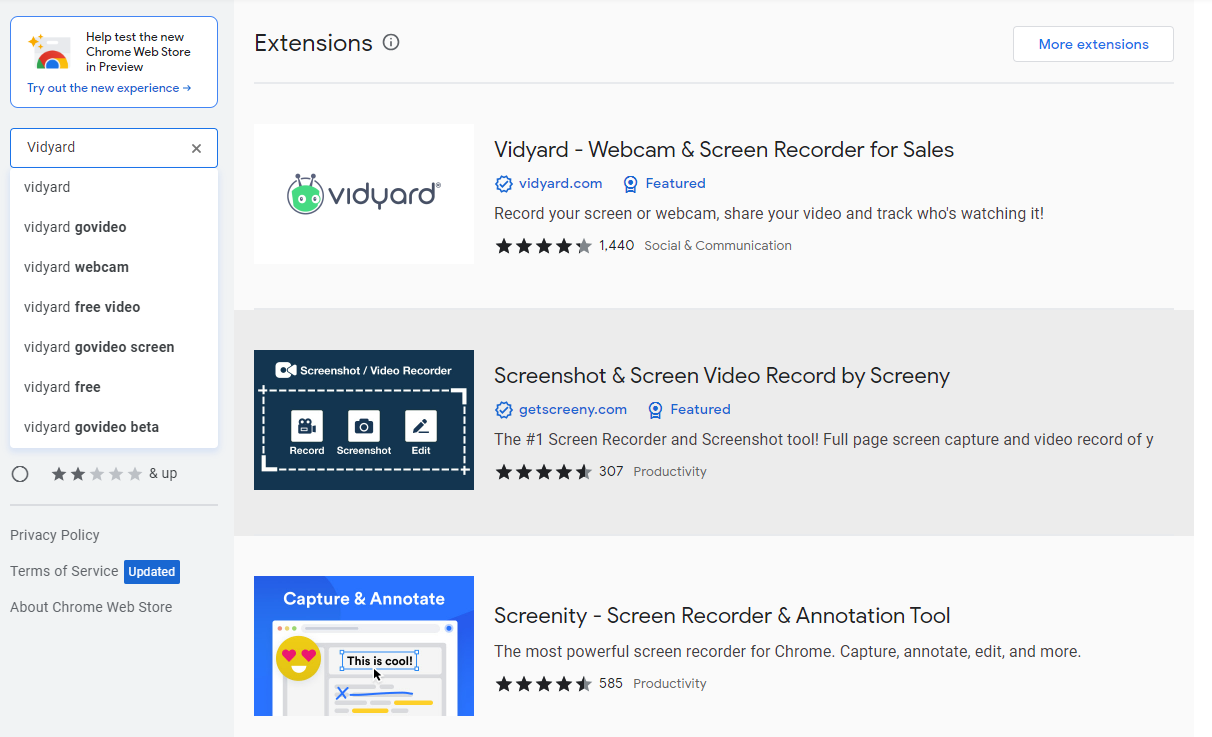
- Now click on the first result, and once opened, click on Add to Chrome.

- After Vidyard is added, head to the top right corner of Chrome, click on Extensions, and then on Vidyard.
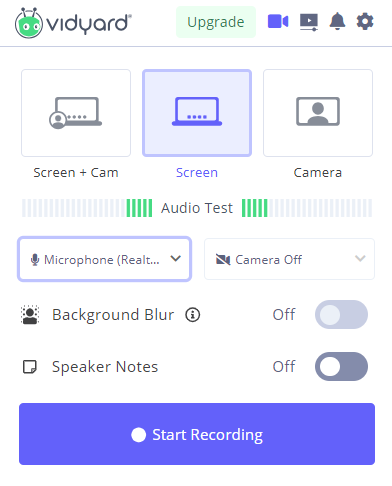
- Once done, login, and you’re ready to record the screen. Before proceeding with recording, select the type of recording and audio source.
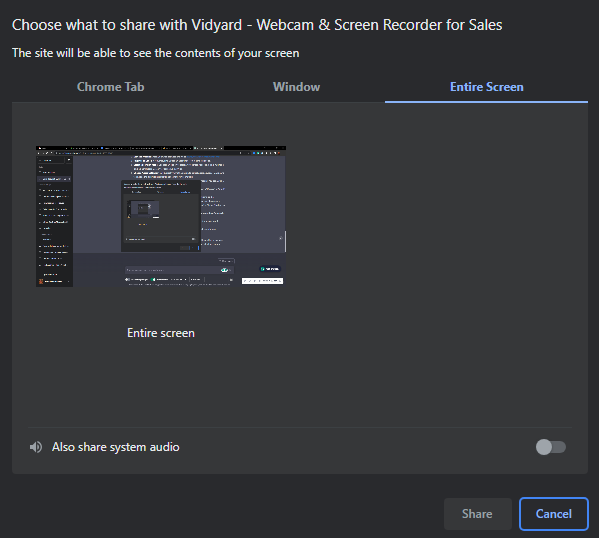
- After you press on Start Recording, select the area and click on Share to start recording. Once done, click on Stop Recording and Download the recording.
Wrapping Up
Congratulations on successfully recording the screen with audio on Windows 10/11!
While the above approaches are arguably the best, you can try checking other options as well. However, keep in mind to choose the open-source ones as they are filled with features, and the best part is you don’t have restrictions or watermarks.
If you’re opting for online screen recorders, ensure you select the ones that are prominent and have good reviews online to prevent the leak of private information within the recordings.
FAQs
How do I screen record in Windows with audio?
To screen record in Windows with audio, you can use built-in features like the Xbox Game Bar. Press Win + G to open it, and then click the record button. Alternatively, you can use third-party software like ShareX, OBS Studio, or Snagit for more advanced recording options.
Can I record both system audio and a microphone in my screen recording?
Yes, you can record both system audio and a microphone in your screen recording. Most screen recording software allows you to select multiple audio sources, making it possible to capture your system’s audio and your voice through a microphone simultaneously.
How can I edit and save my screen recordings with audio in Windows?
After recording, you can edit and save your screen recordings with audio using video editing software like Adobe Premiere Pro, Camtasia, or Windows Movie Maker. These tools allow you to trim, enhance, and export your recordings in various formats.


