
Fonts play a crucial role in editing and presenting the document. With proper fonts, the readability and visual appeal of the document you’re working on can be significantly enhanced.
Continue reading to explore ways to add a font to Word and strengthen your document creation and editing game.
What we cover
How to Download & Install Fonts on Word?
While Windows offers many ways to install fonts on Word, we have listed the ones that are simple and easy to follow.
However, a few can be difficult to follow as they are meant for readers using previous versions of Windows, so if you’re running the latest version of Windows, you can skip them.
Add a Font to Word using Microsoft Store
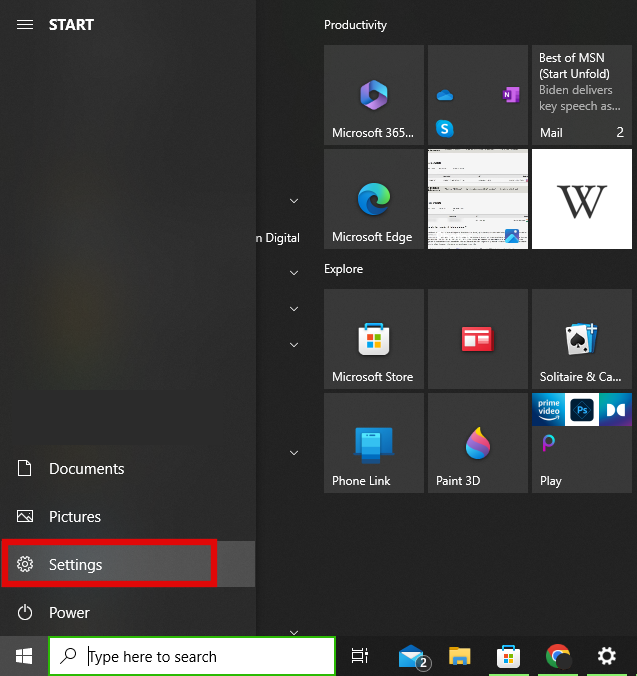
- Press the “Windows” key on your keyboard to open “Start.” Now look for the “Gear icon” at the bottom left corner to open “Settings.”
- After the “Settings” is loaded, search for “Font Settings” in the search box provided.
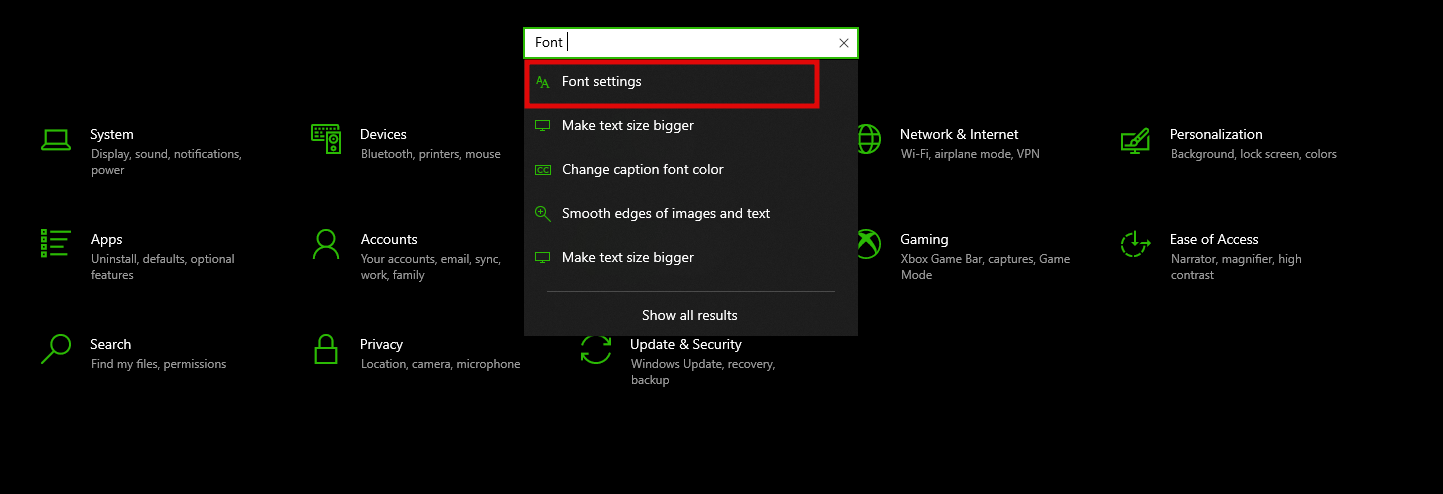
- Once the “Font Settings” are displayed, look for the “Get more fonts in Microsoft Store” and click on it.

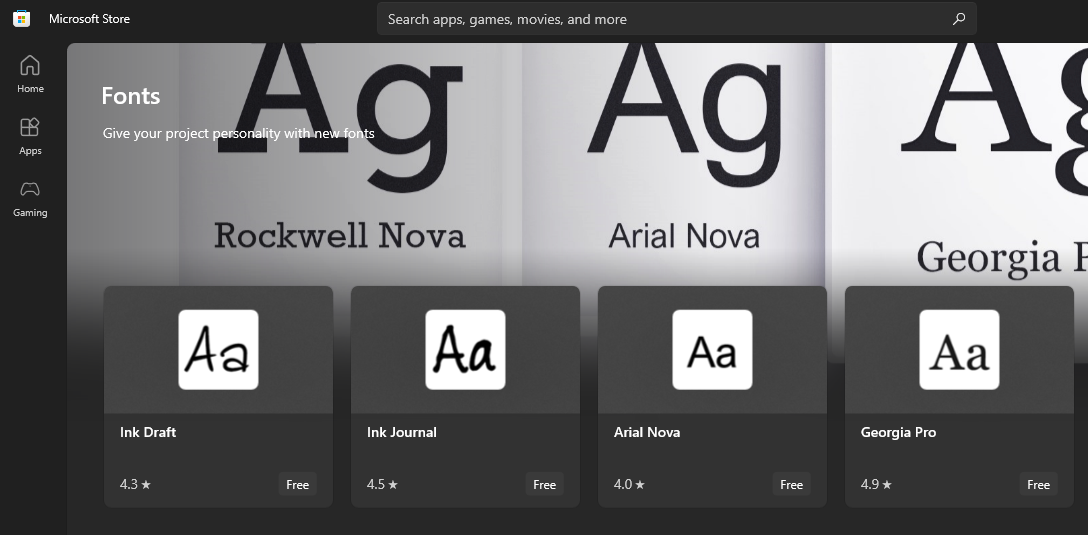
- Doing so, the fonts available on the Microsoft Store are displayed. Now, select the font you choose to proceed. For demonstration, we have chosen the “Ink Journal” font.
- After selecting the font of your choice, click on the “Get” button to download and install the font.

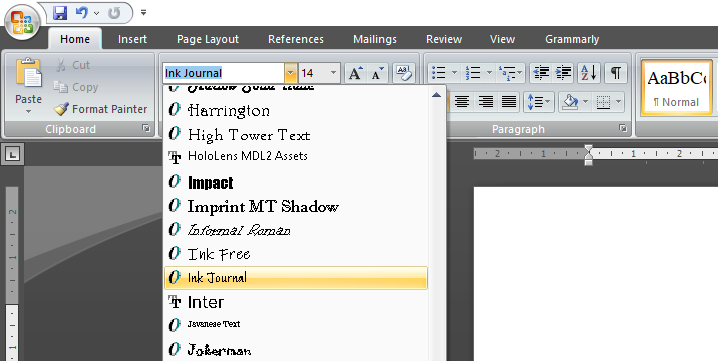
- Wait for the download and installation to finish. Once done, the font is added to Word, and the best part is you can use it right away without the need to restart the device for the changes to appear.
Add a Font to Word using Google Fonts
Compared to the above approach, this approach is slightly complex as you add a custom font outside the Microsoft Store. However, the best part is that the installation can be done in Settings and doesn’t require third-party tools.
- Open the browser and navigate to Google Fonts. Choose one you’re interested in from the list of fonts displayed. For demonstration, we have selected the “Poppins” font.

- Once the font is loaded, look for the button “Download family” and click on it to download the font.

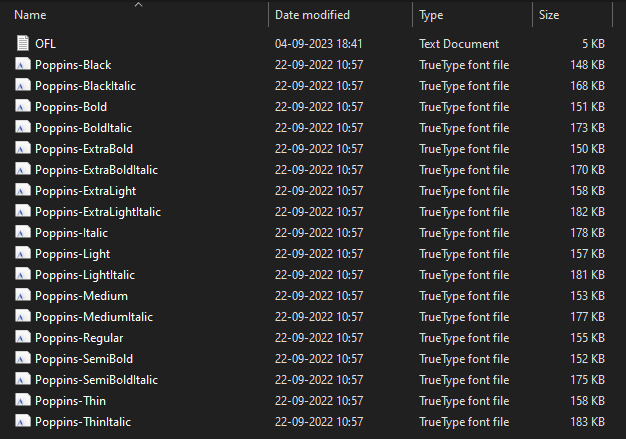
- After downloading the font, extract the zip file using any zip extractor. Once extracted, the fonts with the extension “TrueType font file (.ttf)” are displayed.
- Repeat the steps 1-2 from the above approach to open Settings >> Font Settings.
- Now look for the option “Drag and drop” from the settings, and once you find it, open the File Explorer; drag and drop the fonts downloaded before.
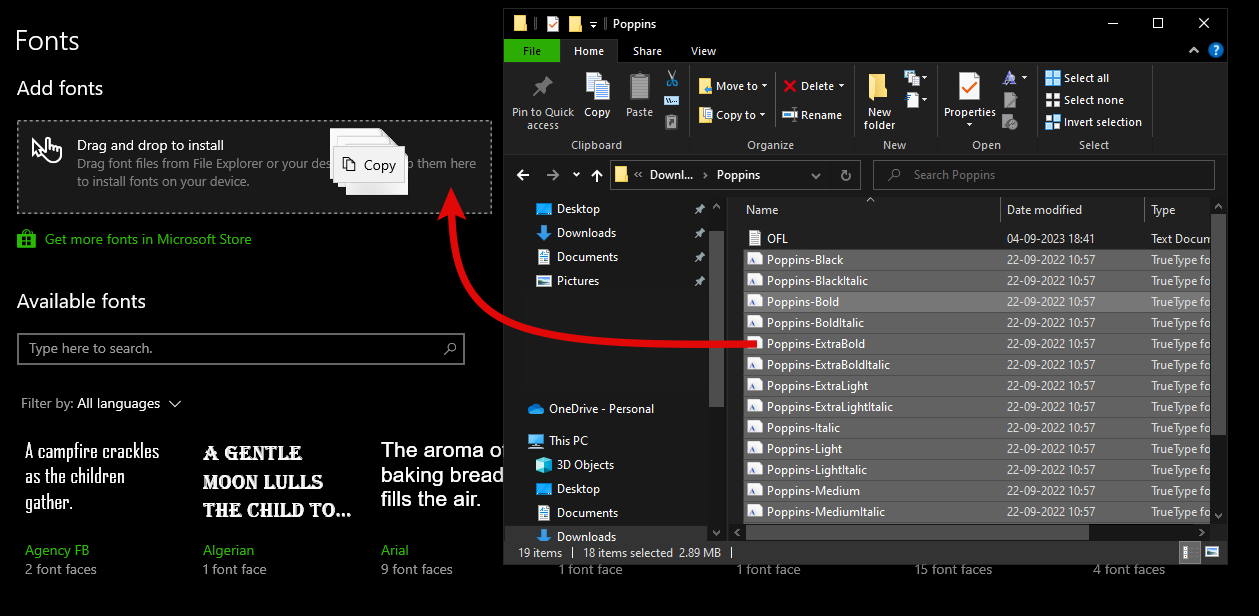
- Wait for the installation to finish, and once done, you can access these fonts on Word without restarting the Word or Windows.

Add a Font to Word using the Control Panel
While you can add custom fonts through Settings, those using previous Windows versions don’t have this flexibility. Here are steps on how to add a font to Word using Control Panel:
- For downloading the font, refer to steps 1-2 provided in the above approach (adding a font using Google Fonts).
- After you have successfully downloaded the font file, extract the font zip file using any zip extractor.

- Once extracted, the fonts with the extension “TrueType font file (.ttf)” are displayed.
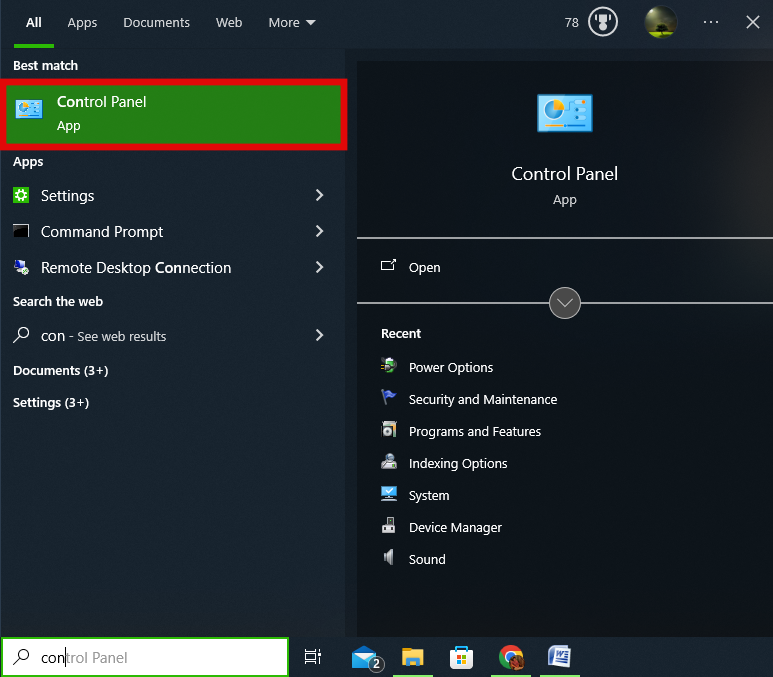
- Now, press the “Windows” key on your keyboard, and in the search, type “Control Panel” and click on the first result to open the Control Panel.
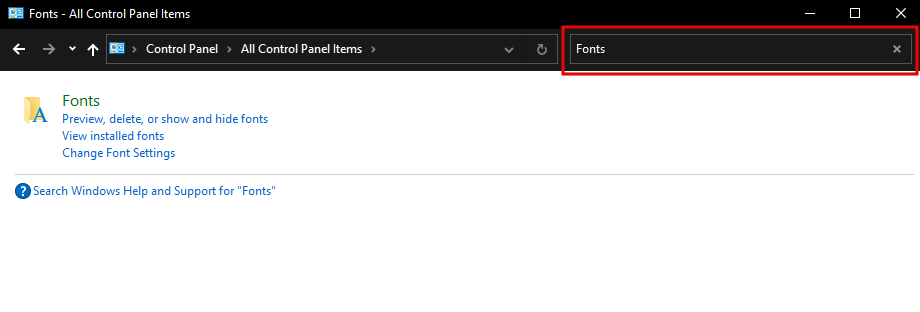
- After the Control Panel is open, navigate to the search, type “Font,” and click on the first result.
- Once all the fonts are displayed, just like the drag-and-drop process used in the previous approach, open the File Explorer and drag and drop the fonts downloaded to the control panel.
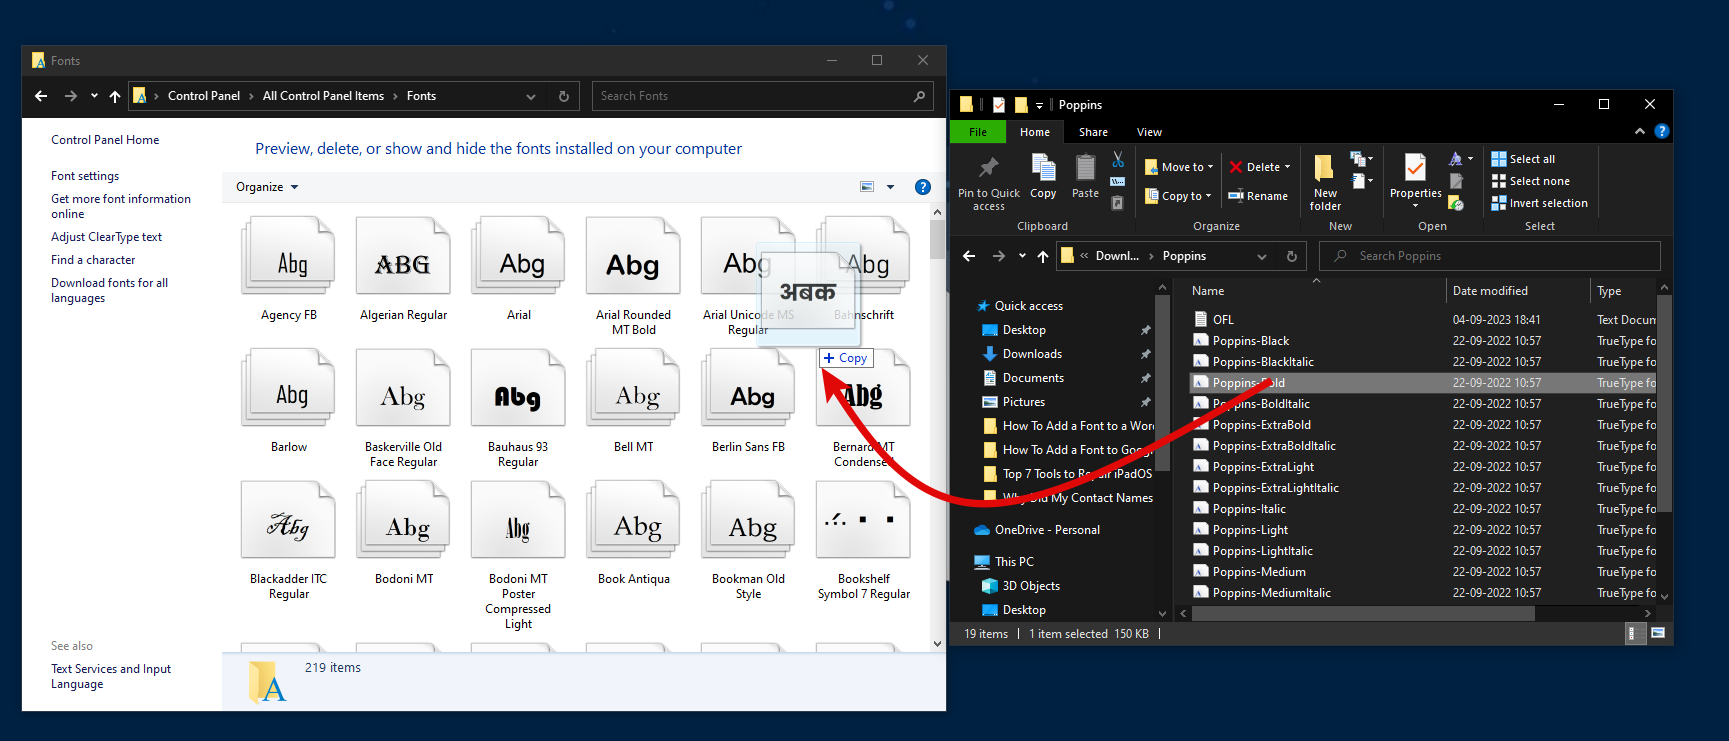
- Wait for the installation process to finish, which usually takes a few seconds. However, if you add many, it might take a while; do not stop the process.

- After the installation, open Word to access these fonts without restarting the Word or Windows.
Add a Font to Word using File Explorer
Compared with the above approaches that involve adding custom fonts, this is arguably the easiest one. Here are steps to add a font to Word using File Explorer:
- Start by downloading the fonts from the web; extract the font zip file to view all the fonts. (Refer to steps 1-3 from the second approach – adding a font using Google Fonts).
- Now, open the File Explorer and head to the file location featuring the fonts with the extension “TrueType font file (.ttf)” that are downloaded.
- Once done, select the font files you want to install and right-click them, which opens several options. Click “Install for all users” from the options provided to install.

- Wait for the installation to finish, and once done, open Word to access these fonts without restarting the Word or Windows.
Wrapping Up
Congratulations on adding a new/custom Font to the Word!
While the approach that involves using Microsoft Store is easy, you cannot add multiple fonts at once. However, this approach is the best if you’re not interested in adding custom fonts to the word.
Regarding custom fonts, we suggest downloading the fonts from reputed websites to prevent downloading malicious files.
FAQs
How do I add a Sanskrit font to Word?
Start by looking for the Sanskrit font on the Microsoft Store, and if it isn’t available, download the font from reputed websites and use the approaches that involve the installation of custom fonts to add Sanskrit font to Word.
What to do if I cannot find Font Settings in the Settings?
If you cannot find Font Settings in the Settings, follow the approach that involves adding a font to a word through the Control Panel.
What is the simplest way to add a font to Word?
Compared to all approaches, arguably the simplest approach is adding a font to Word using File Explorer.


