Compressed files, often in the form of ZIP files, have become a ubiquitous part of our digital lives. They are used for various purposes, including saving disk space, archiving data, and sharing files over the Internet. If you’re a Mac user, you’re in luck because macOS provides a built-in feature that makes it incredibly easy to create ZIP files. In this article, we’ll walk you through the steps of creating a ZIP file on your Mac.
What we cover
Create a Zip File on Mac in 4 Simple Steps
Step 1: Select the File or Folder
To begin, choose the file or folder that you want to compress into a ZIP archive. You can select multiple items if you wish to include them all in the same ZIP file.
Step 2: Compress the File(s) or Folder(s)
There are a couple of ways to initiate the compression process:
Method 1 (Right-Click): Control-click (or right-click) on the selected file(s) or folder(s). A contextual menu will appear. From the menu, choose the “Compress” option.
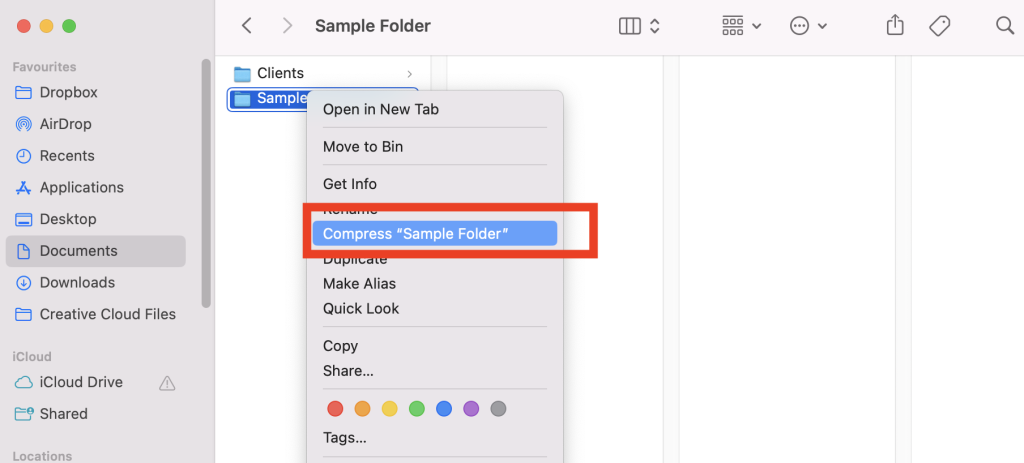
Method 2 (Two-Finger Tap): Alternatively, if you have a trackpad or a Magic Mouse, you can select the file(s) or folder(s) and tap them with two fingers. This will also bring up the contextual menu with the “Compress” option.
Step 3: Wait for Compression to Complete
- After selecting the “Compress” option, macOS will begin compressing the selected item(s) into a ZIP file.
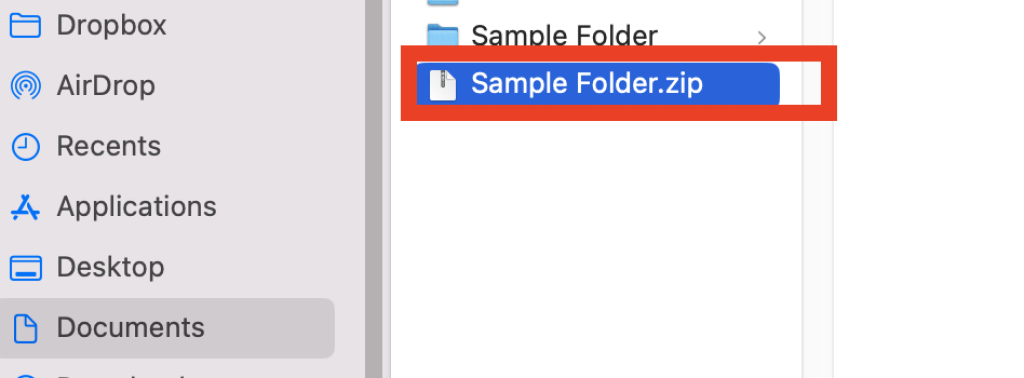
- The compressed file will be created in the same location as the original item(s). If you compress a single item, the ZIP file will retain the name of the original item with a “.zip” extension.
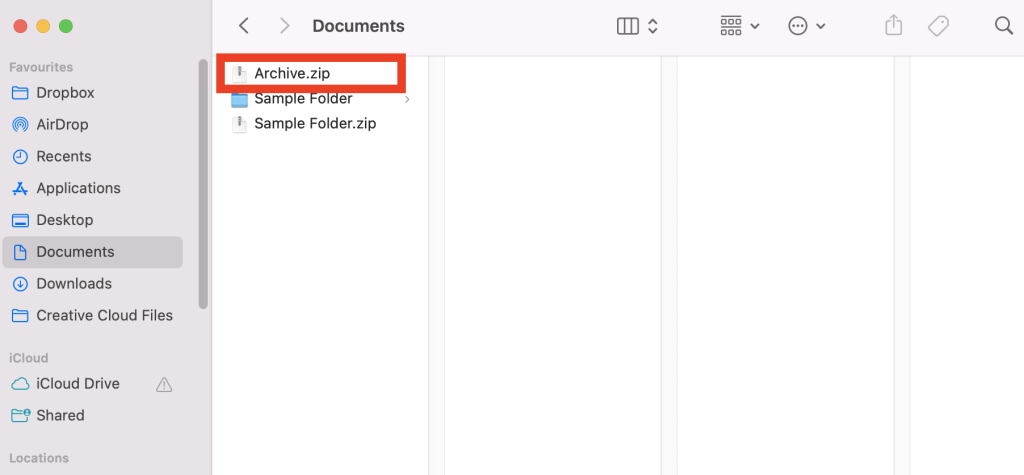
- If you compress multiple items, the ZIP file will be named “Archive.zip” by default.
Step 4: Locate Your ZIP File
Once the compression process is finished, you’ll find your newly created ZIP file in the same folder as the original item(s). It will have a “.zip” extension, making it easily recognizable.
Optional Step: Delete the Original File(s)
If you want to conserve disk space further, you can choose to delete the original file(s) or folder(s) after successfully creating the ZIP archive. Be cautious when doing this, as deleting the original items means they will only exist within the ZIP file.
Also Read: How to copy and paste on Mac
How to Unzip (Expand) a Compressed Item
Creating ZIP files is only one side of the coin; you might also need to unzip or expand them. Fortunately, macOS makes this process equally straightforward:
Locate the ZIP File You Want to Unzip
Double-click on the ZIP file. MacOS will automatically extract the contents and place them in a similar folder as that of the ZIP file.
If you no longer need the ZIP file, you can delete it to free up additional disk space.
Troubleshooting Tips
In some cases, you might encounter issues when dealing with ZIP files:
Unable to Open ZIP File: If you can’t open a ZIP file, ensure that you have enough disk space for the unzipped content. If you receive the ZIP file from anyone else and encounter problems ask them to recreate and resend the ZIP file.
Creating ZIP files on your Mac is a simple yet powerful way to manage and share your data efficiently. Whether you’re archiving important documents, sharing files with colleagues, or organizing your digital life, the built-in compression feature on macOS has you covered.
Benefits of Creating Zip Files on Mac
- Disk Space Management: ZIP files reduce the size of your files and folders, allowing you to save valuable disk space. This is especially useful for archiving old documents or media files.
- File Organization: You can group related files together in a single ZIP file, making it easier to organize and manage your data.
- File Sharing: ZIP files are a common format for sharing multiple files or folders with others. They compress the content into a single package, making it more convenient for sharing via email or cloud storage.
- Backup: Creating ZIP archives is a useful way to back up important data. You can store multiple files and folders in a single ZIP file, simplifying the backup process.
FAQs
How can I extract a password-protected ZIP file on a Mac if I forget the password?
Unfortunately, if you forget the password for a password-protected ZIP file on your Mac, there is no built-in way to recover it. You’ll need to rely on third-party password recovery software or contact the person who provided the ZIP file if they have the password.
What is the maximum file size for a ZIP file on a Mac?
The maximum file size for a ZIP file on a Mac is determined by the file system used on your storage device. On modern macOS systems that use the APFS file system, there is practically no practical limit to the size of a ZIP file. However, if you’re using older file systems like HFS+, there may be file size limitations.
Can I create a ZIP file with multiple levels of nested folders on Mac?
Yes, you can create a ZIP file with multiple levels of nested folders on Mac. When you compress a folder that contains other folders and files, the resulting ZIP file will maintain the entire folder structure, including nested folders. This makes it easy to organize and archive complex directory structures.


