
Compressing files is a great way to reduce their size, making them easier to send and receive via email. Most email providers have a limit on the size of attachments that can be sent, so compressing your files can help you avoid bouncing emails.
How to Send Large Files via Email
Compressing files is a great way to reduce their size, making them easier to send and receive via email. Most email providers have a limit on the size of attachments (e.g. 25 on Gmail and 20 on Outlook), that can be sent, so compressing your files can help you avoid bouncing emails.
There are a few different ways to compress files, but the most popular file compression formats are ZIP, RAR, and 7Z. ZIP files can be created using the built-in tools on most operating systems or third-party archive tools such as WinZip or 7-Zip. While RAR is a proprietary format and can only be created through the WinRAR app, 7Z files can be created with 7-Zip software or several other archive software programs.
To Compress files on Windows:
- Open File Explorer and select the file and/or folder you want to compress. To select multiple files, hold down the
Ctrlkey and click on each file you need, or use the mouse. - Then, right-click on the selected files/folders.
- On Windows 10 and older systems, select Send to > Compressed (zipped) folder. On Windows 11 systems, select Compress to ZIP file.

- The Windows will start compressing the selected files or folders. This may take a few minutes, depending on the size of the files or folders.
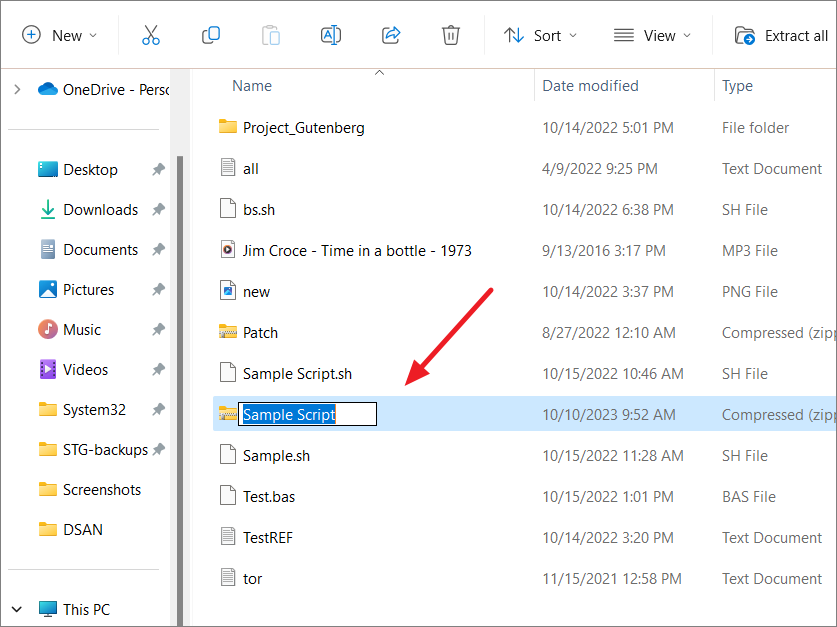
- A new zipped file with the same name as the original file will be created in the same location. If you selected multiple items, the zipped file will be created with the name of the file or folder where you right-clicked.
- You can then rename the ZIP file with a descriptive name that tells the recipient what it contains.
- Once you have renamed the ZIP file, you can attach it to an email and send it just like you would any other file.
To compress a file on Mac:
If you’re using a Mac computer, you can compress files quite easily using the built-in Compress feature just like Windows.
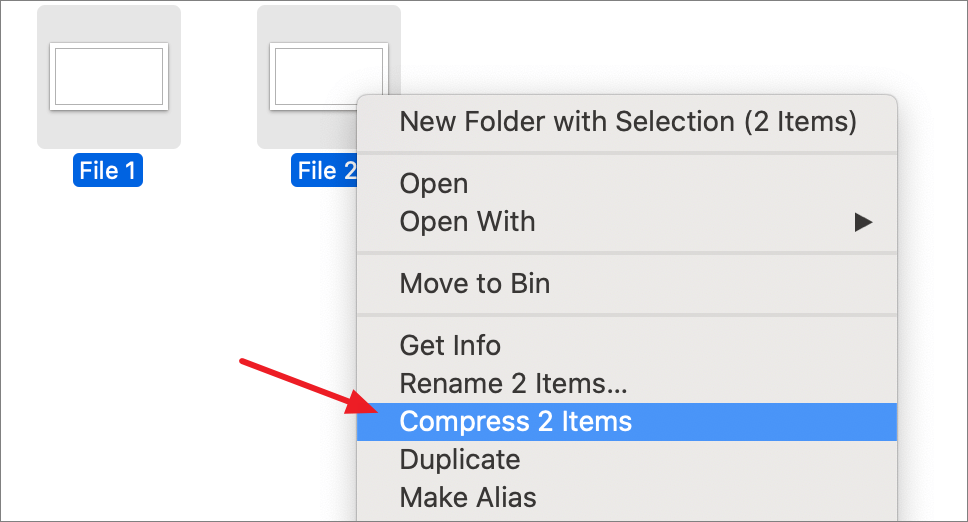
- Find and select the file(s) or folder(s) you’d like to compress. To select more than one file/folder, hold the
Commandkey and click on each file/folder you want to compress. - Once you’ve selected the file/folder, right-click (or Control-click) on it and select Compress.
- The compression process may take a few minutes, depending on the size of the files or folders.
- A new zipped file with the same name as the original file will be created in the same folder. If you compress more than one item, the ZIP file will be named ‘Archive.zip’ by default. If there is already a file named ‘Archive.zip’ in the folder, the new ZIP file will be named in a numbered sequence (e.g., ‘Archive 2.zip’).
To compress a file on Linux:
Linux does not have built-in GUI options for compressing files like Windows and Mac do. Instead, you need to use command-line tools.
Using tar command
Open the terminal on your Linux system and run the following command to compress a whole directory or a single file on Linux:
tar -czvf name-of-archive.tar.gz /path/to/directory-or-fileLet’s break down this command:
-c: Create a new archive.-z: Compress the archive using gzip.-v: Show progress in the terminal while creating the archive. This is also known as “verbose” mode. Thevswitch is always optional in these commands, but it can be helpful.-f: Allows you to specify the filename of the archive.
For example, to compress the directory /home/Work/Documents into a file called my_documents.tar.gz, you would use the following command:
tar -czvf my_documents.tar.gz /home/Work/DocumentsThis command will also compress all the other directories inside the directory you specified. Once you have compressed your files or directories, you can send them via email, share them with others, or store them to save space.
Using Zip command
If you are sharing files with people who do not use Linux, you may want to use the zip format to avoid compatibility issues. The zip format is supported by all major operating systems, including Windows, Mac, and Linux.
To use the zip command, simply open a terminal window and navigate to the directory containing the files or folders you want to compress. Then, type the following command:
zip [options] archive_name files_or_directoriesThe archive_name is the name of the ZIP file that will be created, and the files_or_directories are the files or folders that you want to compress. You can also specify options to control the compression process, such as the compression level and the types of files that are compressed.
For example, to compress the directory /home/bard/Documents into a ZIP file called my_documents.zip, you would use the following command:
zip -r my_documents.zip /home/bard/DocumentsThe -r option tells the zip command to repeatedly compress the directory and all of its subdirectories.
Use Third-Party Tools to Compress Files
There are many third-party archive software available for compressing files for all operating systems. Here are some popular examples:
For example, to use a third-party tool WinRAR to compress files, follow these steps:
- Visit the official WinRAR website, download and install the software for your platform.
- Navigate to the files or folders you want to compress and select them.
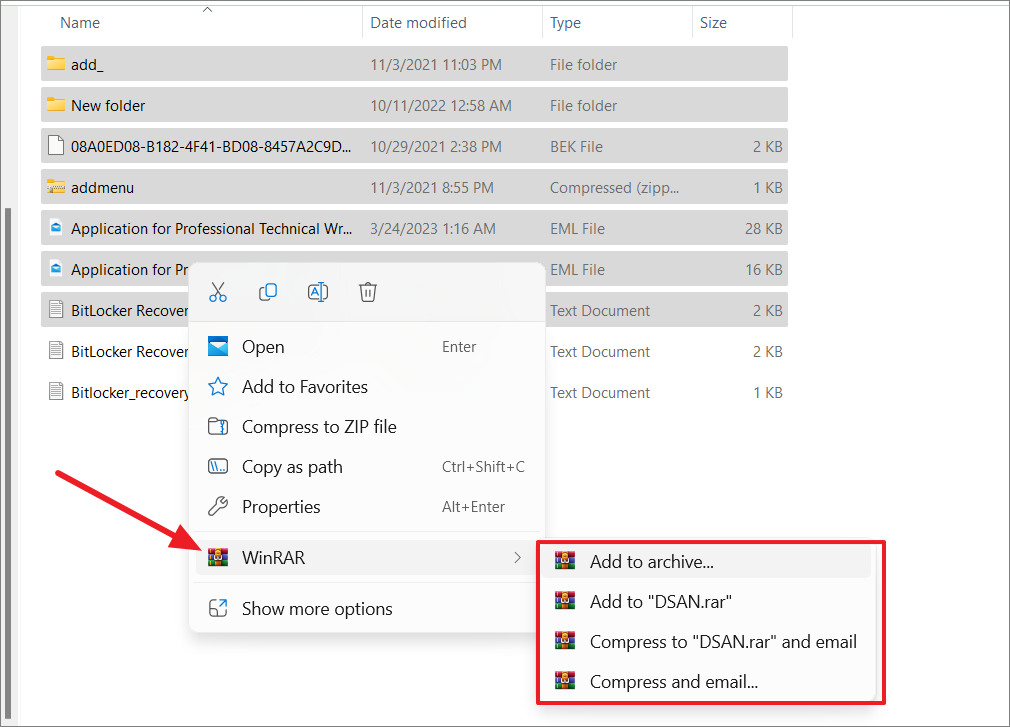
- Right-click on the selected files/folders, click WinRAR, and then choose your preferred compress option from the submenu.
- If you have a default email program installed on your computer, you can select Compress and email or Compress .rar and email to compress and email the files directly.
- To compress the files and save them as a RAR file on your local drive, select Add to .rar.
- If you want to configure various archive options, choose Add to archive.
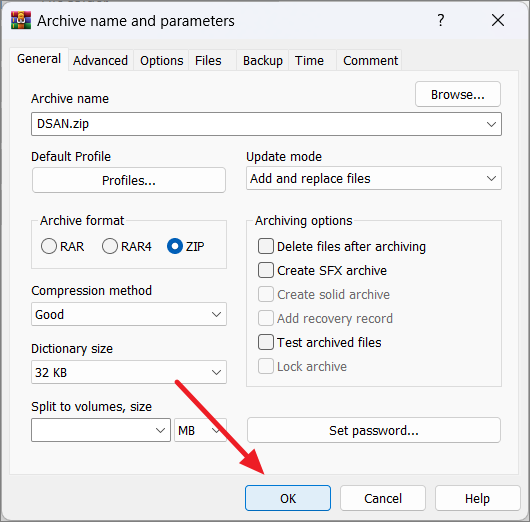
- In the Archive name and parameters window, you can change the name of the file, format, compression level, set a password, and other options.
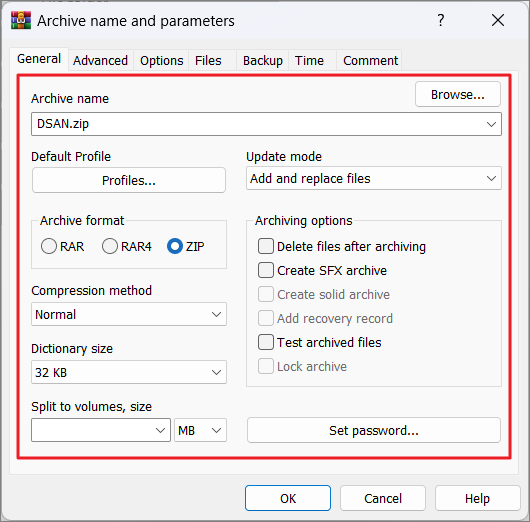
- For a higher compression rate, choose a compression method from the drop-down menu.

- After configuring the parameters, click OK to start compression.
- Unless you specified a different location to save the file, the compressed file will be saved in the same folder as the original files.
Some files, such as image files (GIF, JPG, PNG), video files (MPG, AVI), and music files (MP3), are already compressed, so zipping them will not make them much smaller. Encrypted files also tend to compress poorly. And if you add a compressed file to another zip folder, it won’t get much smaller, either.
How to Send Large-sized Compressed Files on Email
If the compressed file is too large to email or exceeds the size limit for email attachments, there are a few other options you can try:
- Manually reduce the file size: You can choose to simply remove some large content from a file if you don’t need it. For example, you could remove high-resolution images from a document, or reduce the quality of audio or video files.
- Send files via cloud storage: Upload your files to a cloud storage service such as Dropbox, OneDrive, or Google Drive and send a share link to your file instead of attaching the file directly to your email.
- Change compression options: Try a different compression format or compression method. For example, you could try using the RAR format instead of the ZIP format, or using a higher compression level.
- Split files into smaller volumes: Archive software such as WinRAR and 7-Zip allows you to split files into smaller volumes. This can be helpful if you need to send the files to someone who has a small email attachment size limit.
FAQs
How do I compress audio files for email?
Compressing audio files for email follows the same steps as compressing any other file type. You can use the Zip format or other compression tools like WinRAR, 7-Zip, or specialized audio file compression software.
Alternatively, you can use third-party audio editing software such as Audacity, MP3Smaller, or AConvert . These programs allow you to convert audio files to different bitrates and formats. However, converting audio to a lower bitrate will also reduce the quality of the audio.
To compress an audio file in Audacity:
- Open Audacity and import the audio file you want to compress.
- Go to File > Export > Export Audio.
- Select the format and bitrate you want to export the file to.
- Click Export to save the compressed audio file.


