It is important to learn how to watermark an image as it helps protect intellectual property and adds a layer of ownership to your creative work. If you’re trying to make a watermark in Canva, follow the guide below that gets you started with creating one and using it on a preferred image/design of your choice.
What we cover
Make a Watermark in Canva
We suggest using preset watermark templates over creating one from scratch because they are free to use and are engaging to begin with. Hence, before proceeding with creating a new watermark, follow the steps below.
- Start by navigating to Canva and sign in with your credentials. Once you’re signed in, get started by clicking on the Create a design button present at the top right corner and search for Logo in the search box associated with it.
- If you have already started on a design, navigate to the Recent designs section and click on the project you’re working on to open it.

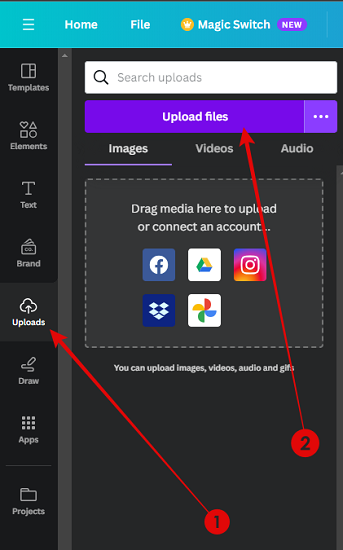
- With the new/existing design loaded, navigate to the Editor panel on the left and click on Uploads. Next, click on the image to add it to the design. However, if you haven’t uploaded anything to Canva yet, do so by using the Upload Files button.
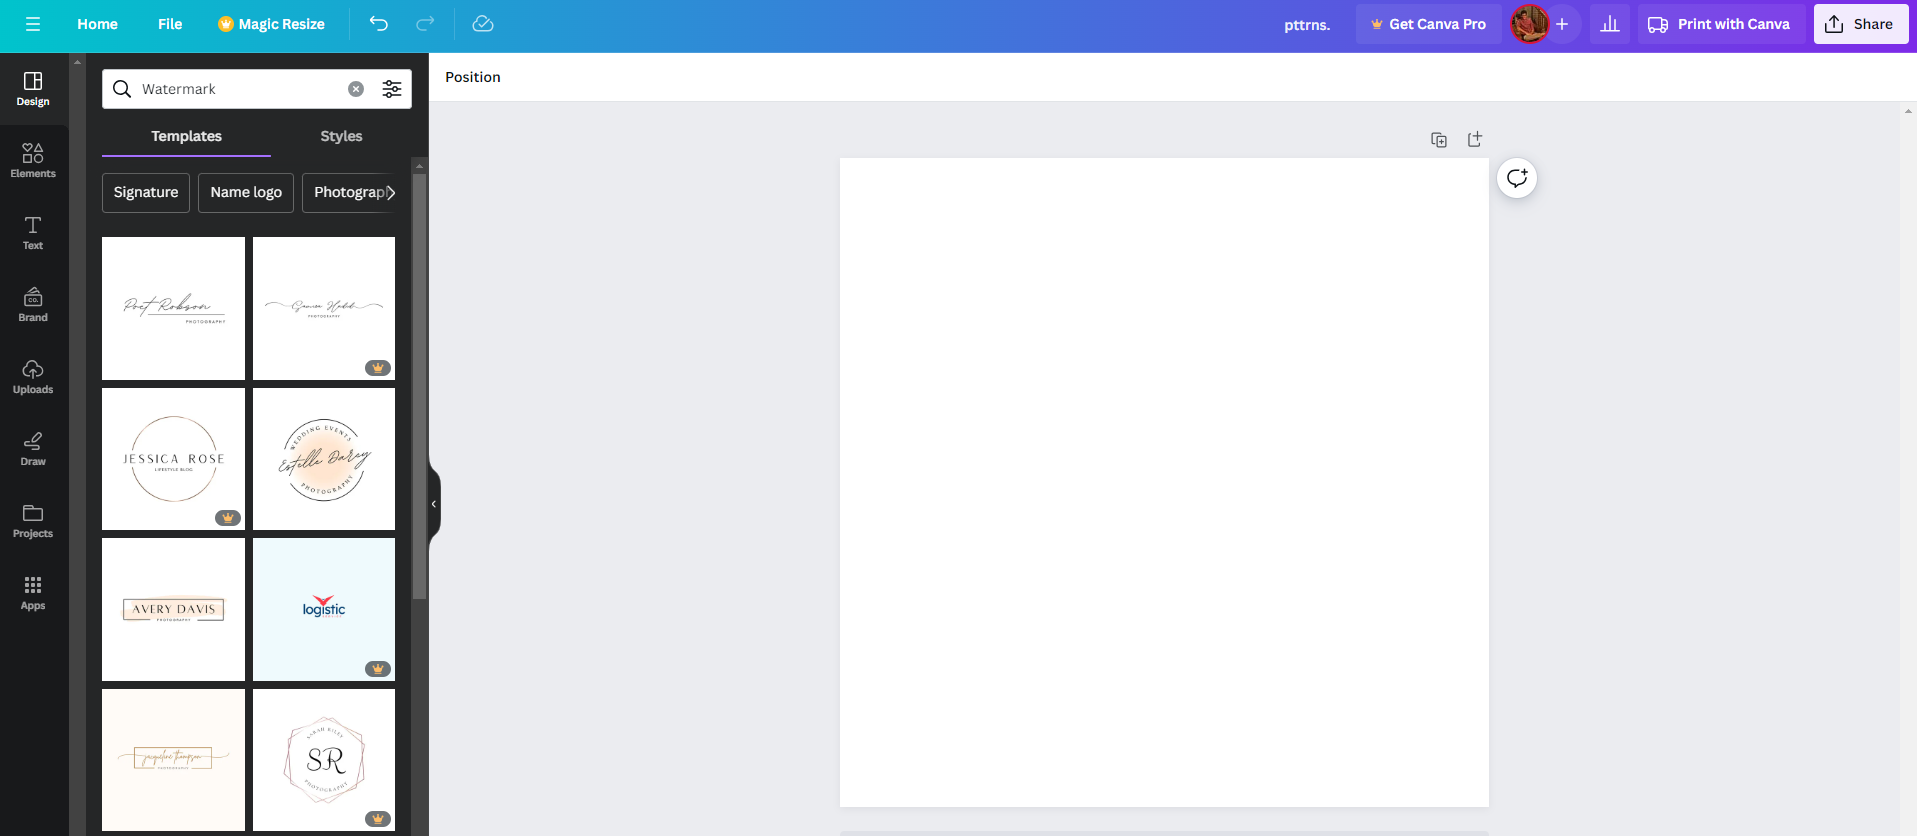
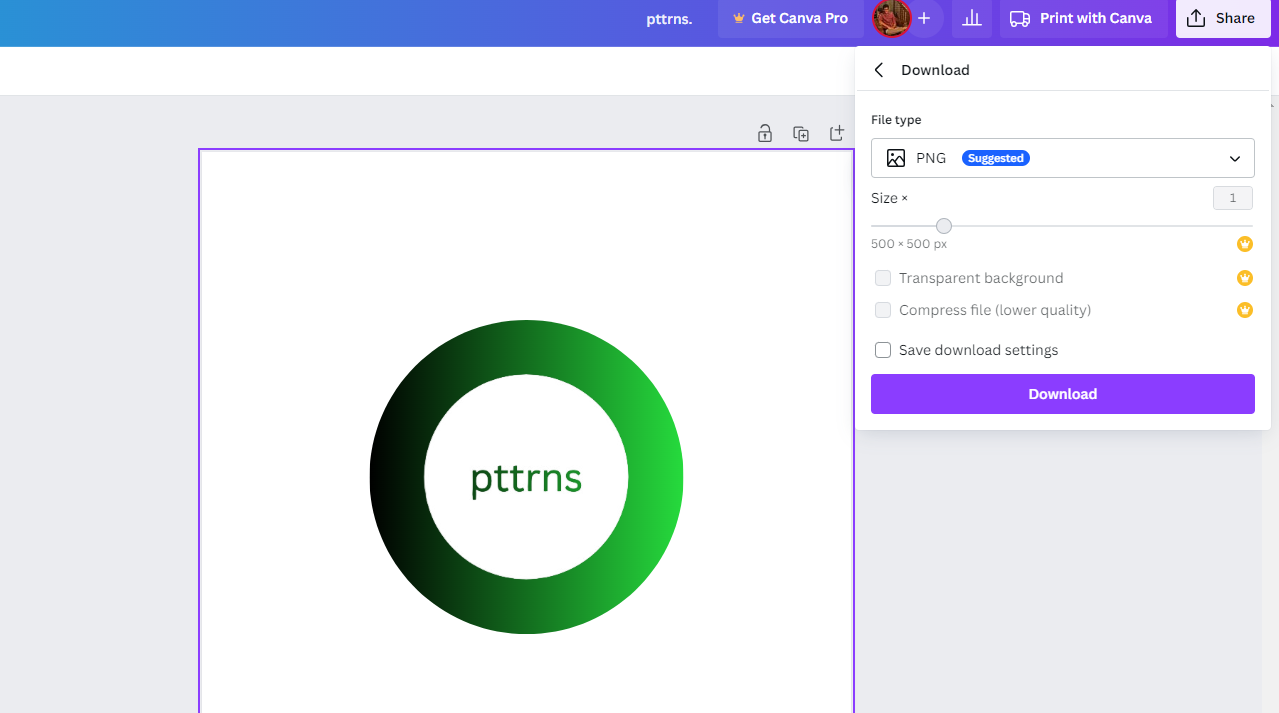
- After the image is added to the design, head to the Editor panel again and click on Designs. Now, search for Watermark to get access to available Canva free templates.
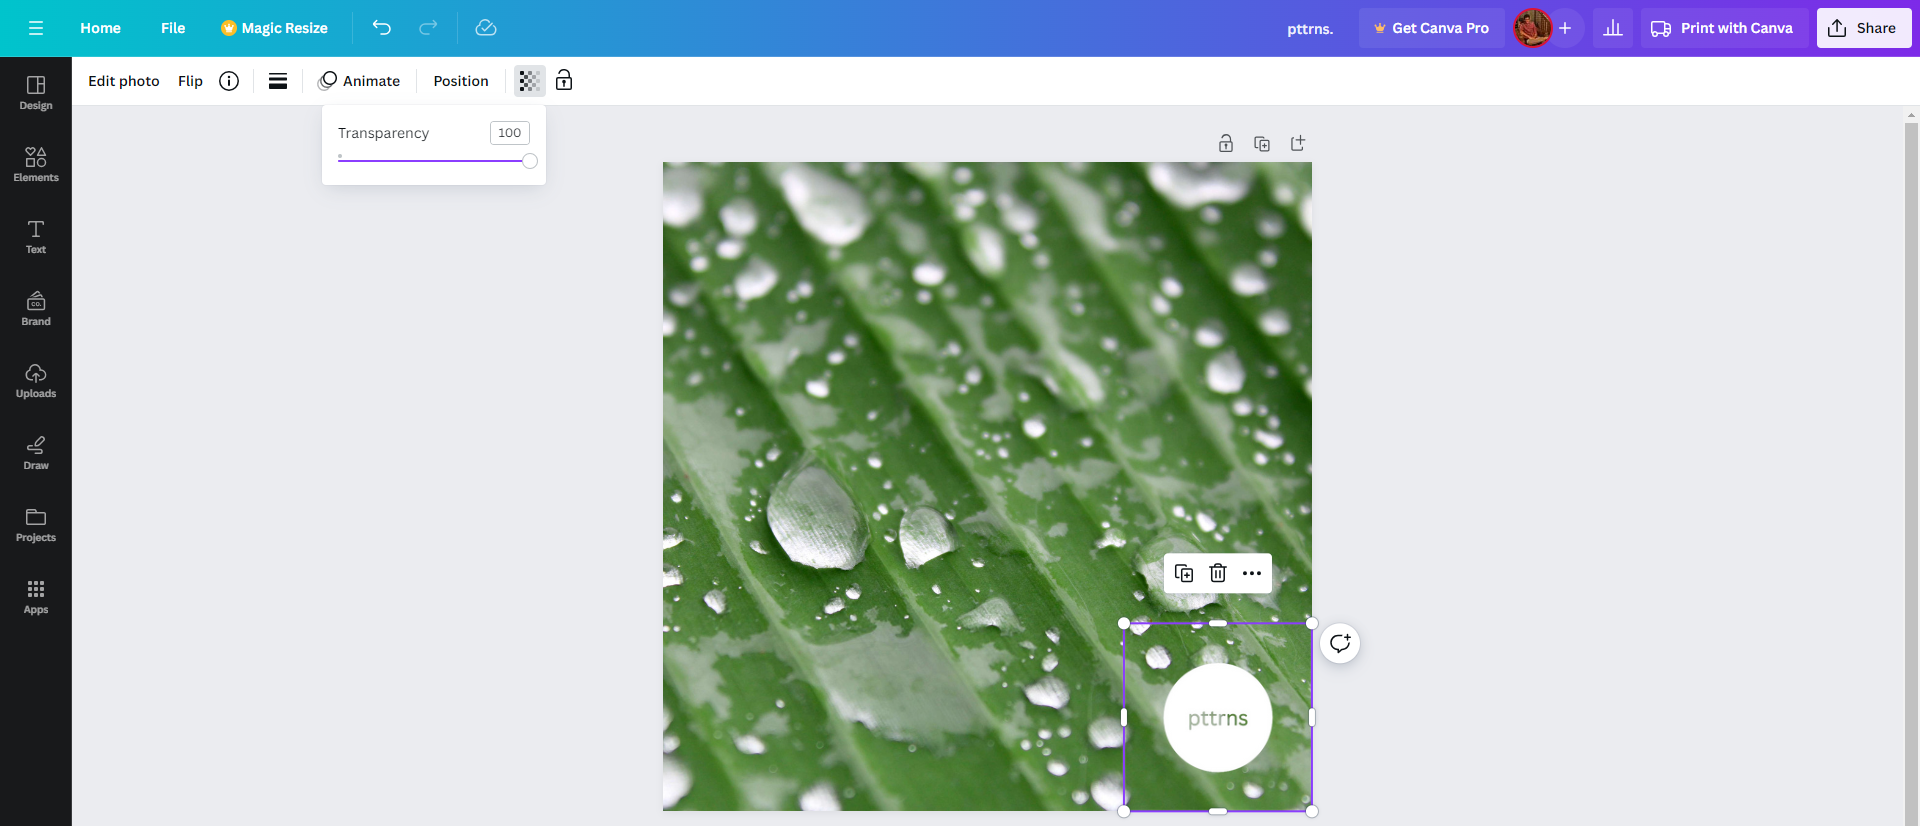
- Once you find the free watermark that matches your design, click on it to add it to the design. Next, make necessary changes to it, and while the placement of the watermark is up to you, we suggest placing it along corners and adjusting transparency.
- With all changes made and you’re happy with the result, click on the Share button present at the top right corner and then click on Download from the options displayed.
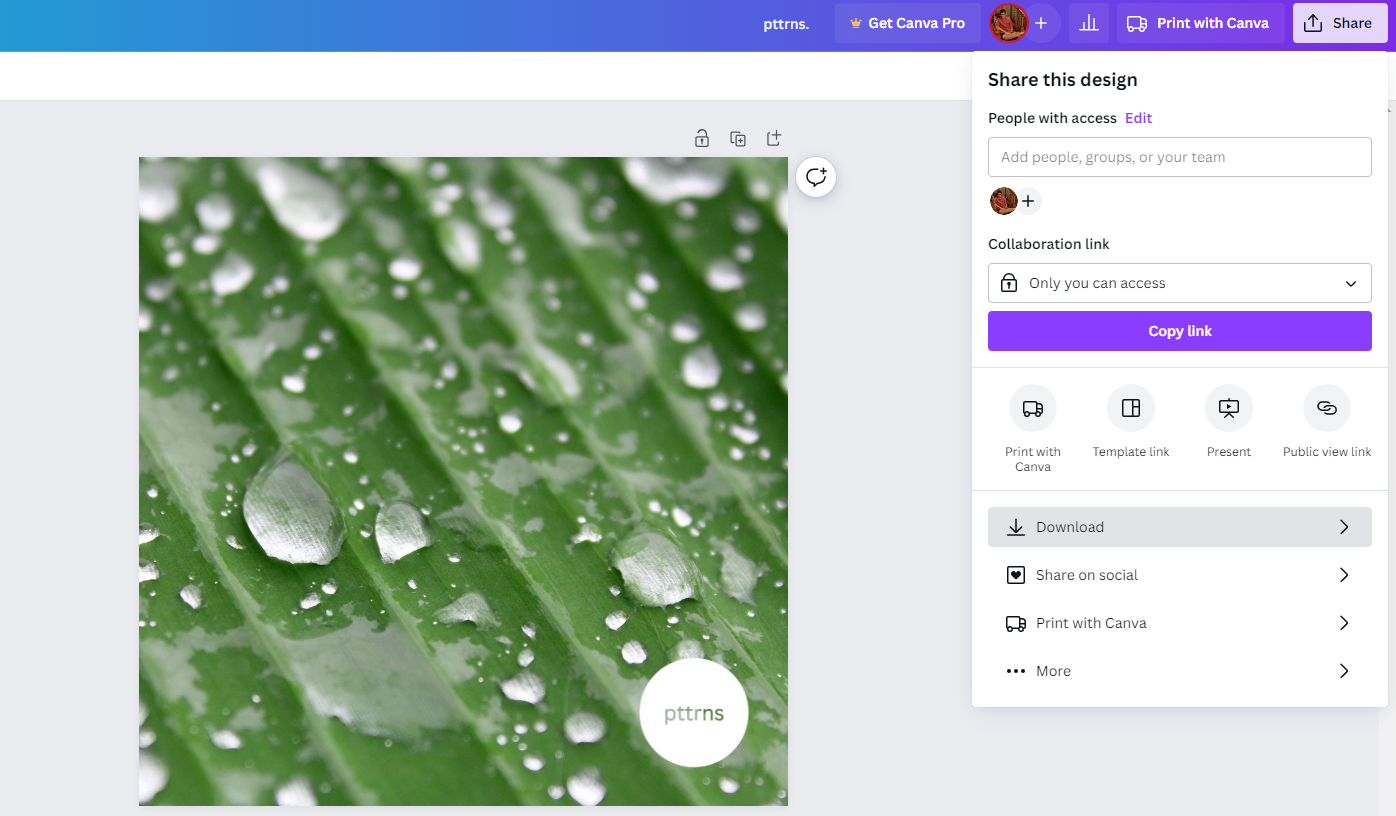
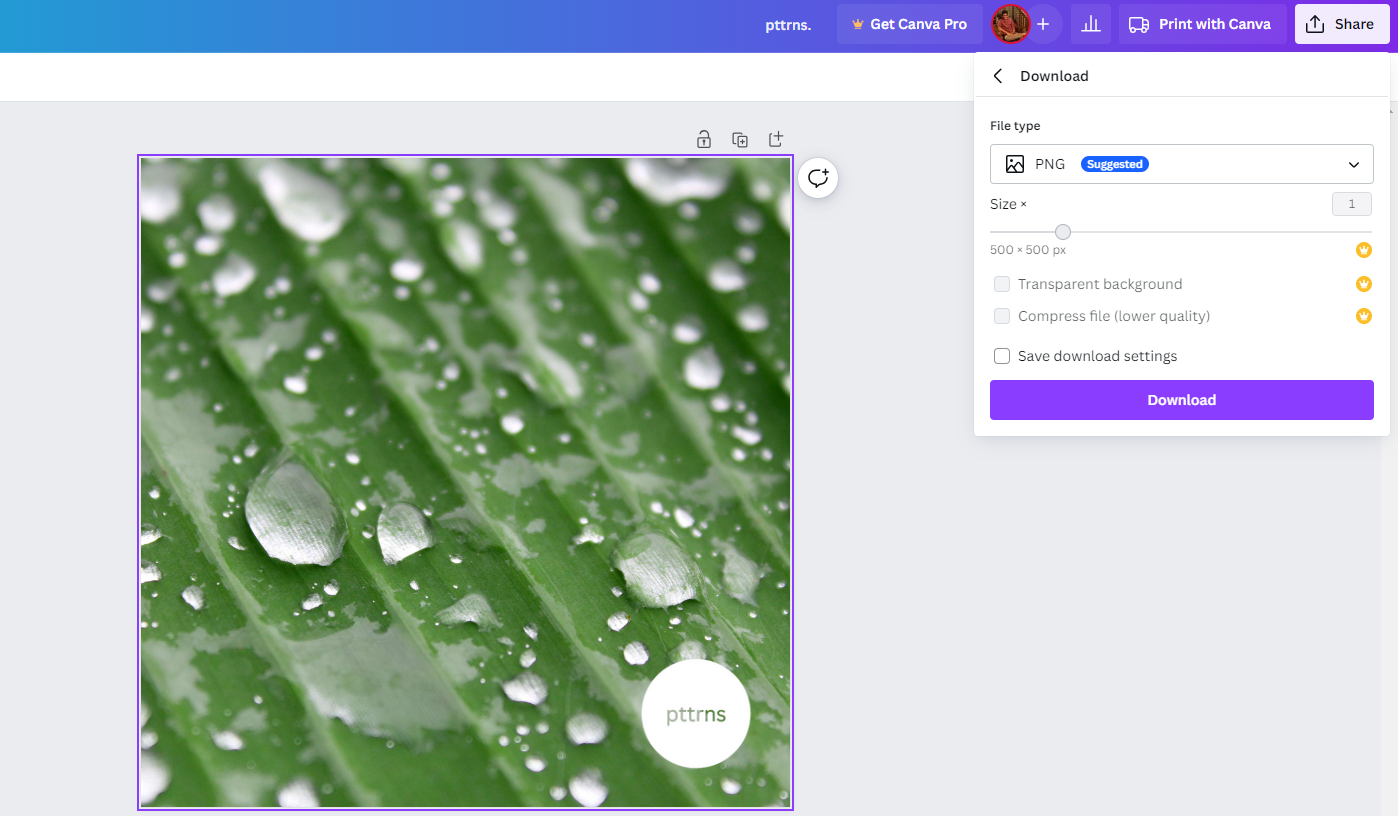
- By doing so, you’re displayed with Download options, from which you set the File type as PNG / PDF Print / PDF Standard. Once done, click on the Download button, and you will have a design with the watermark created on it.
Make a Custom Watermark in Canva
There aren’t any dedicated steps to create a watermark, and with multiple options and tools available on Canva, there are endless possibilities to create a custom watermark.
However, to get you started, we have come up with a simple demonstration, and here are steps for it.
- On the blank canvas, get started by adding a text box to it by pressing T. Next, replace the text with your company name or any desired text of your choice.
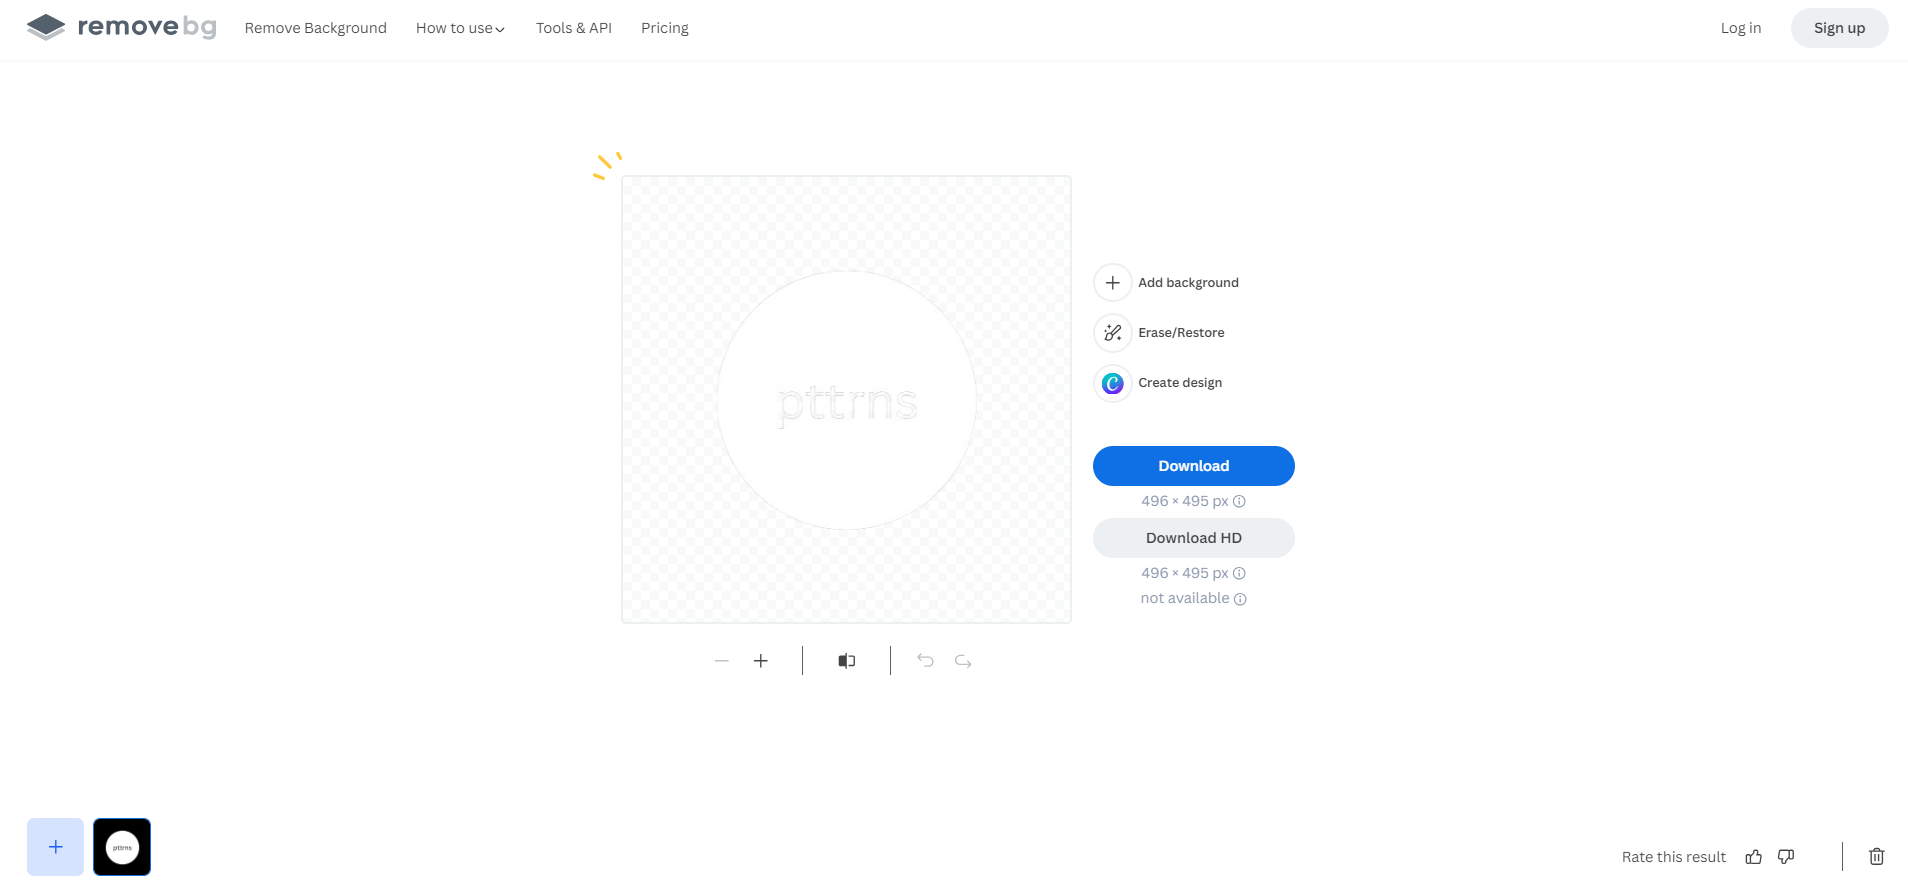
- Next, upload the company logo from the Editor panel through Uploads using the Upload files button. While doing so, ensure it doesn’t feature a background. If it features one, use remove.bg or the BG remover tool from Canva to remove the background.
- With the company logo and text added to the design, make changes to the position, font, color, etc, and try experimenting with all possible tools and effects until you’re satisfied with the result.
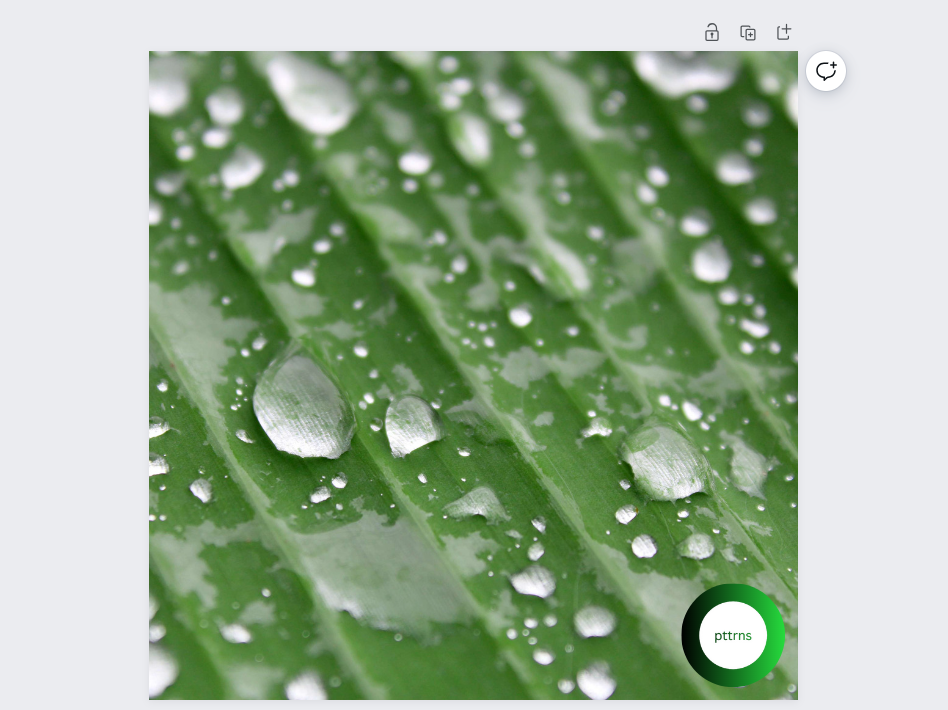
- Once done, download the watermark created by clicking on Share > Download > Download button. Before downloading the design, ensure you set the File type to PNG.
- After the watermark is downloaded, reupload it to Canva to use it to add it to any design/image of your liking. Before uploading, ensure you remove its background [Refer to Step 3].
Wrapping Up
Congratulations on making a watermark in Canva!
While Canva can be used to create engaging watermarks in Canva, if you’re not happy with it, try using conventional photo editing tools like Adobe Photoshop or online logo makers for more flexibility.
Related Reading
How To Save a Design As EPS on Canva
How to Print Your Designs From Canva


