Smartphones are an indispensable part of our lives today and so is the ever growing need to stay updated with new features and to learn tips and tricks like how to rotate video on iPhone to make the experience even better.
However, sometimes, despite our best efforts, we end up with videos that are recorded in the wrong orientation. If you’re an iPhone user facing this issue, fear not! This blog will guide you through the simple yet essential process of rotating videos on your iPhone.
Whether you want to correct a sideways video for a memorable family gathering or fix a poorly oriented clip from your last vacation, we’ve got you covered.
What we cover
Why Rotate an iPhone Video?
Let’s briefly discuss why you might need to rotate a movie on your iPhone before moving on to the next steps. There are a few typical situations:
1. Horizontal Recording Made By Accident
When recording, it’s simple to forget to hold your iPhone vertically, which results in horizontal films that don’t look right on most screens.
2. Two Types of Viewing Preferences
While some individuals prefer to watch videos in portrait format, others prefer to do so in landscape mode. You can adapt a video to different viewing preferences by rotating it.
3. Inappropriate Orientation
It’s possible that a friend or coworker sent you a video that was shot upside down. It will be presented appropriately if you rotate it.
By doing this, you will be directed to the video editing interface where you can make different changes.
iPhone Video Rotation: A Step-by-Step Guide
Let’s now move on to the detailed instructions for rotating a video on an iPhone:
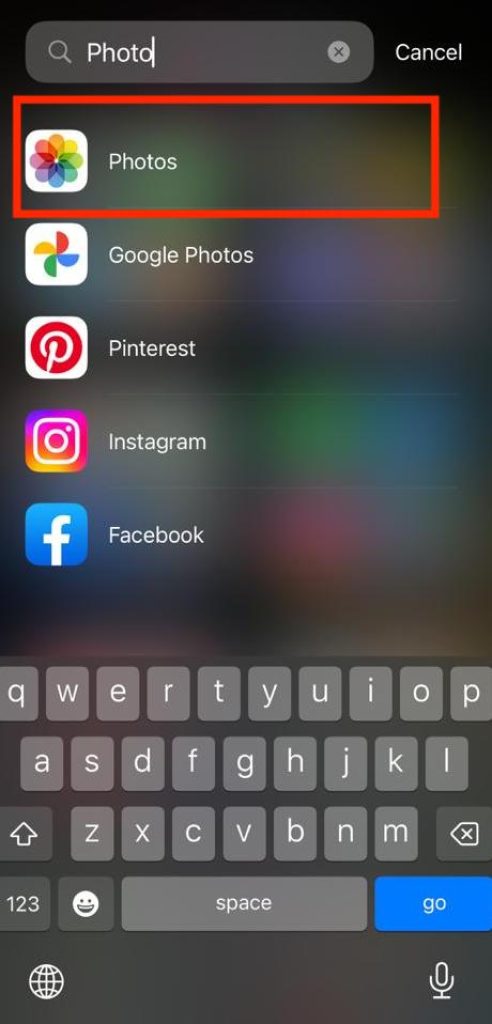
- Open the Photos App First
Open the “Photos” app on your iPhone to get started. You may access all of the images and videos on your device with this app.
- Choose the Video to Rotate
Find the video you wish to spin by scrolling through your photo library. To open and start the video, tap on it. As soon as the movie starts playing, multiple options will appear at the bottom of the screen.
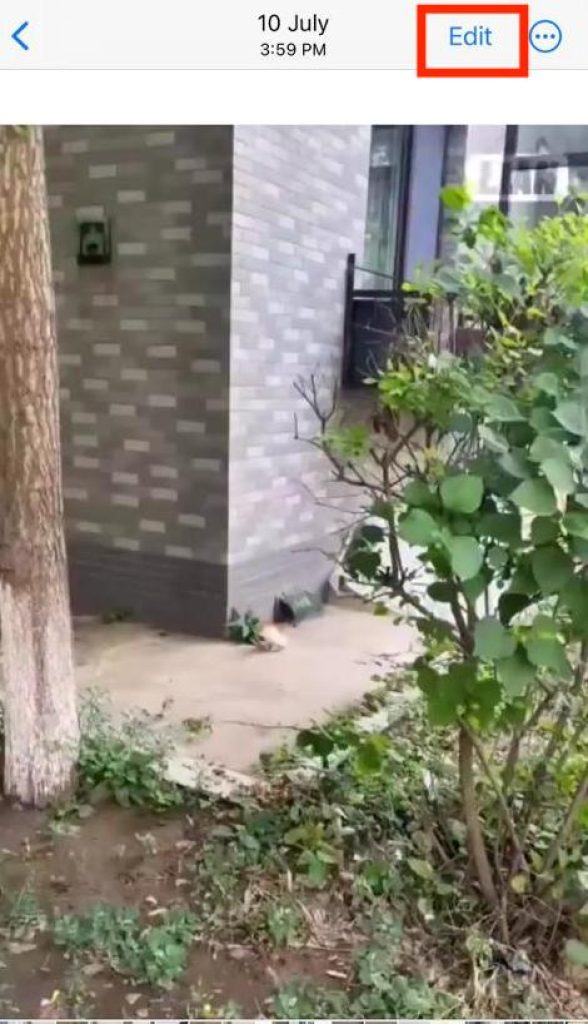
- Select “Edit”
Tap the “Edit” button in the top-right corner of the screen to begin modifying the video.
By doing this, you will be directed to the video editing interface where you can make different changes.
- Rotate the Video
Rotate the video at this point. Find the “Rotate” icon, which resembles a circular arrow and is typically located among the editing tools at the bottom of the screen, to accomplish this.
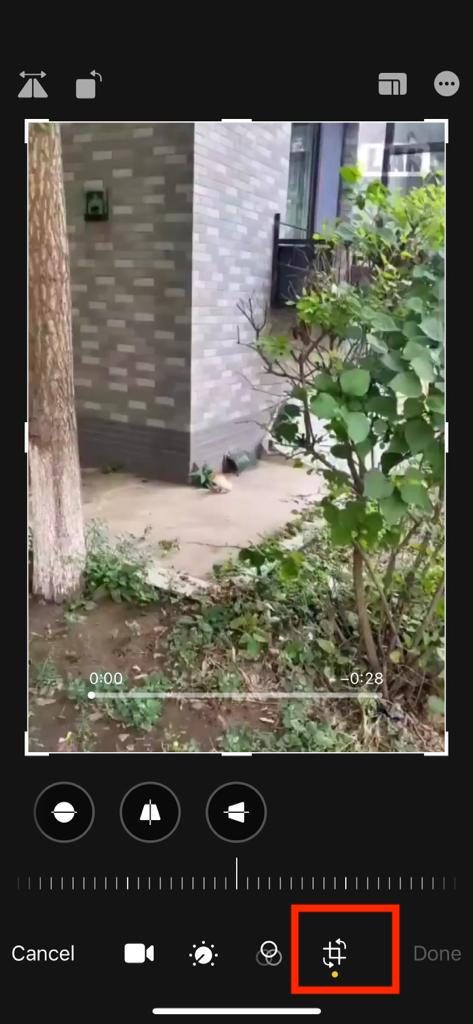
Each time you hit this symbol, the video will rotate 90 degrees clockwise.
- Save a Copy
There are two choices available to you: “Save Video” and “Save Video as New Clip.” The rotated version of the video will be displayed if you choose “Save Video,” not the original.
When you select “Save Video as New Clip,” the rotated video will be saved as a copy while the original is kept.
- Share or Export
Your video has been successfully rotated and stored; at this point, you can share it with your loved ones or export it to other programs or platforms.
To access sharing options, you tap the share icon, which is typically shown as a square with an upward-pointing arrow.
On an iPhone, rotating a video is a simple technique that can improve viewing quality and guarantee that your recordings are presented properly.
The instructions in this guide will help you easily rotate your movies so that they are prepared for sharing and enjoyment, whether it’s rectifying an accidentally horizontal recording, accommodating various viewing preferences, or adjusting a mismatched orientation.
Use the video editing tools on your iPhone to take control and prevent orientation errors from ruining your priceless memories.
Also read: How to rotate screen on Mac
How to Use iMovie to Rotate a Video on an iPhone
- On your iPhone, launch iMovie. If you don’t already have the app, you can get it for free from the Apple App Store by clicking here.
- Next, select Projects. On your screen, this will be visible at the top.
- Then select Create Project.
- Choose Movie next.
- From your camera roll, pick the video that you wish to edit. The bottom-right corner of the video will show a blue tick.
- Next, select Create Movie. This can be seen at the bottom of the display. Your footage will appear in a viewer at the top of a new project page that will open. A timeline will be visible below the viewer as well.
- Press the timeline clip once. The timeline clip’s outer edge ought to turn yellow.
- To rotate the movie in the desired direction, use two fingers. You may manipulate the screen by moving your thumb and index finger left or right as if you were turning a real knob.
- Continue doing this until the frame is oriented how you want it to be. Then select Done. This can be seen in the screen’s upper-left corner. Without a chronology and with My Movie underneath, you will see the video clip in the middle of the screen.
- At the bottom of the screen, tap the share icon. This is the symbol that has a square and an arrow pointing up.
- When you do this, the video file will export back to your camera roll so you may share it on social media or with other apps.
Finally, click Save Video or one of the other available options to send the video.


