In this day and age, you don’t need a separate scanner to print your documents or photos. All you need is your Macbook and a printer. So, if you want to learn how to print on Macbook, make sure you keep reading:
What we cover
How to Print Documents From Macbook
At first, you’ll need to use the “print” option on your MacOS to choose the printer and then set the options that decide what the end result of your printed copy would look like.
To do this, make sure you follow these steps:
Step 1: Add any printer to the list of your printers.To do this, follow the below steps:
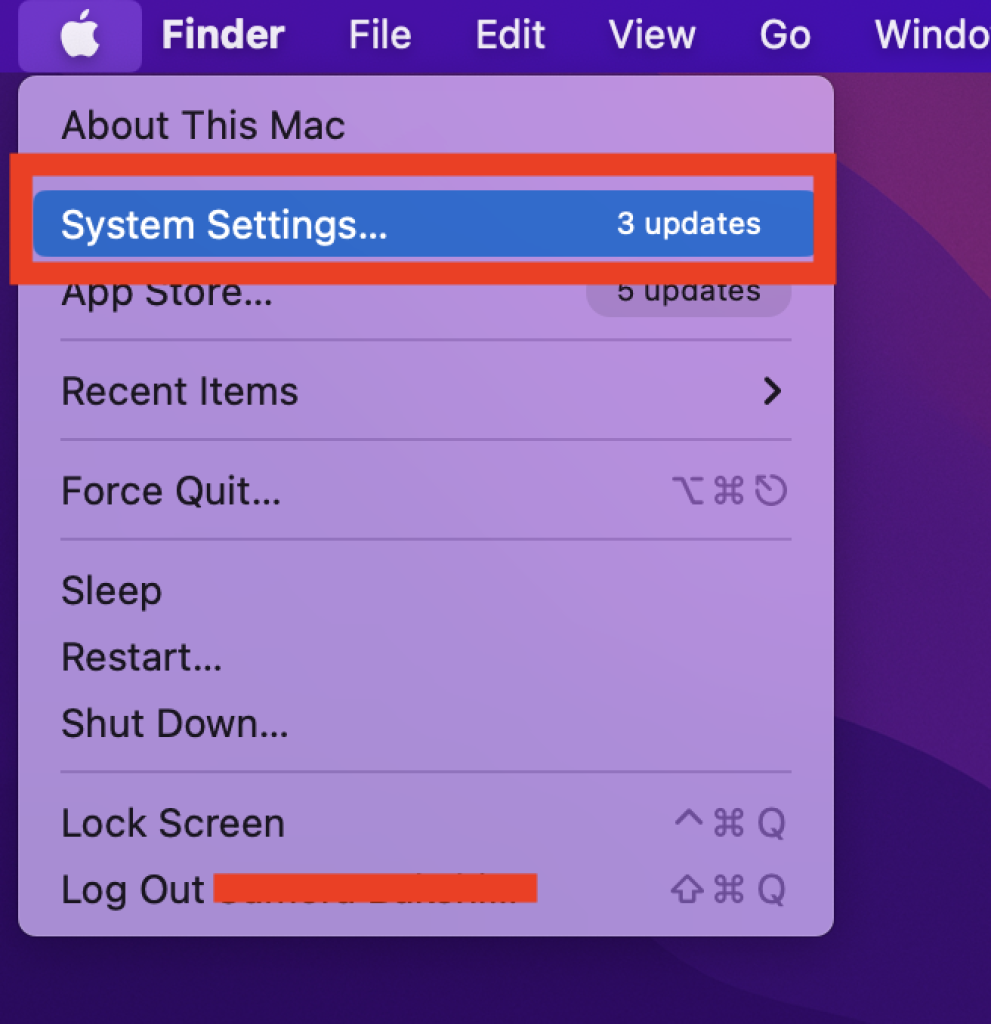
- Open System Settings from Apple menu
- Select Printers and Scanners option
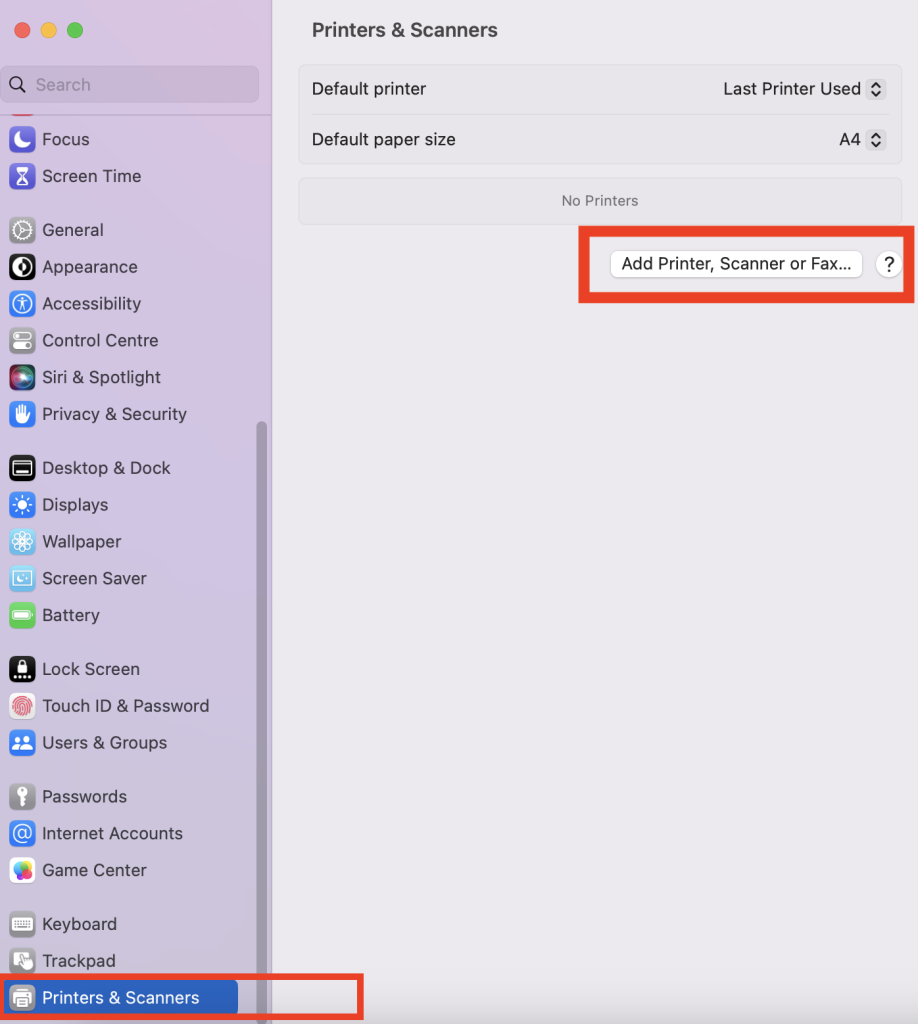
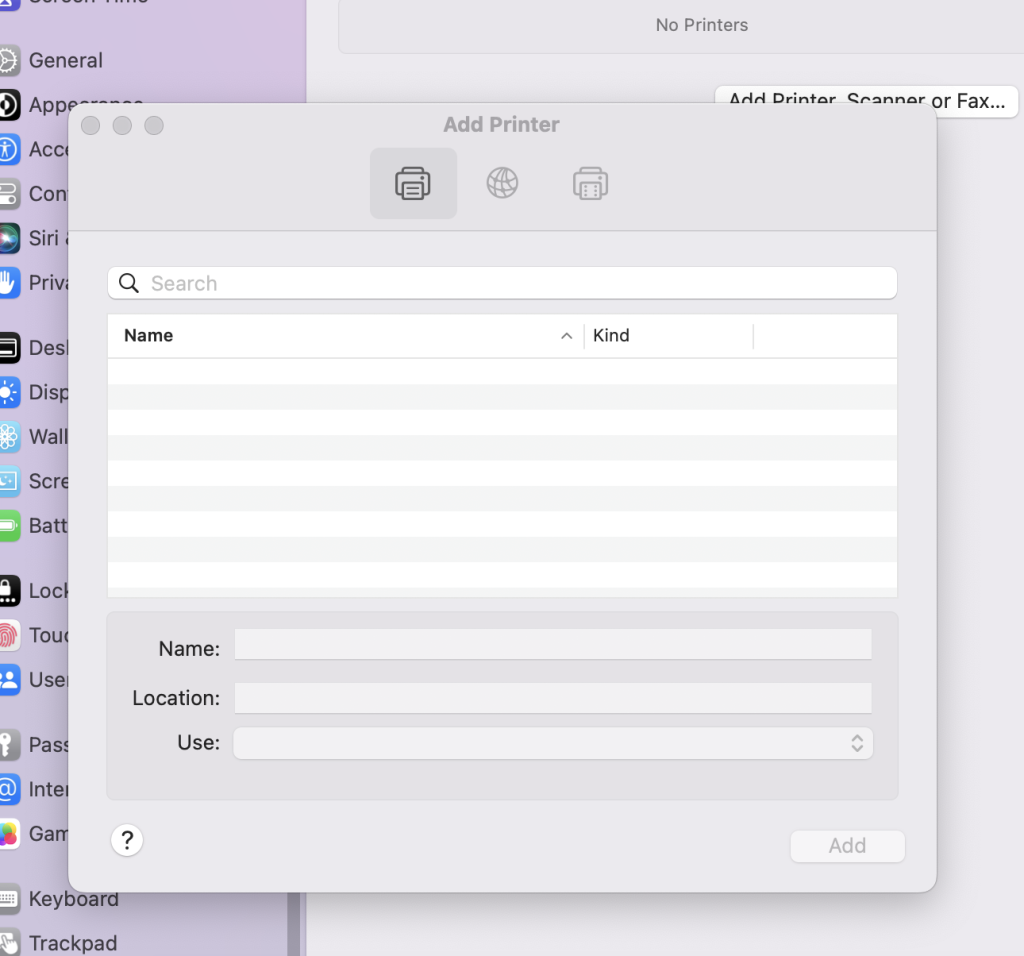
- Add new printer from the option given
- Select default paper size for printing
Step 2: Then, choose a file that you want to print, whether it’s a photo or a Word document, or any such format.
To make this step a little convenient, have the document open beforehand, so you can get on with the printing step straight away.
Step 3: After choosing the file, click on “print” or just press the “Command” and “P” keys on your Mac keyboard together.
Now, the print options will open up along with your printed document on the side.
In most cases, you will see the Presets option, the Copies option which states how many copies you want for the output, the Pages option, a choice if you want the output colorful or in black and white form, and many more.
Here’s a little gist of the choices:
- Printer: Select the printer that you want to print your output.
- Presets: Presets are the default settings for the printer.
- Copies: Here, select the number of prints you want for the same document.
- Print Range: Let’s say you want to print a Word doc. And, if your Word doc is 7 pages long, and you only want to print the first two pages, you can select the two by using this feature. Just select “print pages 1 and 2, and you are good to go.” This feature actually helps you save a ton of time, as, unlike the traditional setting, it doesn’t need you to create a separate doc with just those two pages on the go.
- Print in color: If you toggle on this option, it will print your copy in color, provided your printer has a colorful cartridge. If you toggle off this option, it will print your doc in the usual black-and-white format.
- Double-sided: If you want to print both sides of your print page, then turn this option on.
- Paper size: Depending on the size of your paper, you can select an option if your paper’s size falls into any of the categories. Let’s say you have to print on an A4 size sheet, then select the 210*297mm option from the menu.
- Orientation: Orientation of a print output varies from horizontal overview and vertical overview, popularly identified as landscape and portrait orientations respectively.
- Scaling: Type the percentage of scaling to set the size of the image or doc in your print output.
Step 4: Now, if you are able to see and select these basic choices, click on Print.
Common Things To Do To Customize Your Printing
At times, we seek additional features to enhance the print output, aiming for a more personalized and satisfying result. Here is a list of common steps that people take to customize their printed output according to their preferences:
- Select a paper size for your print doc.
- If you are someone who prints on a regular basis, and you want to save time on making the same changes in the print options, then you must save the feature on frequently used print settings.
- Zoom out or zoom in the pictures or pages of the document to fit on the sheet as per your preferences.
- Print on both sides of the sheet using the double-sided feature.
- Print n number of pages and pictures on a single sheet.
- Print the print output with reversed images, images with different alignments, and with a border.
- Add watermarks to your pictures and pages.
- Check the ink level on your printer.
Also Read: Why is My Printer Printing Lines?
How to Add a New Printer to the List of Your Printers
When it comes to printing an image or a doc, the first step you need to take is to select a printer from your printer list. But what if you need to add a new printer to your printer list? Here’s how you do it:
Step 1: Update the software of your printer.
Step 2: Turn your printer on and make sure it does not display any error.
Step 3: If you have a USB-connected printer, ensure it’s properly connected to your Mac. If you’re using a network printer, go to your system settings, click on “Printers and Scanners,” and wait for your printer to be detected and added to the list. You can also manually add it using the printer’s IP address.
Or if you’re looking to add a Bluetooth printer, select the default option within the “Printers and Scanners” menu to display your printer as an available option.