GIMP offers a wide collection of brushes to work with and the best part is you get options with each to customize it accordingly. While this adds flexibility, GIMP doesn’t offer the ability to create custom brushes.
To address this, we have found a way around and here are steps to make custom brushes in GIMP.
What we cover
Make a Custom Brush in GIMP
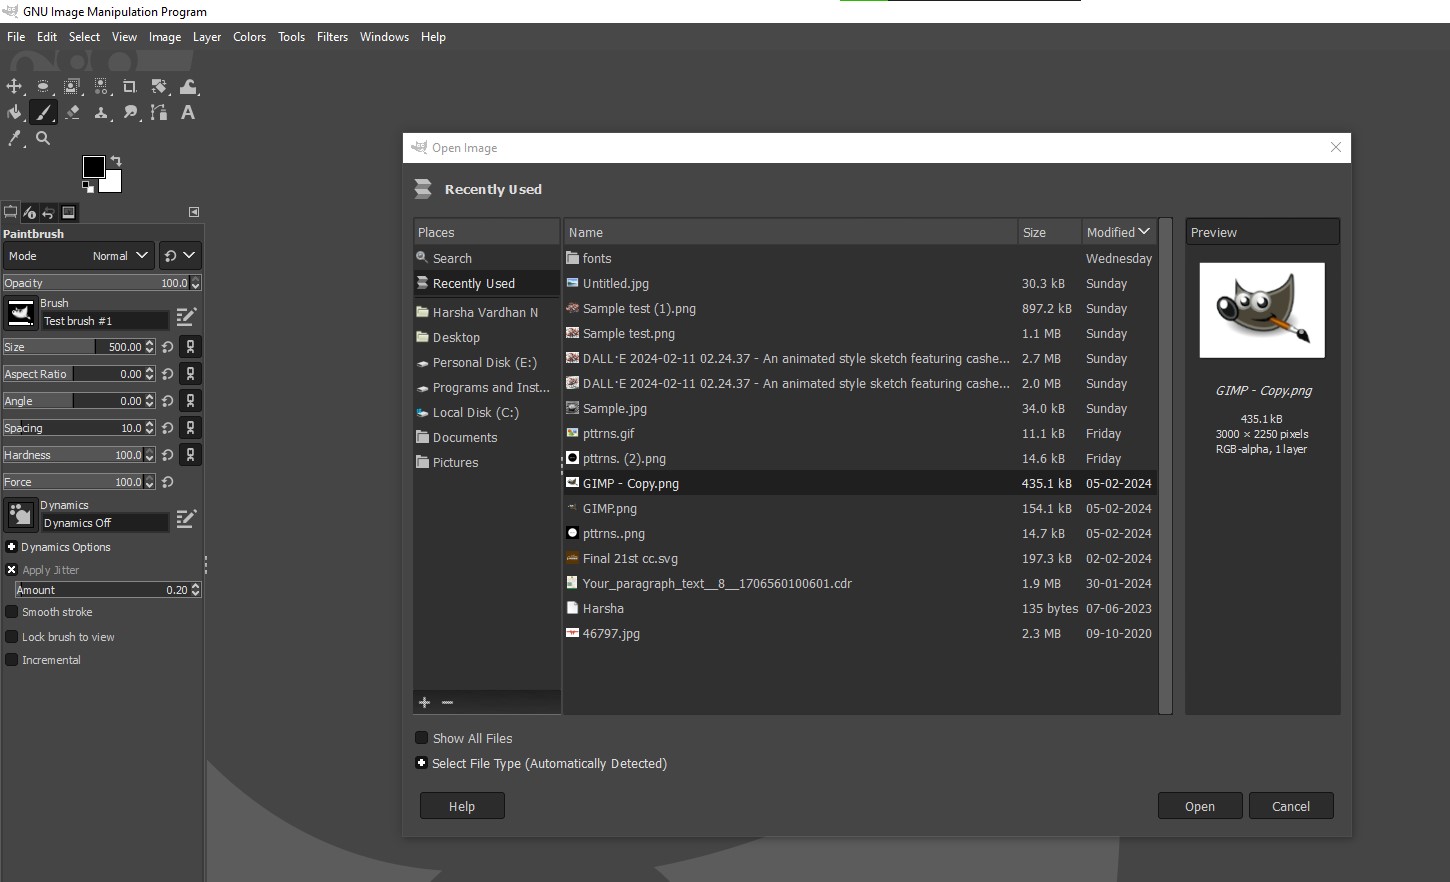
- Begin by opening GIMP on your PC and wait for it to load completely. Once it is loaded, navigate to the Menu Bar, click on File, and then Open. By doing so, you’re displayed with an Open Image dialog box from which you select the image by navigating to its path to load it on the canvas.
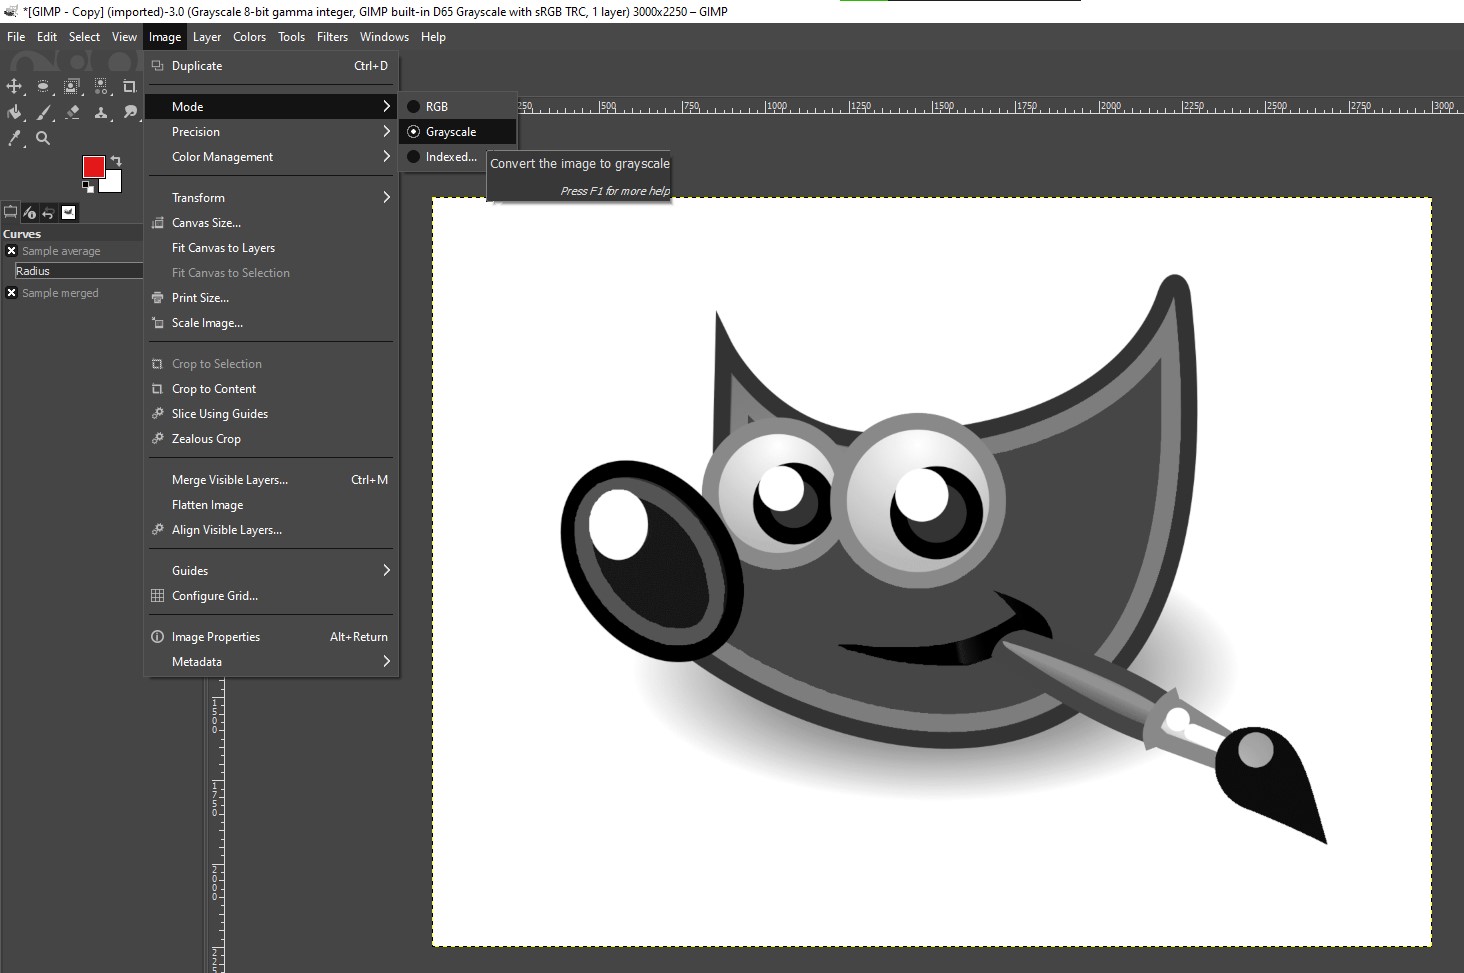
- With the image added to the canvas, navigate to the Menu Bar and click on Image. Now, from the available options, hover the cursor on Mode and then click on Grayscale.
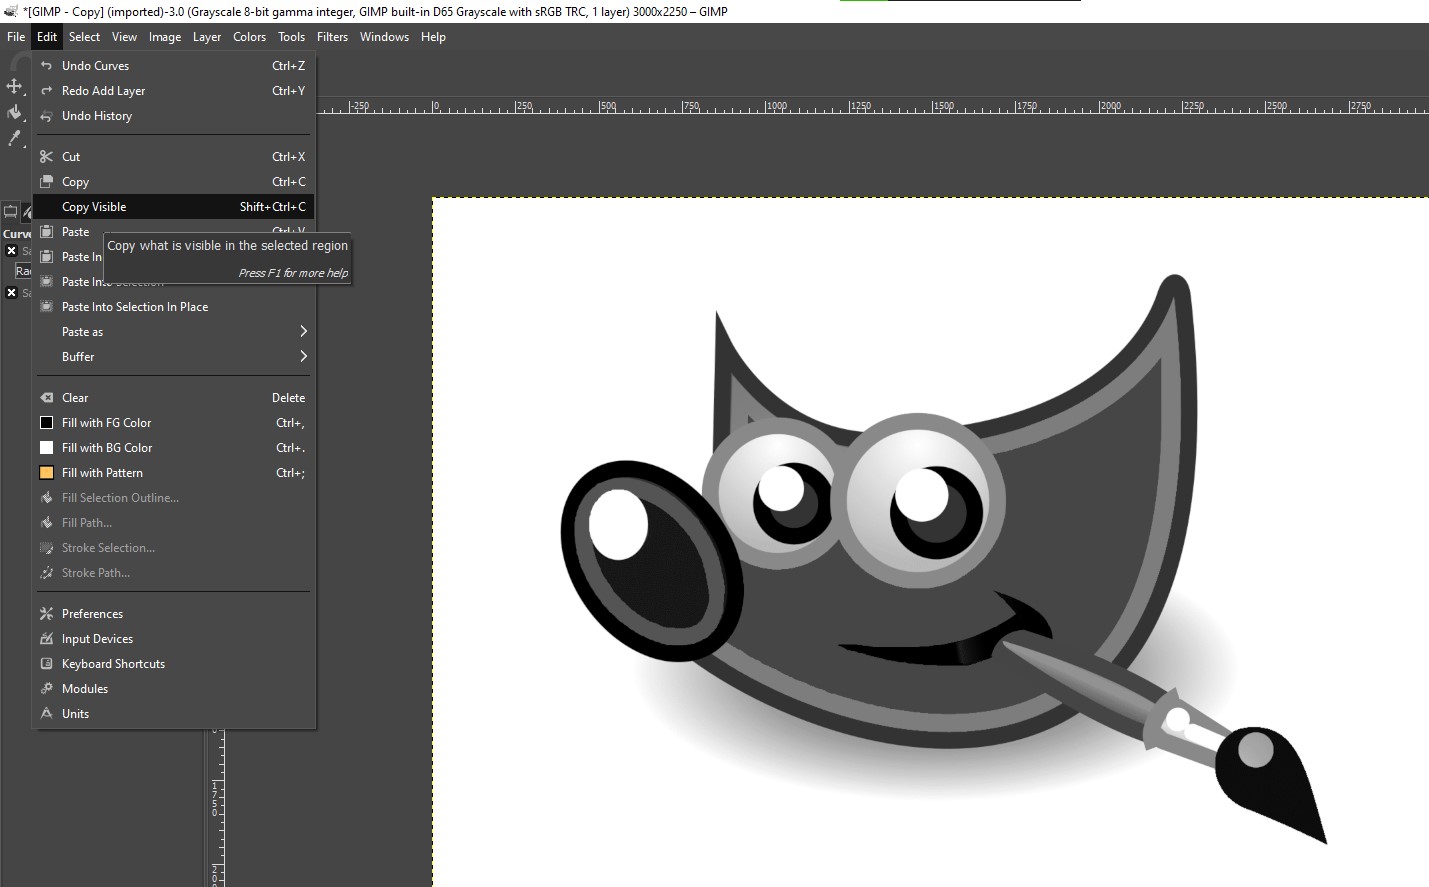
- After the image is converted to grayscale, adjust the curves if needed. Once you’re done making all the adjustments, navigate to Menu Bar and then click on Edit. Now, from the available options click on Copy Visible to copy the image.
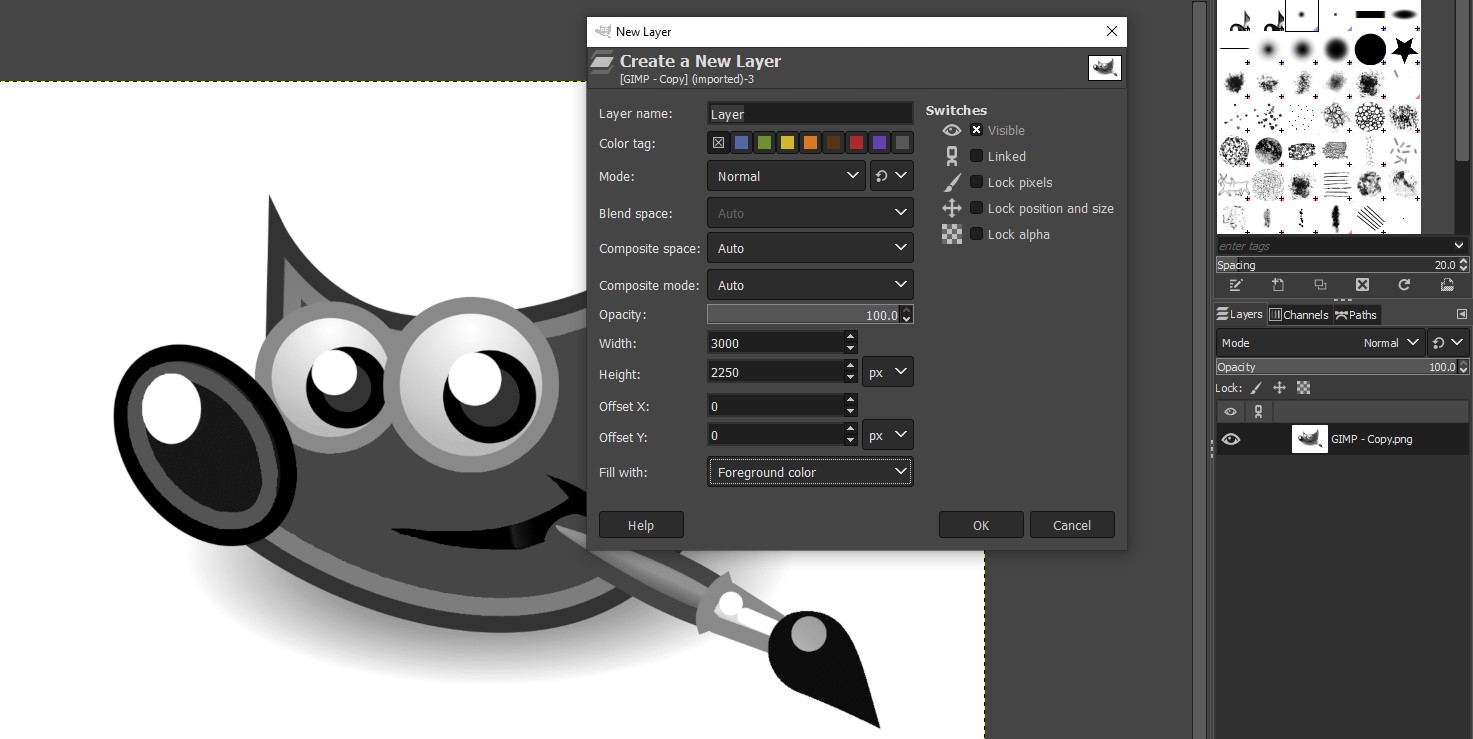
- With the image copied, navigate to the Layers block on the right and right-click on an empty space. Now, from the available options, click on New Layer and once the New Layer dialog box appears, update the Fill with drop down to the one that features a Black color.
Q: How can I adjust the Foreground and Background color?
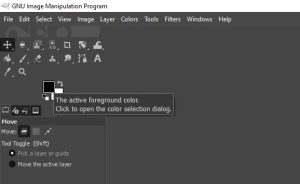
The Foreground and Background colors can be adjusted from the Tools box. The square placed on the top is used to set the foreground color and the square behind is for the background color [Refer to the image for better understanding].
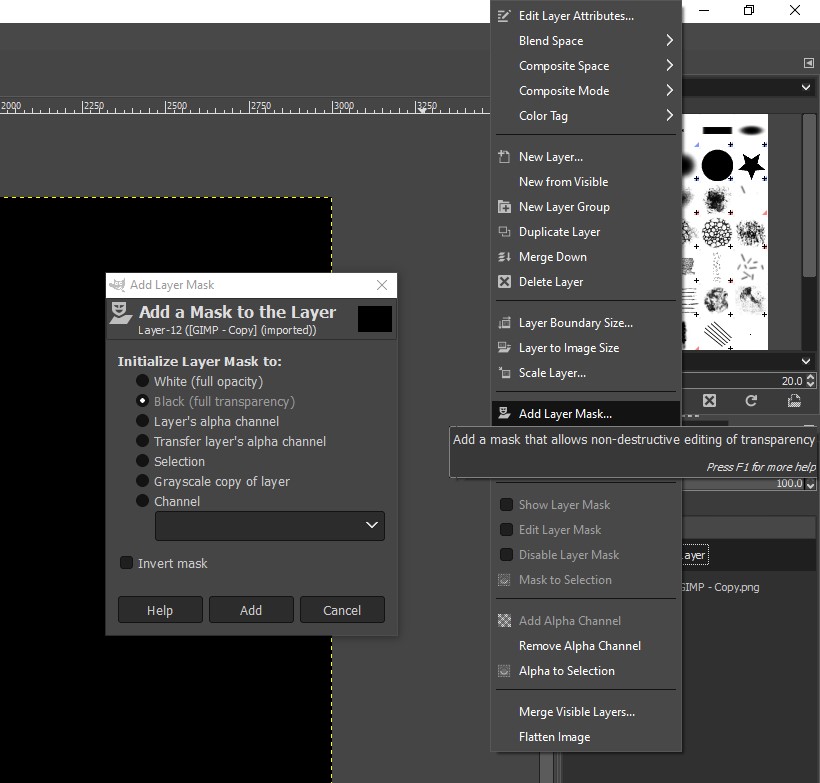
- After the new layer is added, it is important to create a mask. To do this, navigate to the Layers block again and right-click on an empty space. Now, from the available options, click on Add Layer Mask. Next, from the Add Layer Mask Dialog block select Black (full transparency) and click on Add.
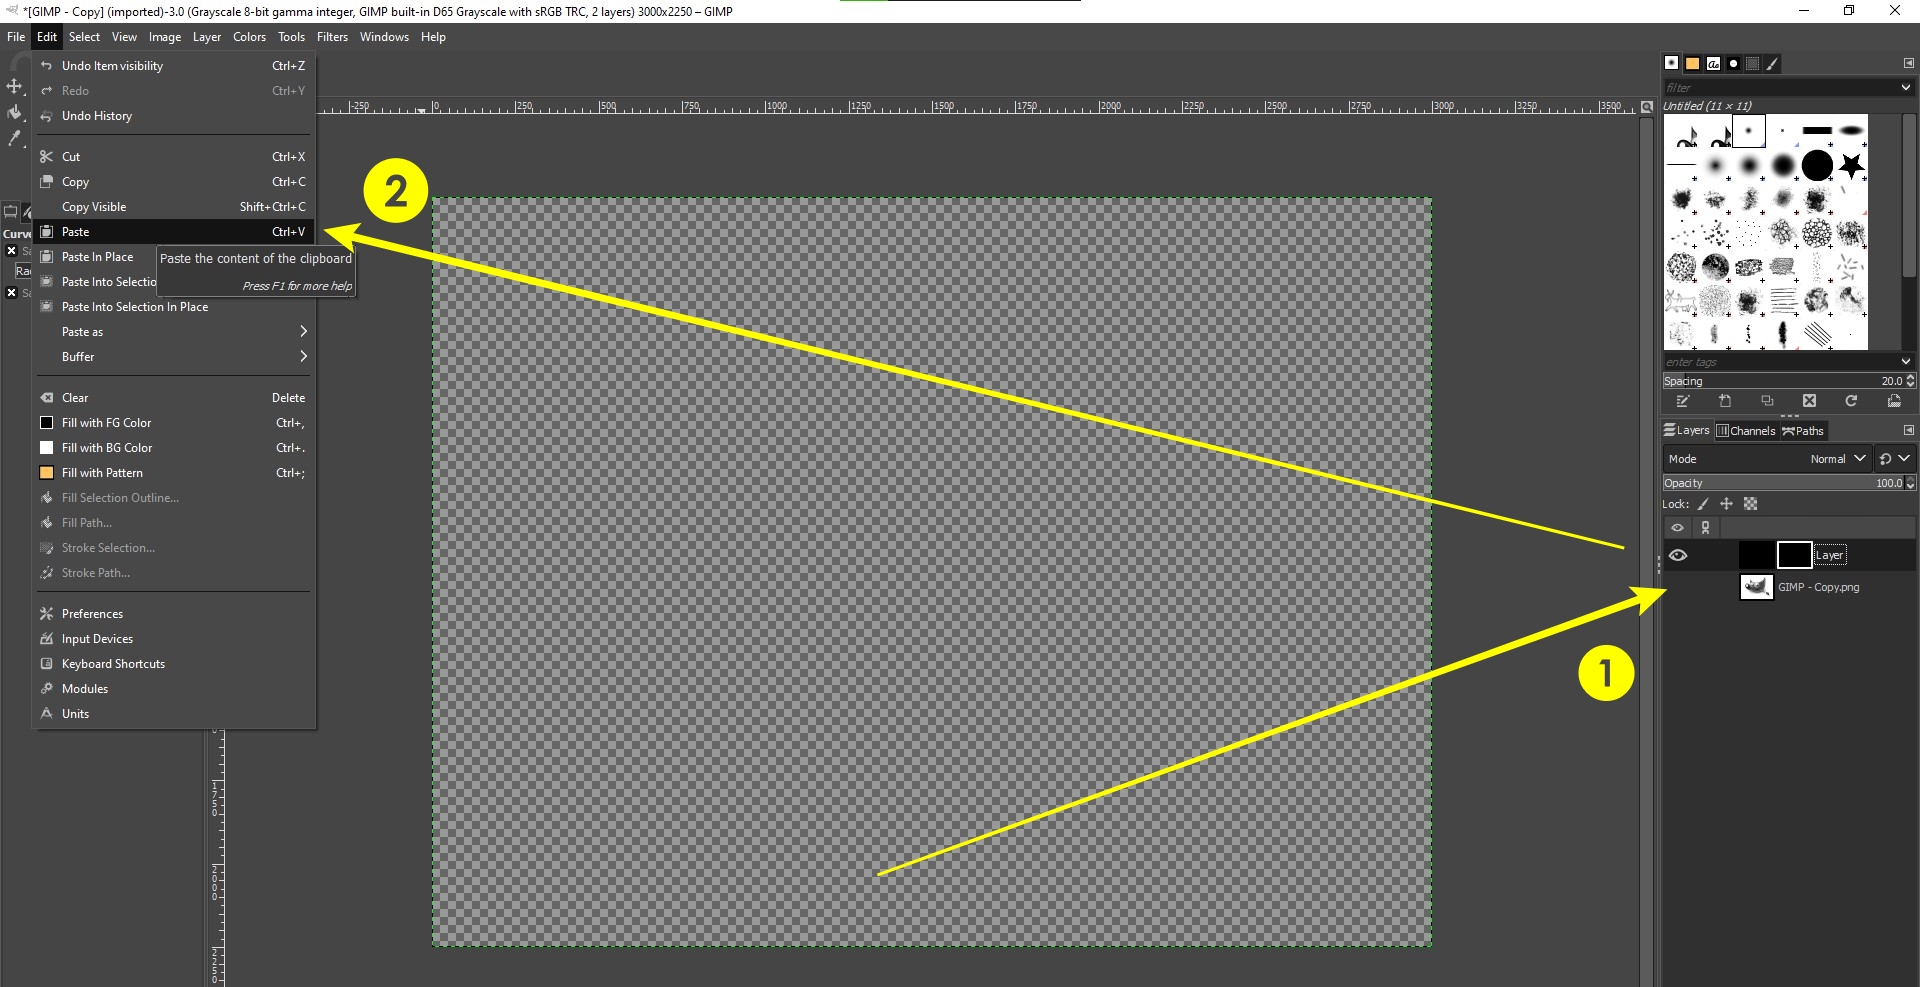
- If you have done it right, you will find the layer mask added to the newly created black layer. Now, hide the original image by clicking on the eye icon and then navigate to the Menu Bar, click on Edit, and then Paste.
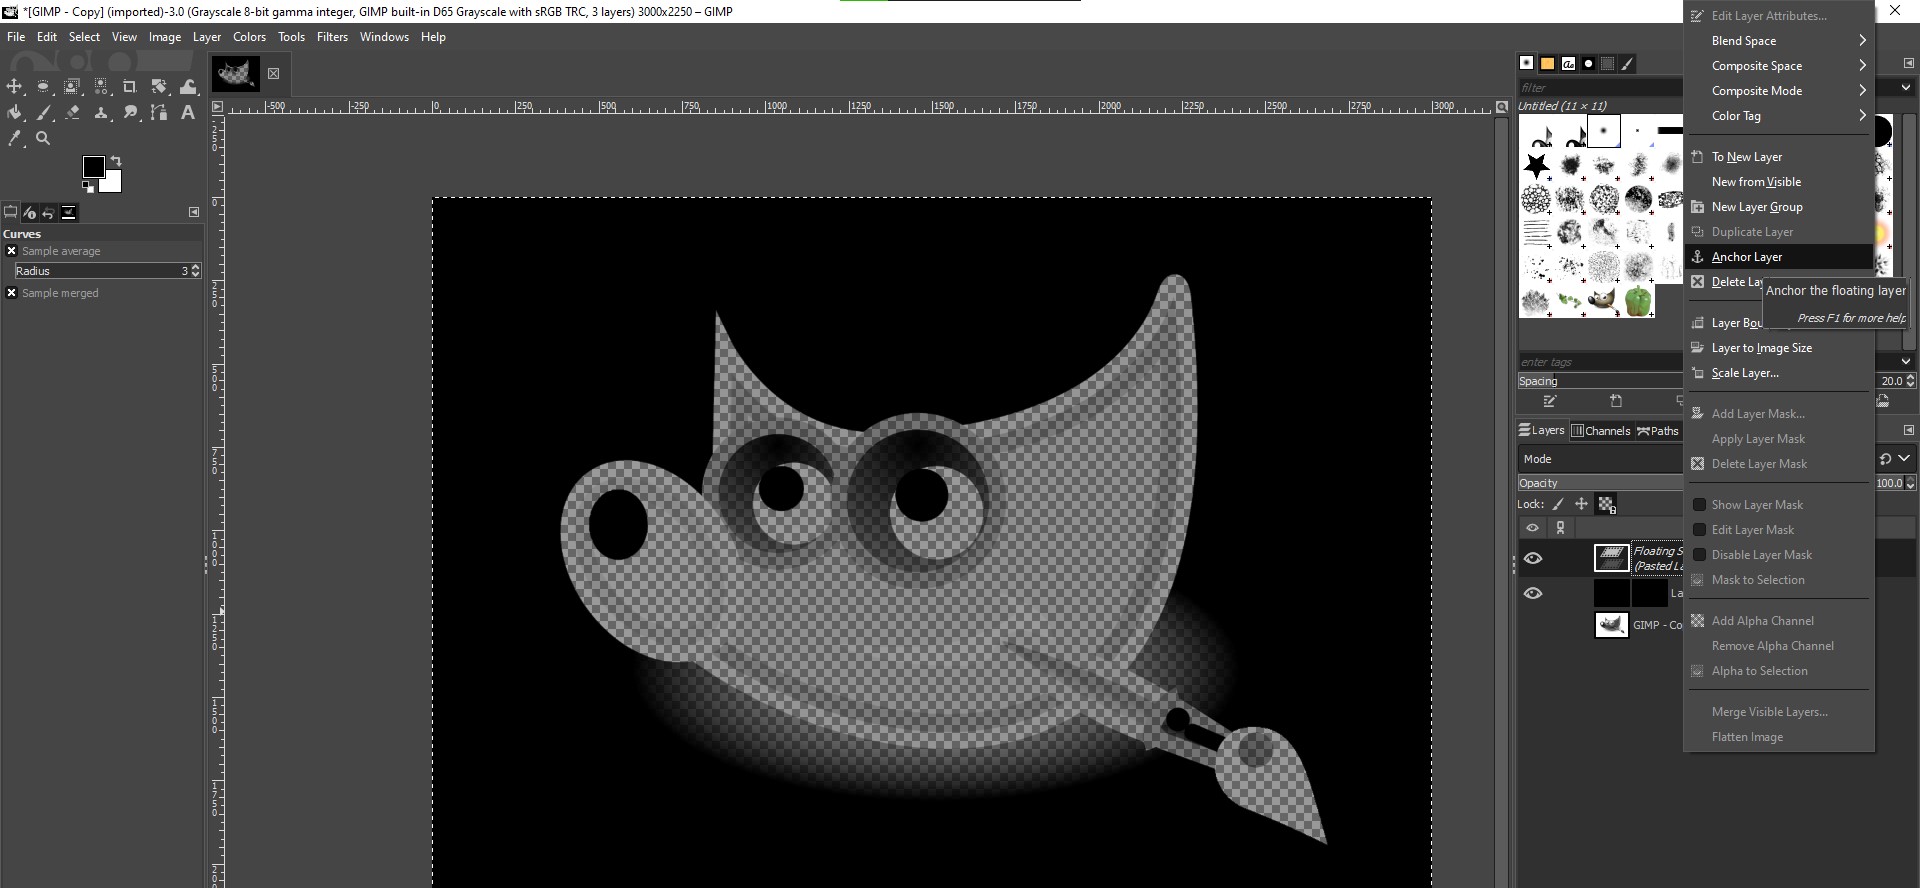
- On performing the above step, you will find that the image is pasted onto the new layer. Now, anchor the image by right-clicking on the new layer in the layer block, and then from the option displayed, click on Anchor Layer.
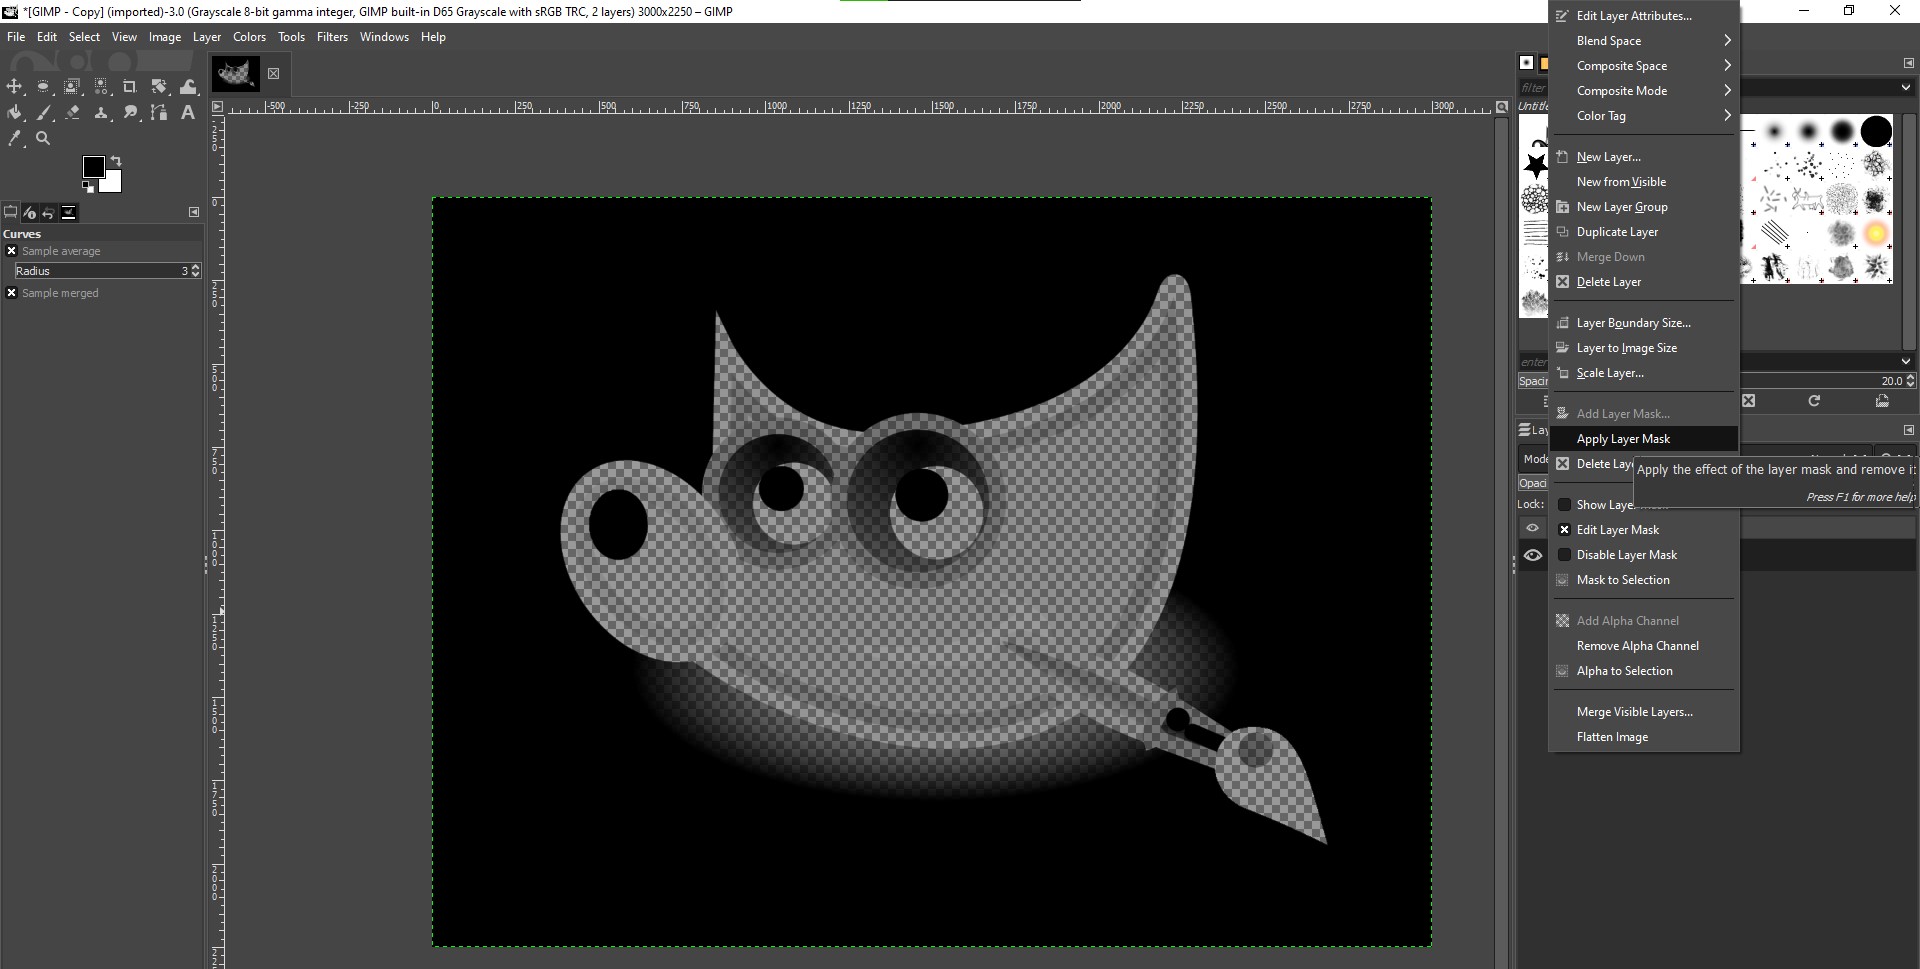
- After the layer is anchored, delete the original image and right-click on the anchored layer. Now, from the available options, click on Apply Layer Mask and you’re done.
- With everything necessary to create a custom brush is done, navigate to the Menu Bar, click on File, and then Export As. After the Export Image dialog box appears, select the GIMP brush as file type and click on the Export button.
- If you have done it right you will find the file exported as GIMP brush with the .gbr extension. Now copy the file and paste it to the path mentioned below:
C:\Users\your_username\AppData\Local\Programs\GIMP 2\share\gimp\2.0\brushes\Basic
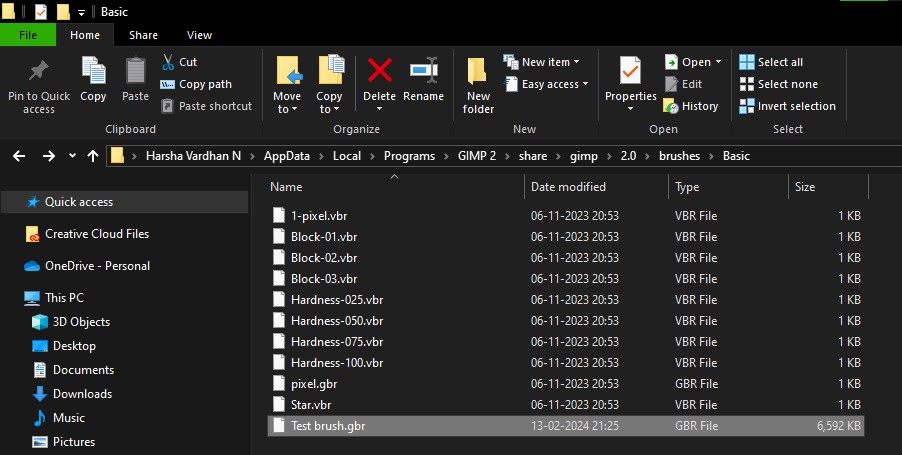
Note: The path might not be the same for everyone and if the above doesn’t open in File Explorer, find the path where GIMP brushes are located by checking the GIMP program files.
How to Use Custom GIMP Brush
After the tedious process of creating a custom GIMP brush, you can use it with ease and the best part is you get to change its color.
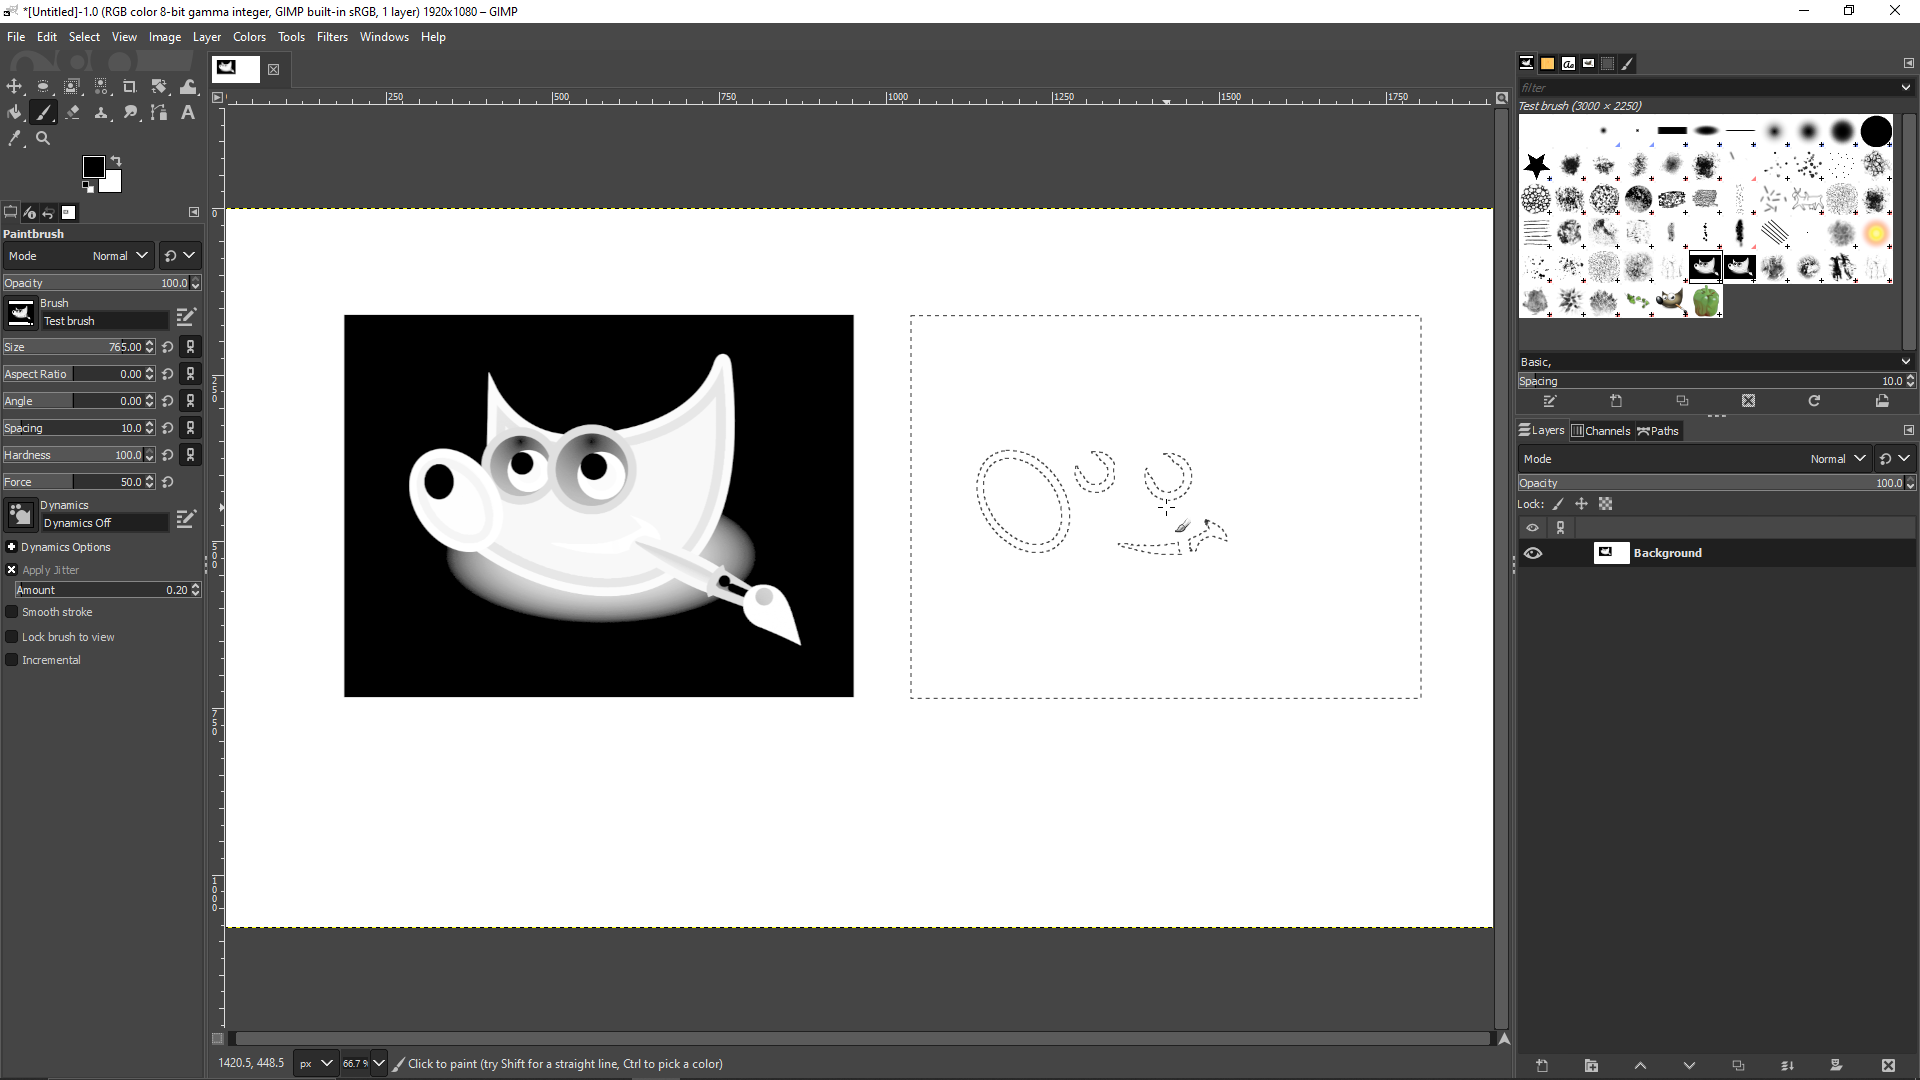
- To use the custom GIMP brush created, navigate to the Brushes tab present at the top right corner and select it.
- Once you have selected it, adjust the sliders on the left associated with the custom brush. Now, navigate to the empty canvas and left-click on the mouse to use the brush.
Wrapping Up
Congratulations on making a custom GIMP brush!
While the above steps might be difficult to follow, unfortunately, it is arguably the only way to create a custom GIMP brush. To avoid undesirable results, ensure you select a simple image to convert it as a brush and also use the Fuzzy Select Tool to avoid adding the image background to the custom brush.
Related Reading
How To Add an Alpha Channel in GIMP