Midjourney offers different options to work with the generated images, and Zoom Out is one of them. Through this, you can effectively add details and extend cropped-generated images.
In this guide, we will help you use Zoom Out through a demonstration and work with Custom Zoom to get you all covered.
What we cover
Using Zoom Out in Midjourney
- Open Midjourney on Discord through Discord’s bot, channels, or custom private server and navigate to the message box. Now, click on it and use the /imagine command to generate an image [Let’s assume you have decided to generate a closeup shot image].
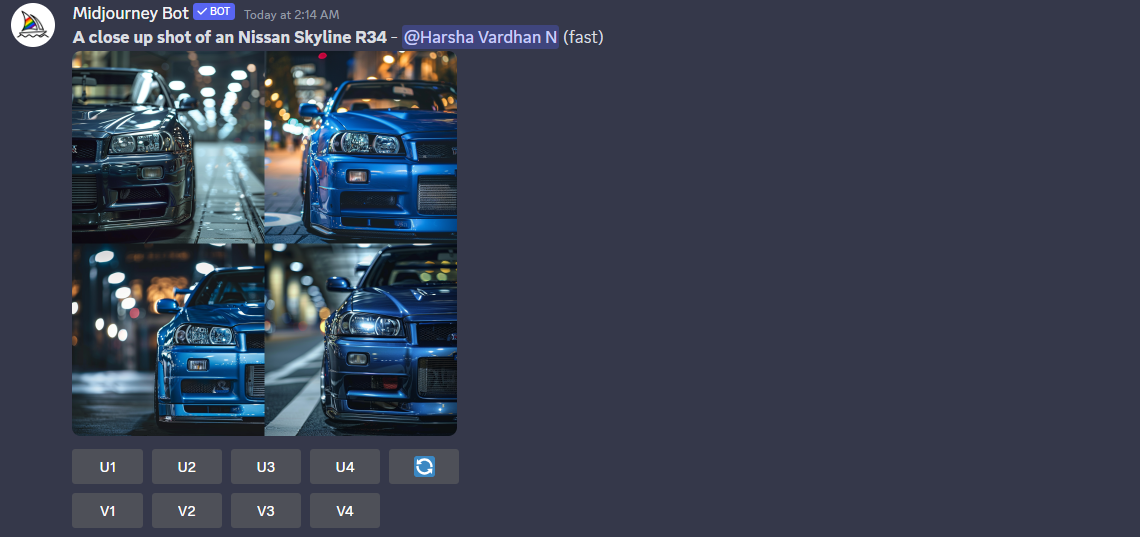
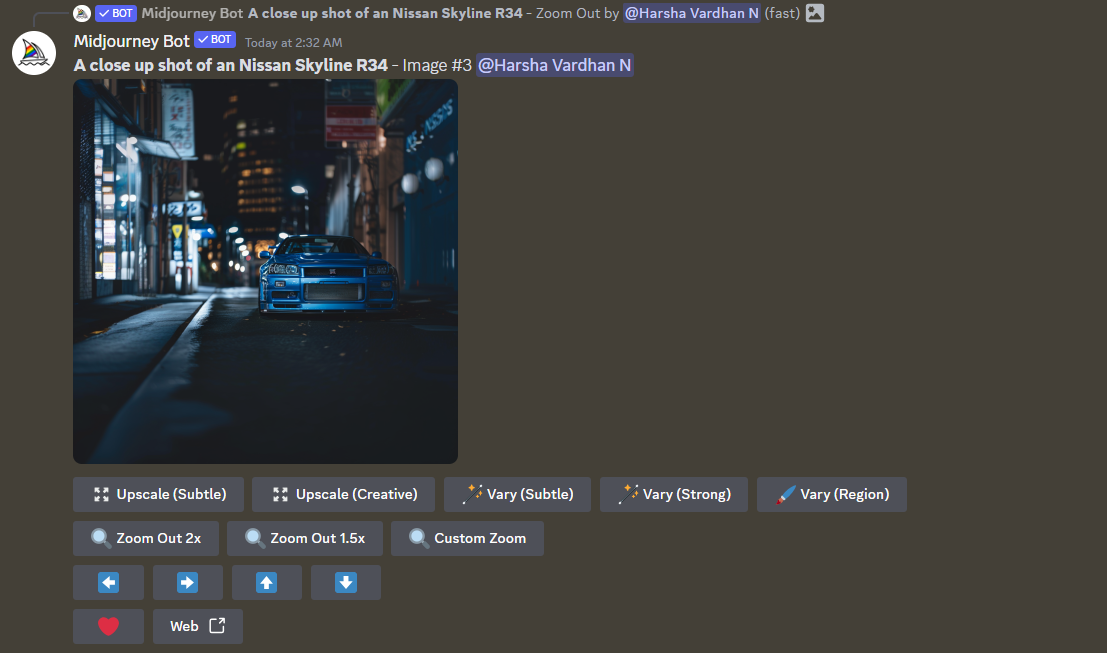
- If you notice the image grid, all car images are cropped. However, if you have changed your mind and want the rest of the car, the Zoom Out option is best. First, we have to separate the image from the grid by clicking on the respective U button to use it.
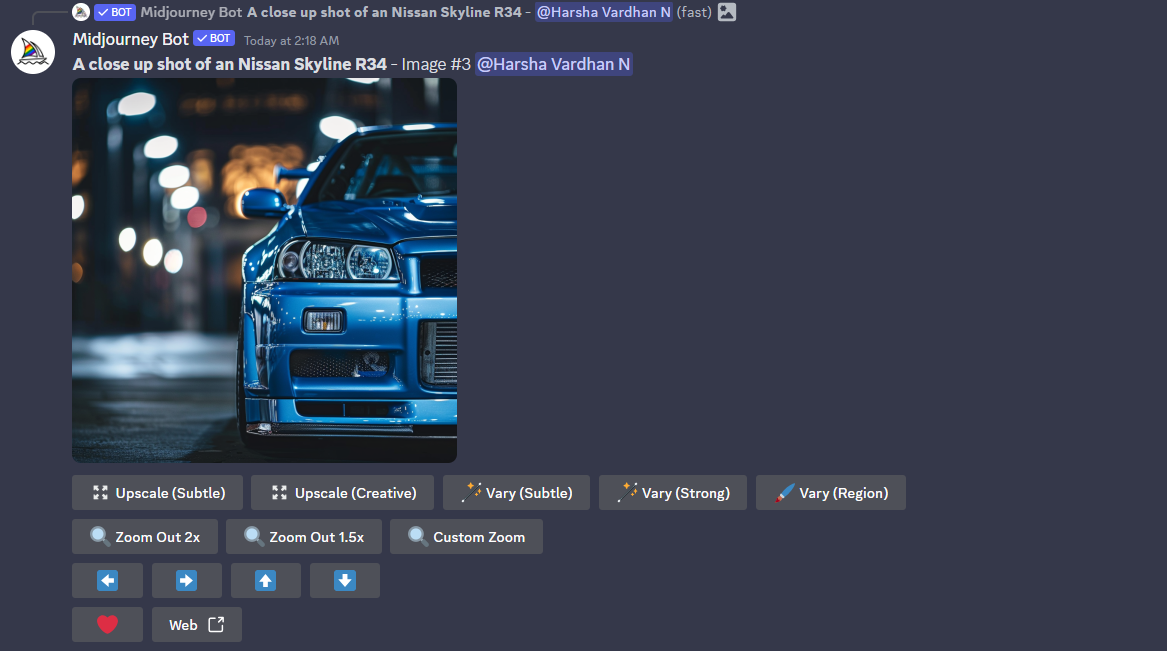
- After the image is separated from the grid, you will find several options to interact with. Now, look for Zoom Out options – 1.5x and 2x (Custom Zoom will be discussed in the latter part of the article), and click on any to extend the cropped image and fill in details without changing the image.
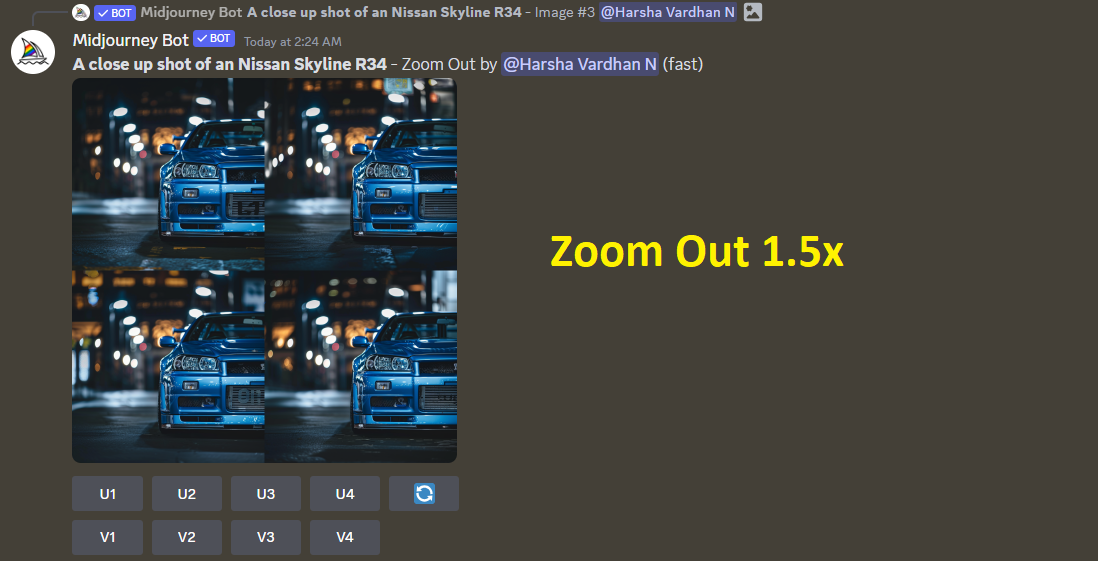
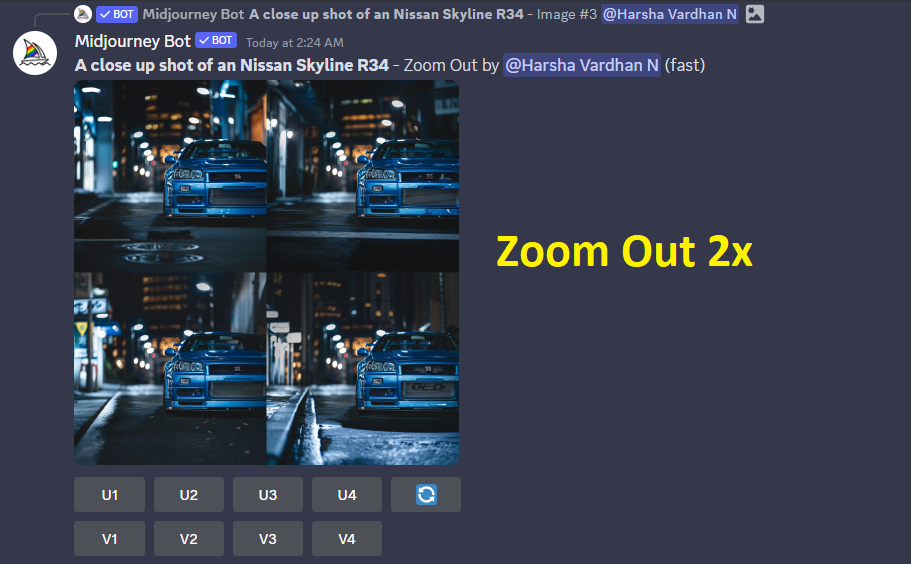
- As you can see from the above results, the Zoom Out option could add more details. You can repeat the steps, such as Separating the image from the grid and using the Zoom Out option until you get the desired result, as demonstrated below.
What is Custom Zoom? Why is it Important?
If you have noticed the process of adding full details to a cropped image using Zoom Out options, you have utilized minutes more than once, which can waste minutes if you have a large area of details to be added.
However, with Custom Zoom, you can skip repeating the zoom-out operations and save minutes. Here are steps on how to use it.
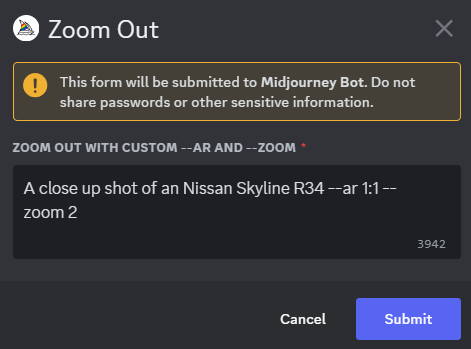
- From the available options, after separating the image from the grid, click on the Custom Zoom option. By doing so, you’re displayed with a Zoom Out dialog box where you can zoom out the image.
Note: For Custom Zoom to work, the --zoom parameter needs to be entered in the prompt at the end, which accepts values between 1 and 2 (Refer to the below image for better understanding).
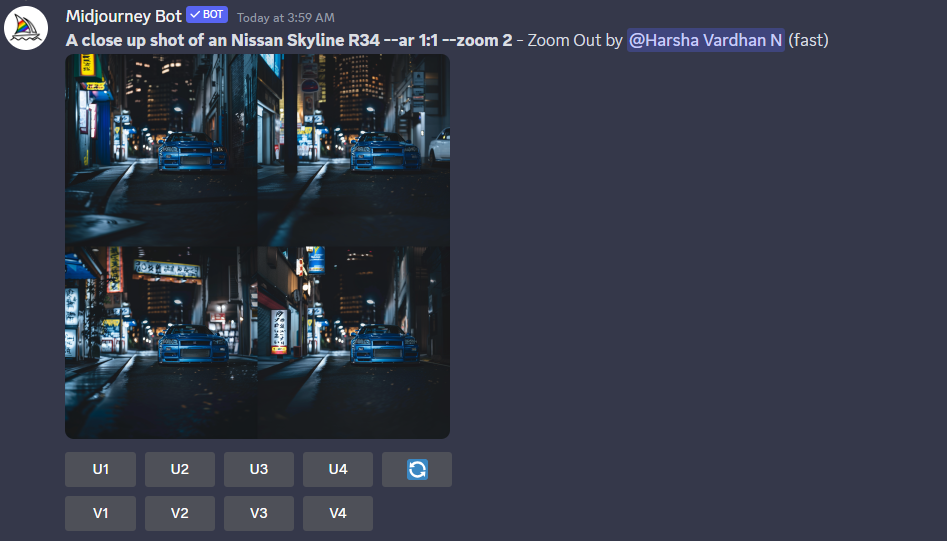
- If you have noticed in the above prompt, we have updated it by adding more requirements and using the
--zoomparameter. Here is the result, generated within one step, resulting in conserving minutes.
Wrapping Up
Congratulations on learning how to Zoom Out in Midjourney!
While the Zoom Out options are easy to use, you must pay attention while using Custom Zoom as it can get undesirable results and can create the same result as the Zoom Out 2x option. Hence, we suggest you get creative with the prompt and add more details to get the best result.
Related Reading
What Does Stylize Do in Midjourney
How To Use Weights in Midjourney