With the ability to generate images on Midjourney, you also get the flexibility to edit the images further. While most upscale the images to add details, if you want to add details in a specific direction, you need to use the arrows provided to pan the image further.
In this guide, we will help you use arrows, the pan feature of Midjourney, with a demonstration.
Using Arrows in Midjourney
- Start by opening Discord and accessing Midjourney through the Midjourney Bot, channels, or private servers. Now, generate an image using the /imagine command in the message box.
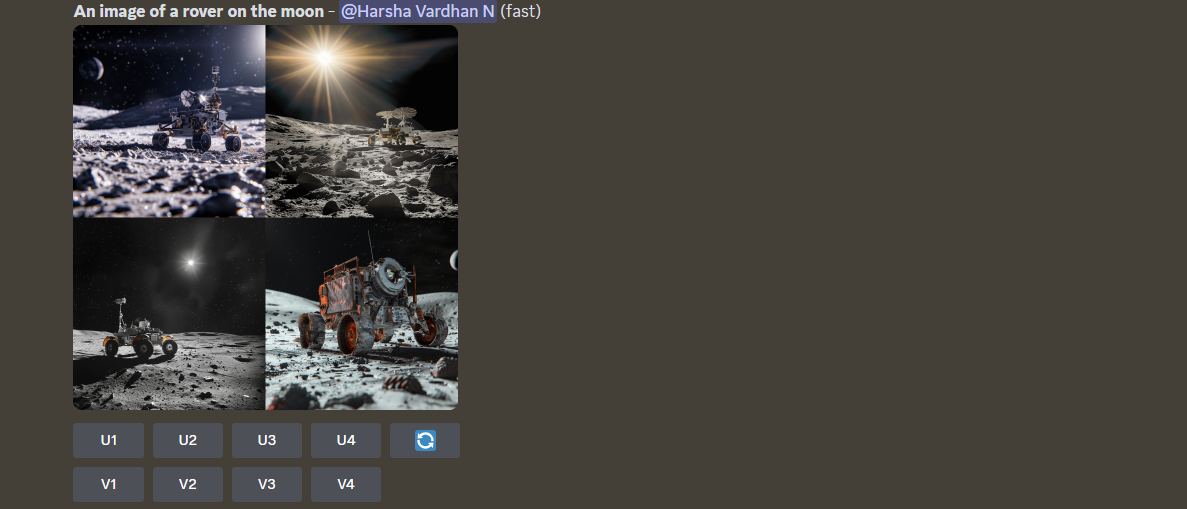
- With the image grid generated, find the one that best matches your requirement and separate it from the grid by clicking on the respective U option.
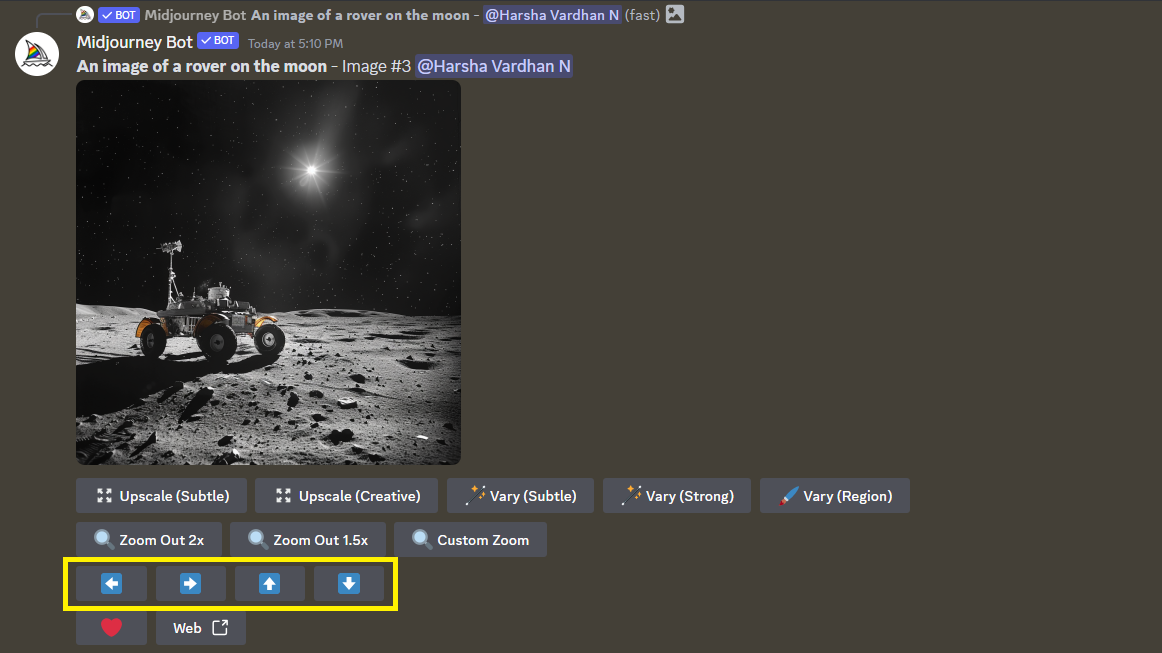
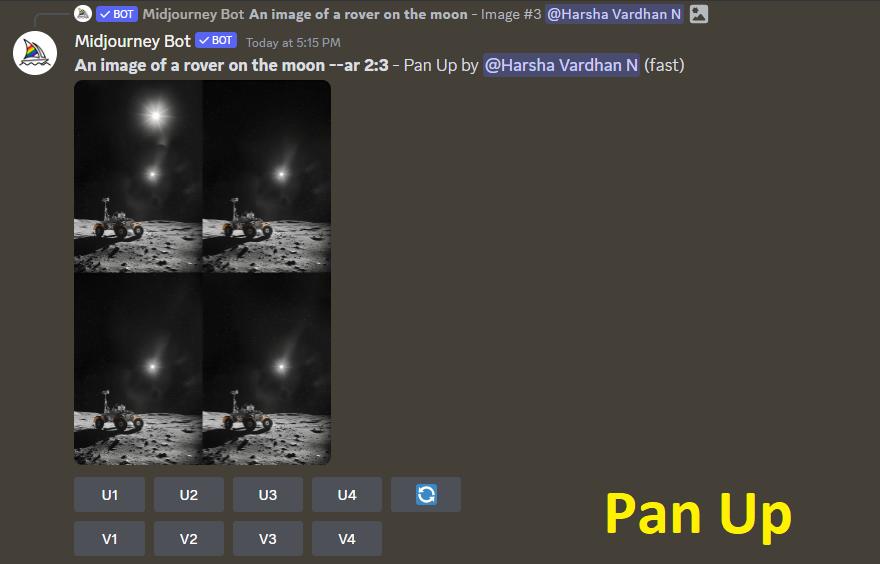
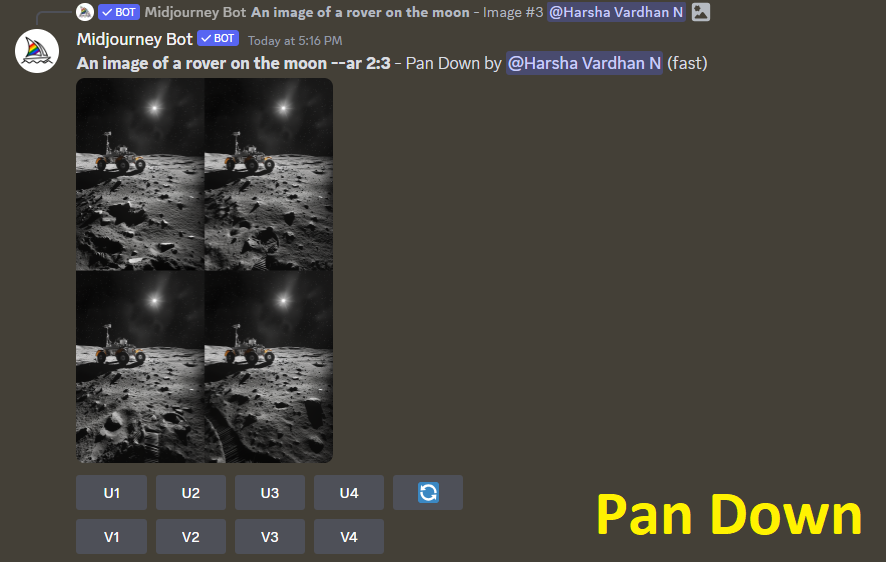
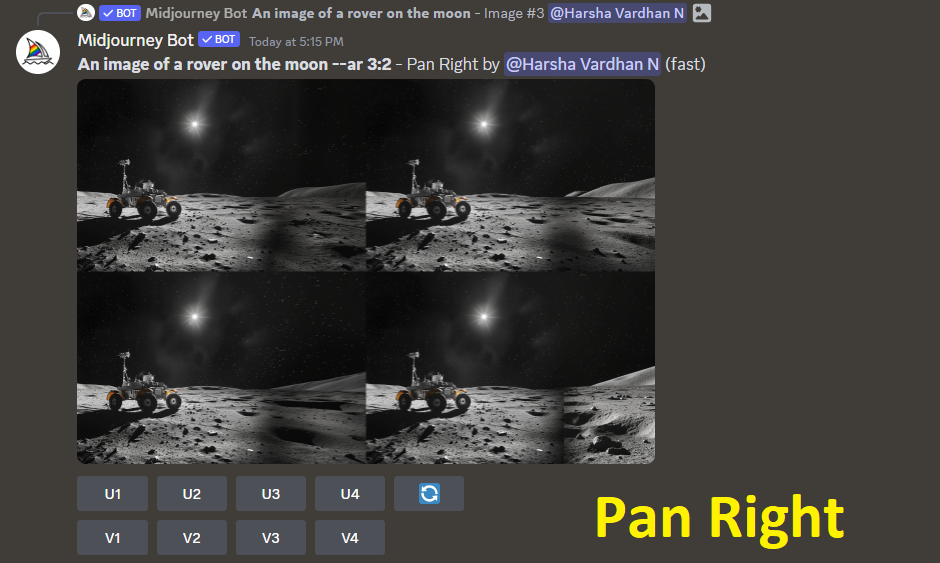
- After separating the image, you will notice multiple options below, which include the arrows for panning the image. For a clear demonstration, we will use each pan option (arrow) and present the results below so you can understand how it works.

Wrapping Up
Congratulations on learning how to use arrows in Midjourney!
While there are no issues with using the arrow for panning the image, use the right pan arrow as you might crop out of the subject. Also, make sure to upscale the images for the best results.
Related Reading
How To Make Variations in Midjourney
How To Combine Two Images in Midjourney